Tag Archives: wild food

Massaman Goat Curry Pie

hunters kitchen spread

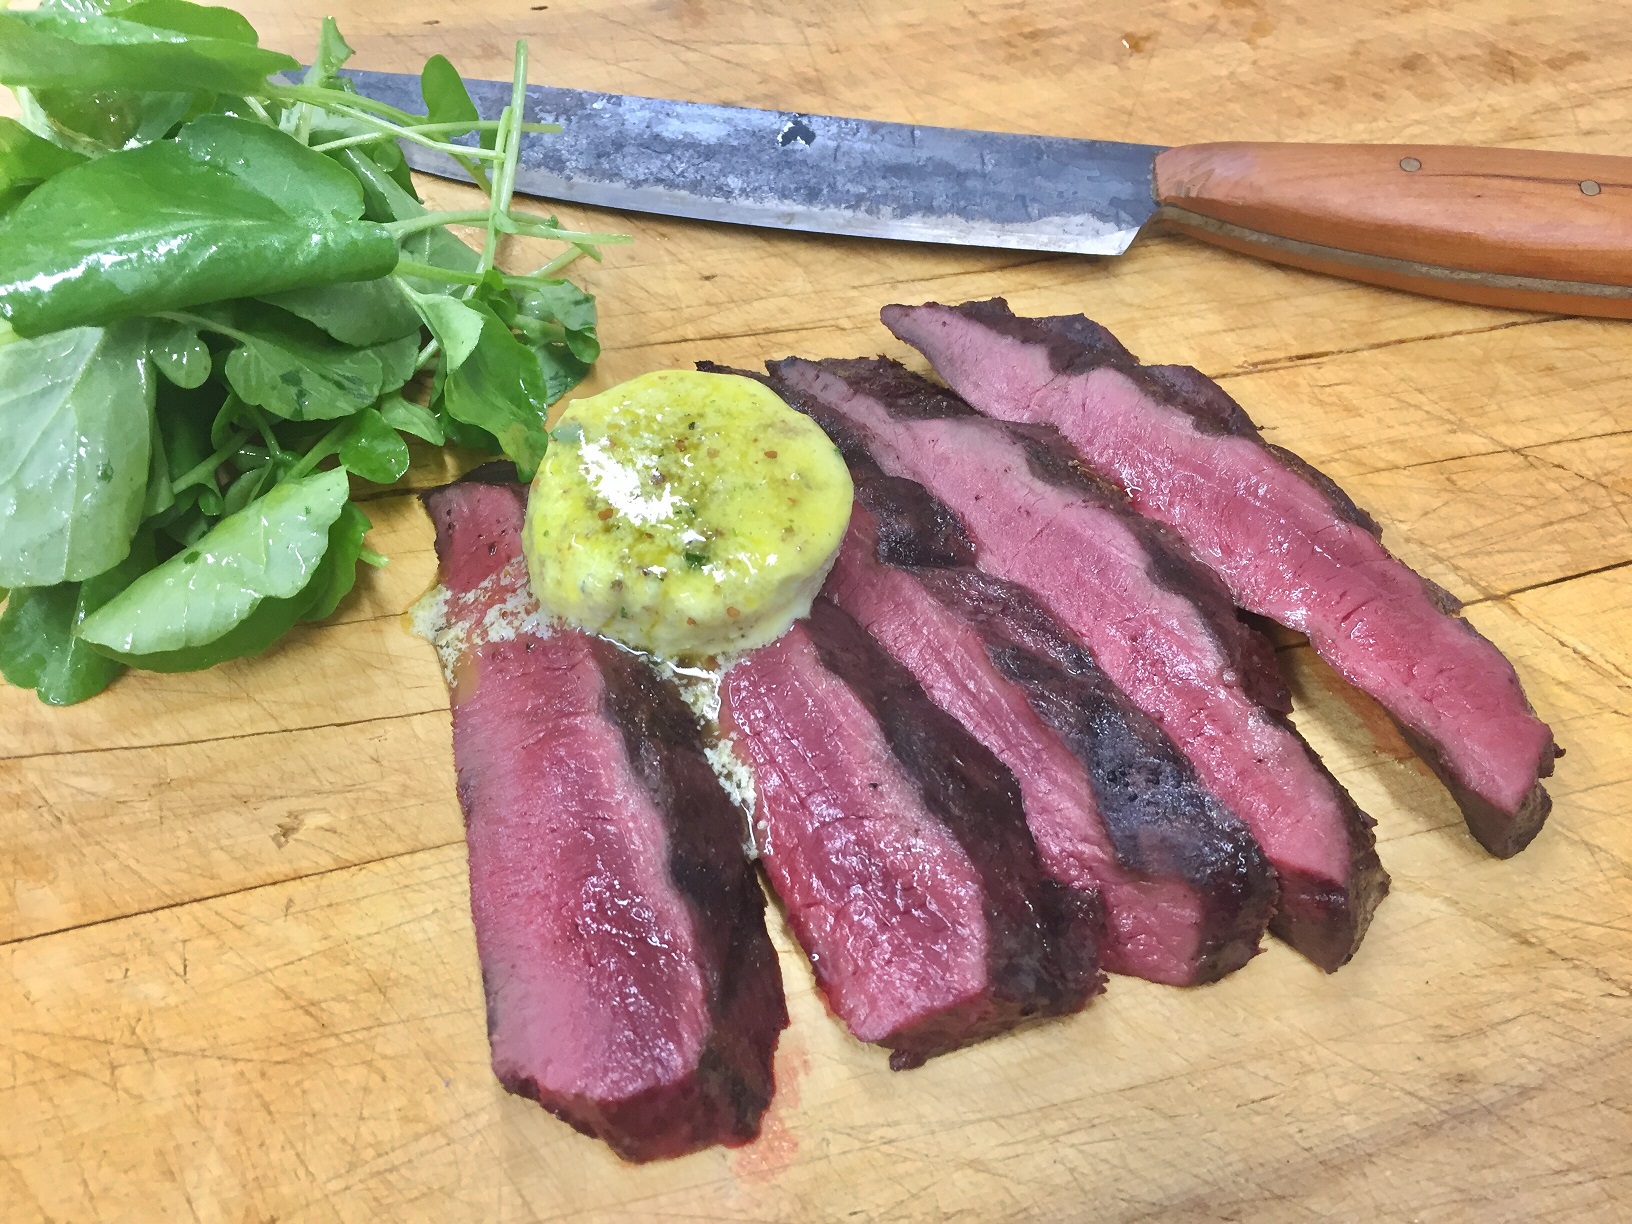
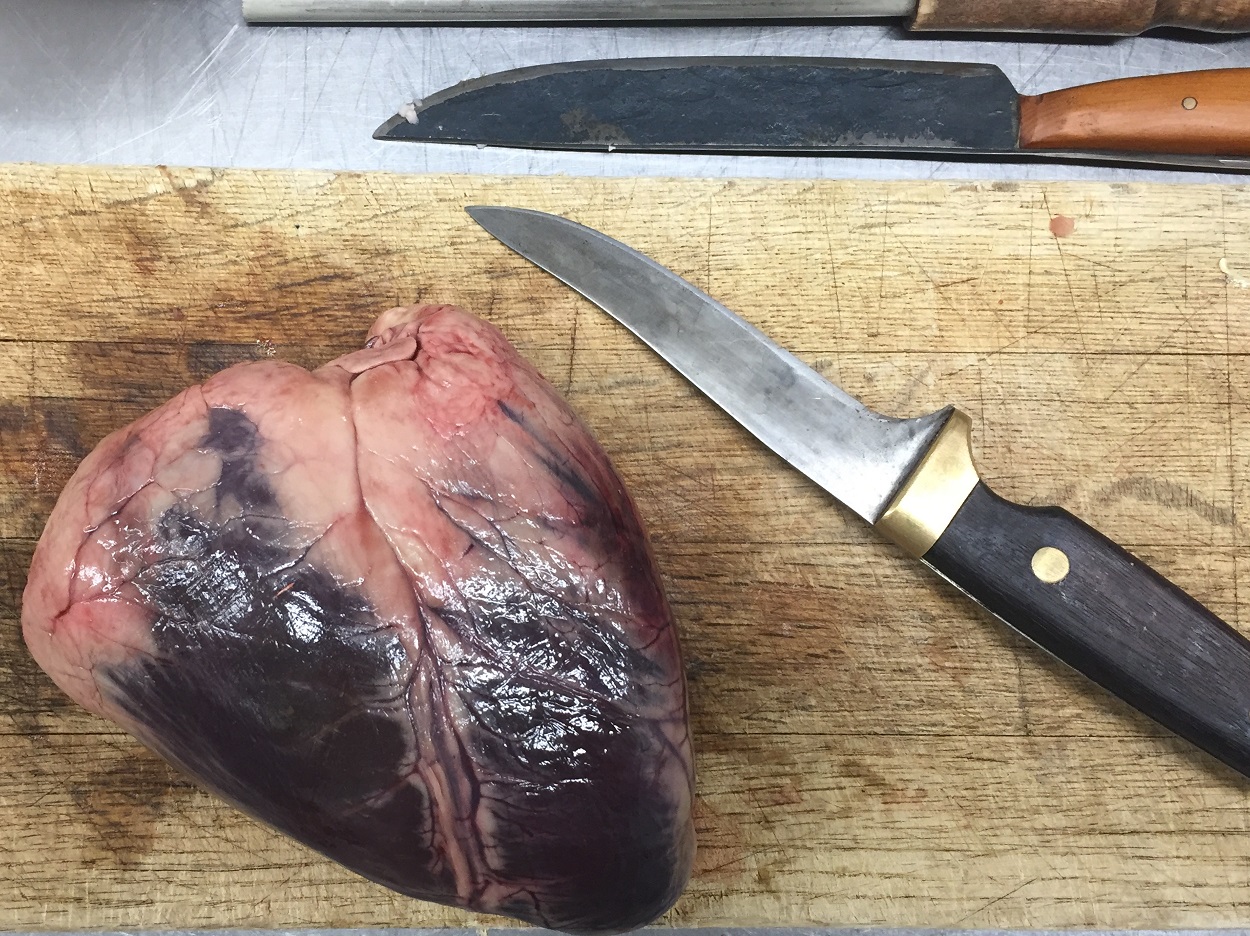
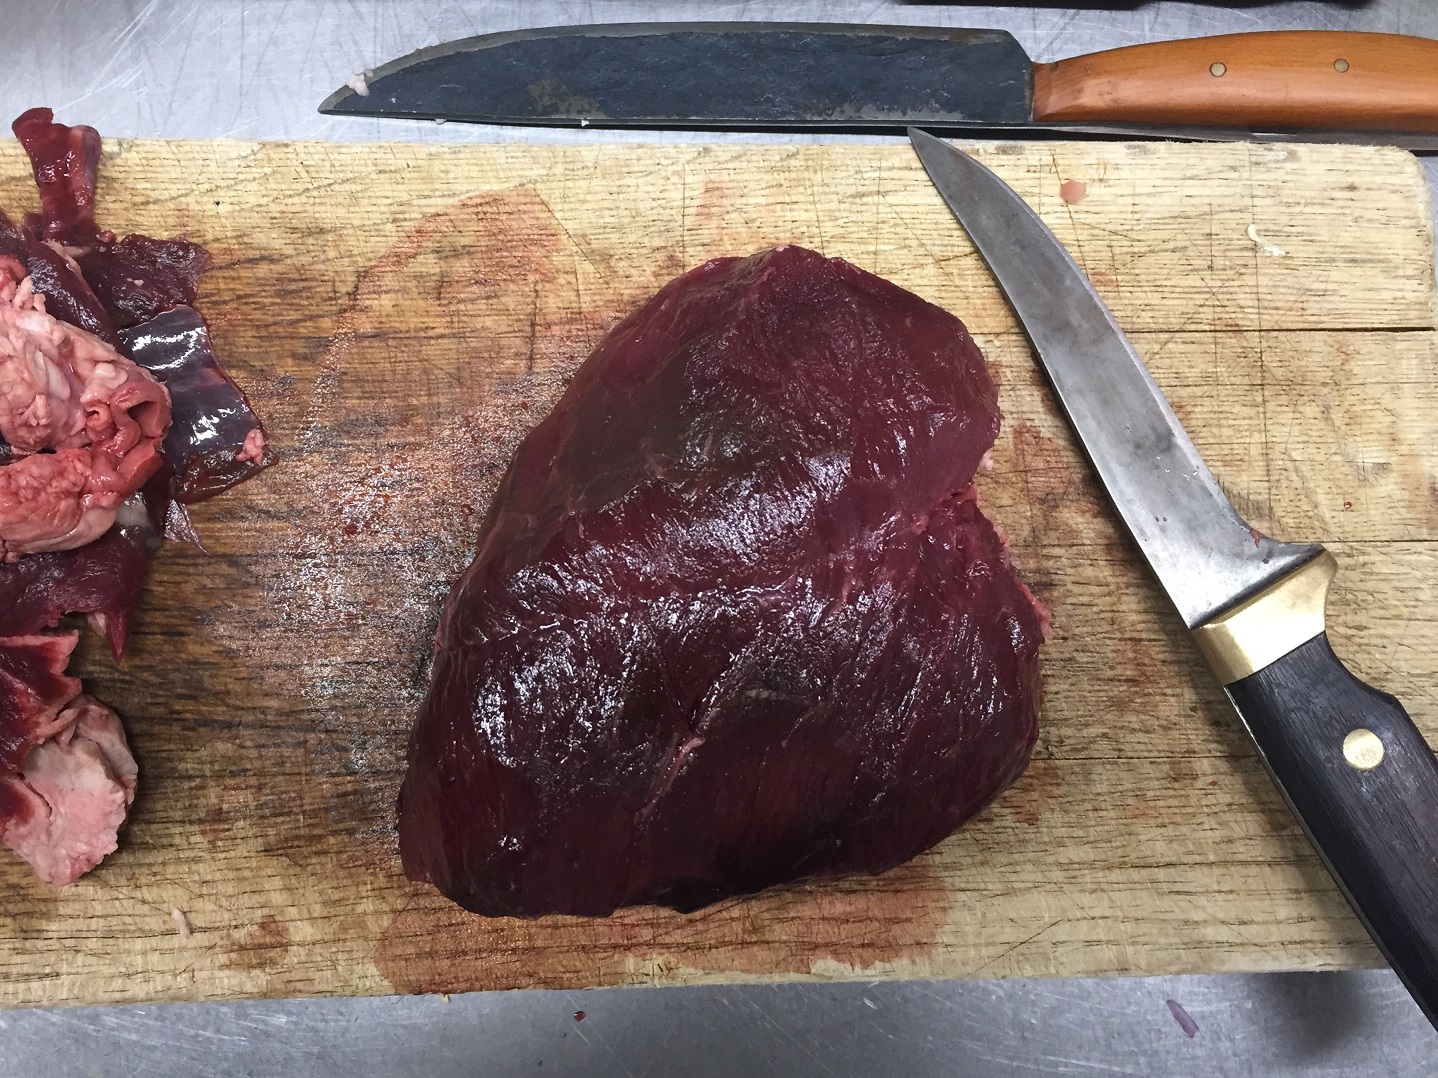
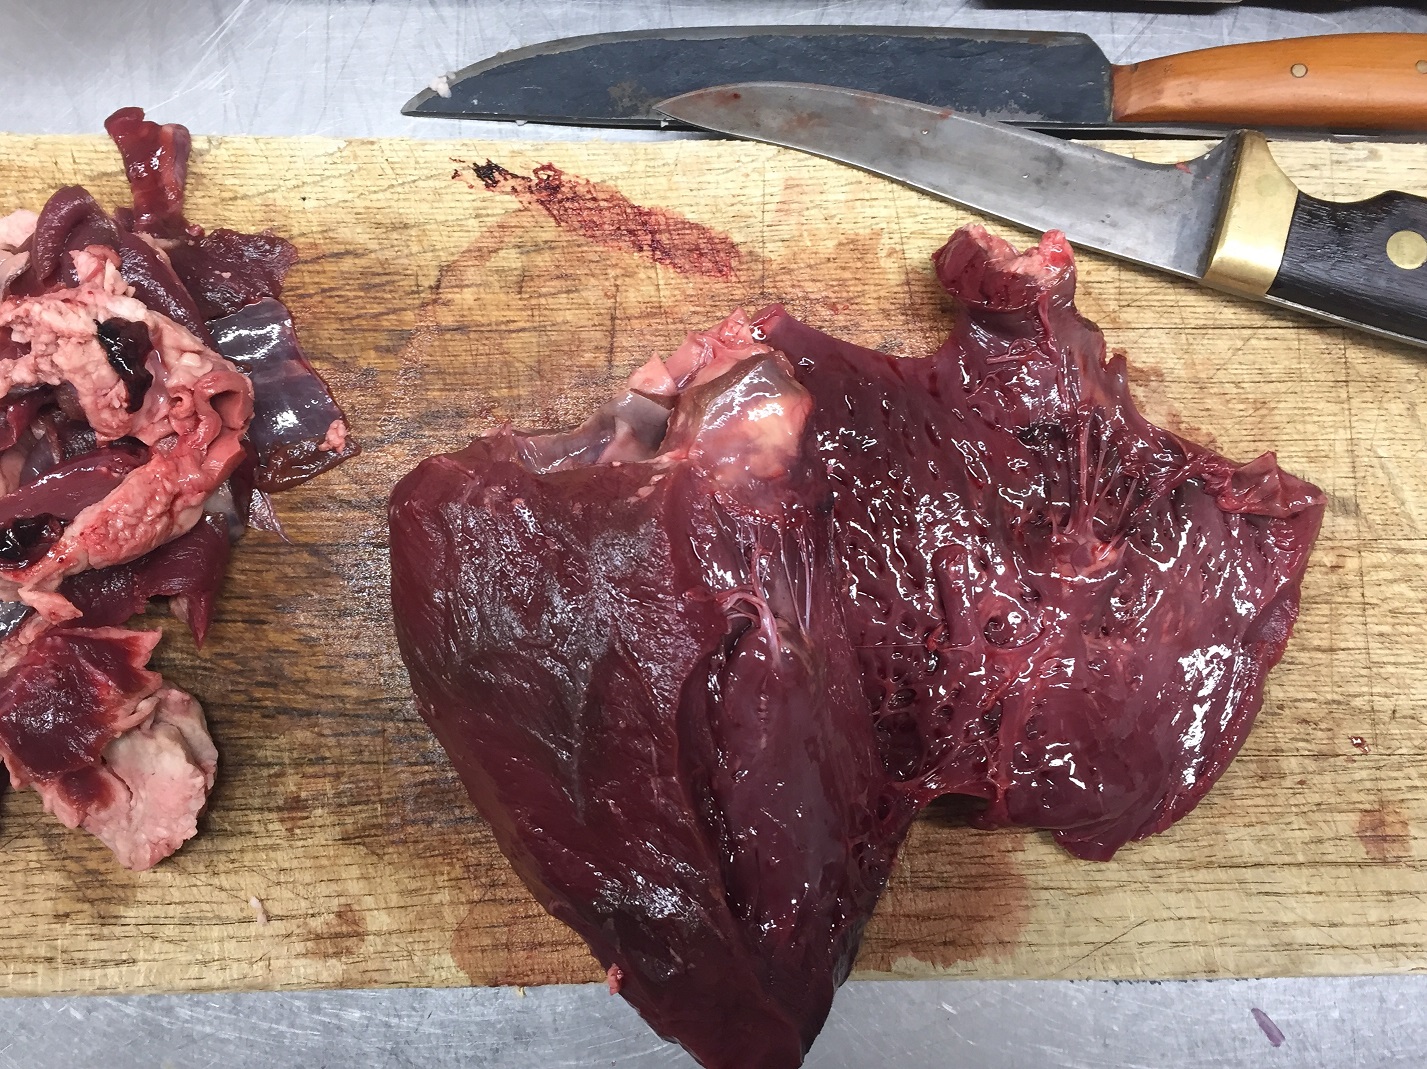
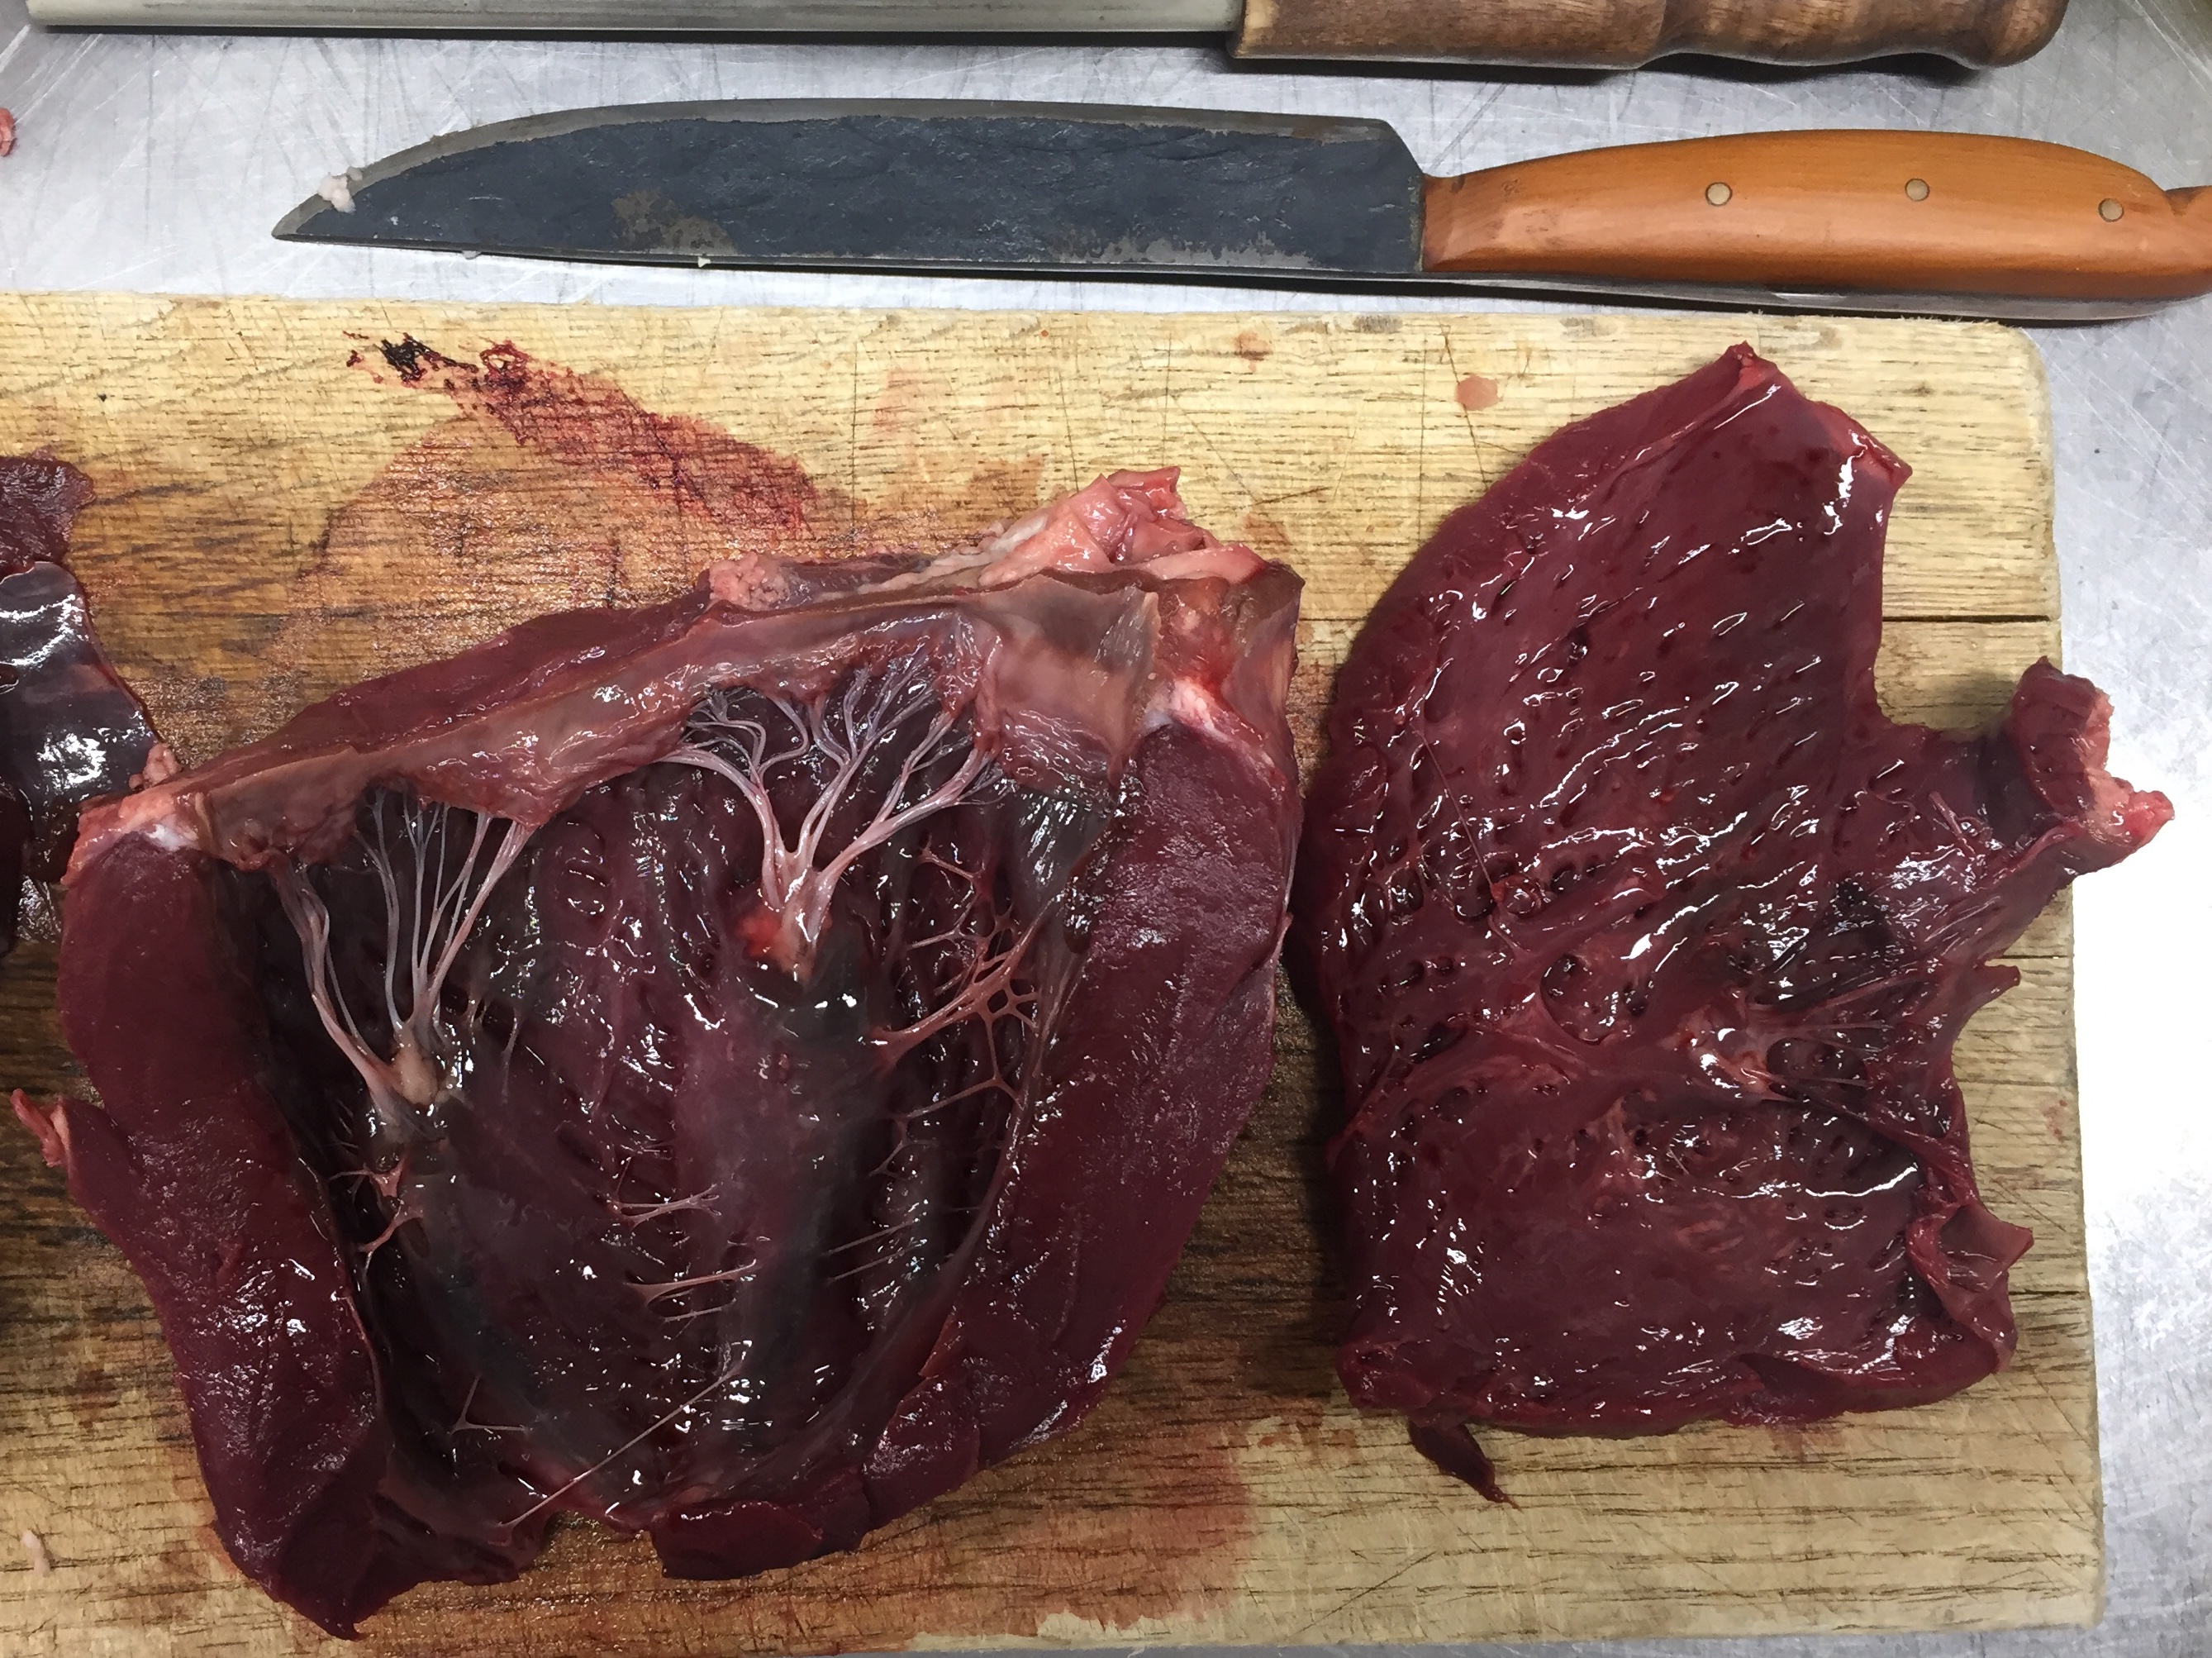
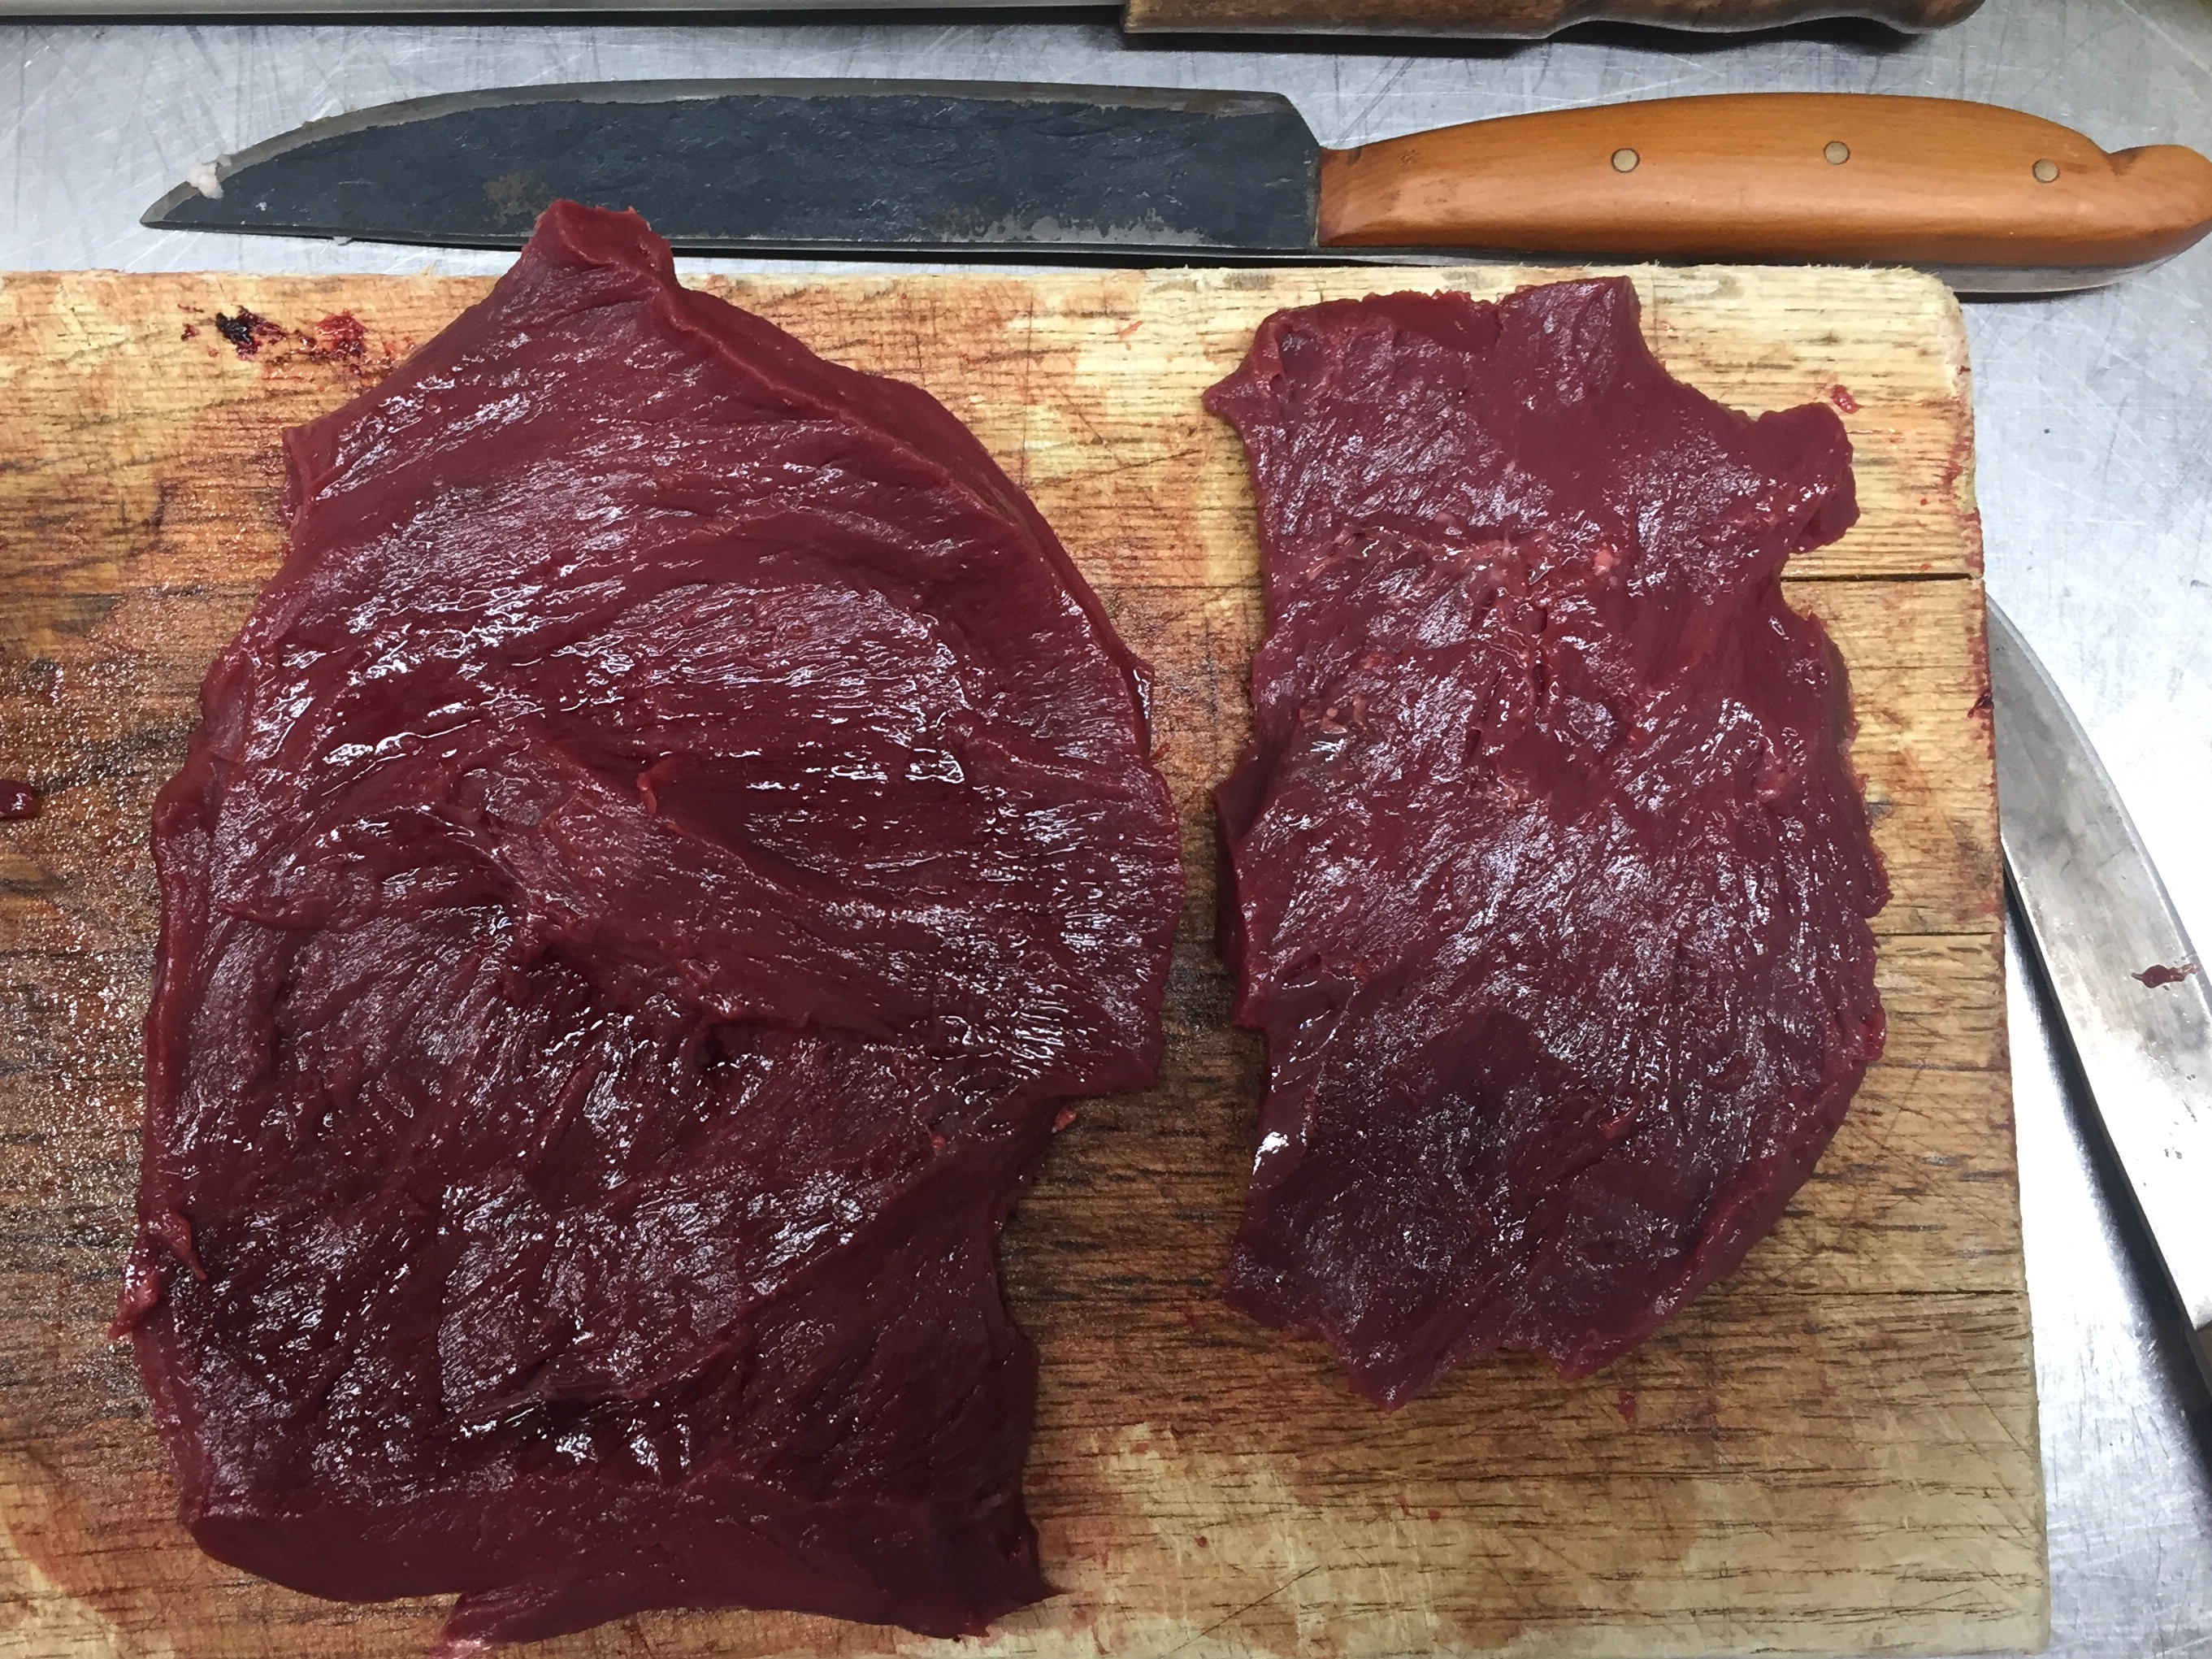
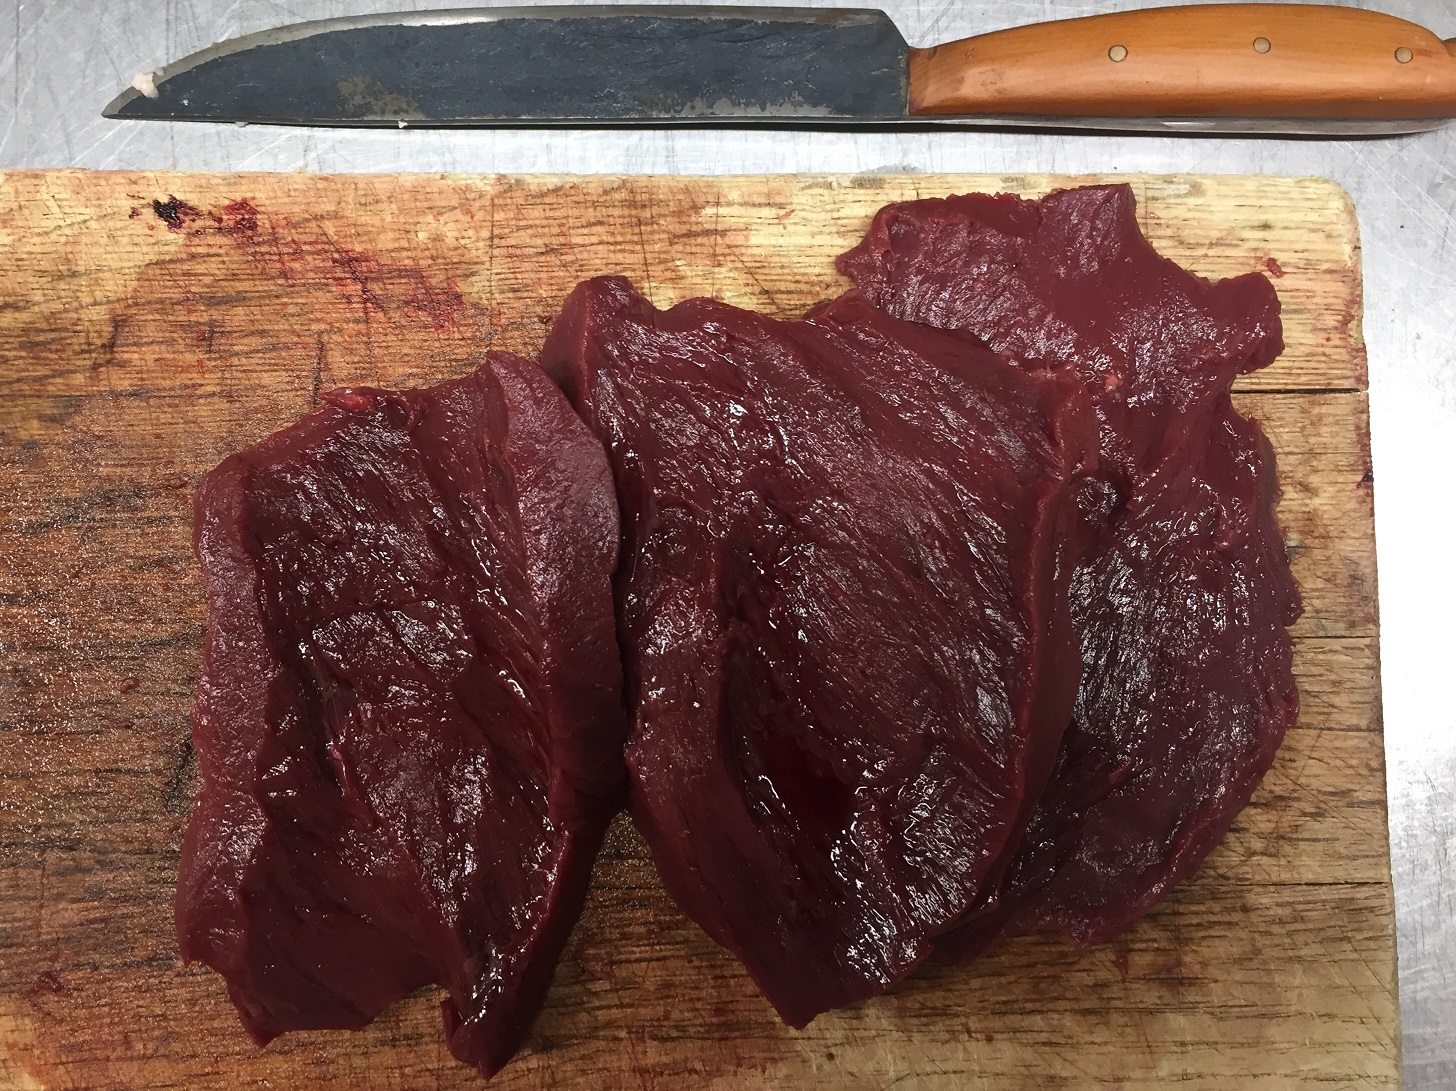
Shooting goats was the way many of us first graduated from hunting small to larger game and this recipe in my opinion transforms the humble goat into something pretty special. This recipe uses all of the animal which I think is really important, if we’re taking a life we should give it the respect it deserves and try to not waste any of it. You can use any part of the goat for the pie, even the prime cuts if you like however if you do you won’t need to cook it as long. For this dish I have used the back leg meat (could use neck or shoulder too) for the pie and I’ve taken to the goat with a hacksaw to make racks but you could always just go the quicker route and take the back steaks off the bone, just make sure you cook them pink so they don’t dry out. Oh and if you’re taking a meat animal, as always the younger nannies will taste the best.

goat 

Massaman Goat Curry Pie
Write a review
Print
Tomato Salsa
  1. 4 Tomatoes, large
  2. 1/4 Red onion
  3. 1/2C Pineapple
  4. 1/2C Cucumber
  5. Mint, finely sliced/chopped
  6. 1tsp Lime juice (to taste)
  7. 1tsp Fish sauce (to taste)
Massaman Goat Curry Pie
  1. 650g Goat leg, trimmed and diced
  2. 1x 425ml Tin coconut cream
  3. 2 tablespoons Massaman curry paste
  4. 1 cup chicken stock
  5. 1/2 cup unsalted roasted peanuts
  6. 2 medium potatoes, peeled, medium dice
  7. 1 cinnamon stick
  8. 2 bay leaves
  9. 5 cardamom pods
  10. 2 tablespoons brown sugar
  11. 1 tablespoon tamarind
  12. 1 tablespoon fish sauce
Plus
  1. 1 packet puff pastry sheets
  2. 1 egg, whisked with 1Tbs milk
  3. 2Tbs butter, melted
Tomato Salsa Method
  1. Take the seeds out of the tomatoes and the cucumbers but you can leave the cucumber skin on. Small dice the tomato, pineapple and cucumber but finely dice the onion (as fine as you can). Combine all the ingredients and season to taste with salt and pepper.
Massaman Goat Curry Pie Method
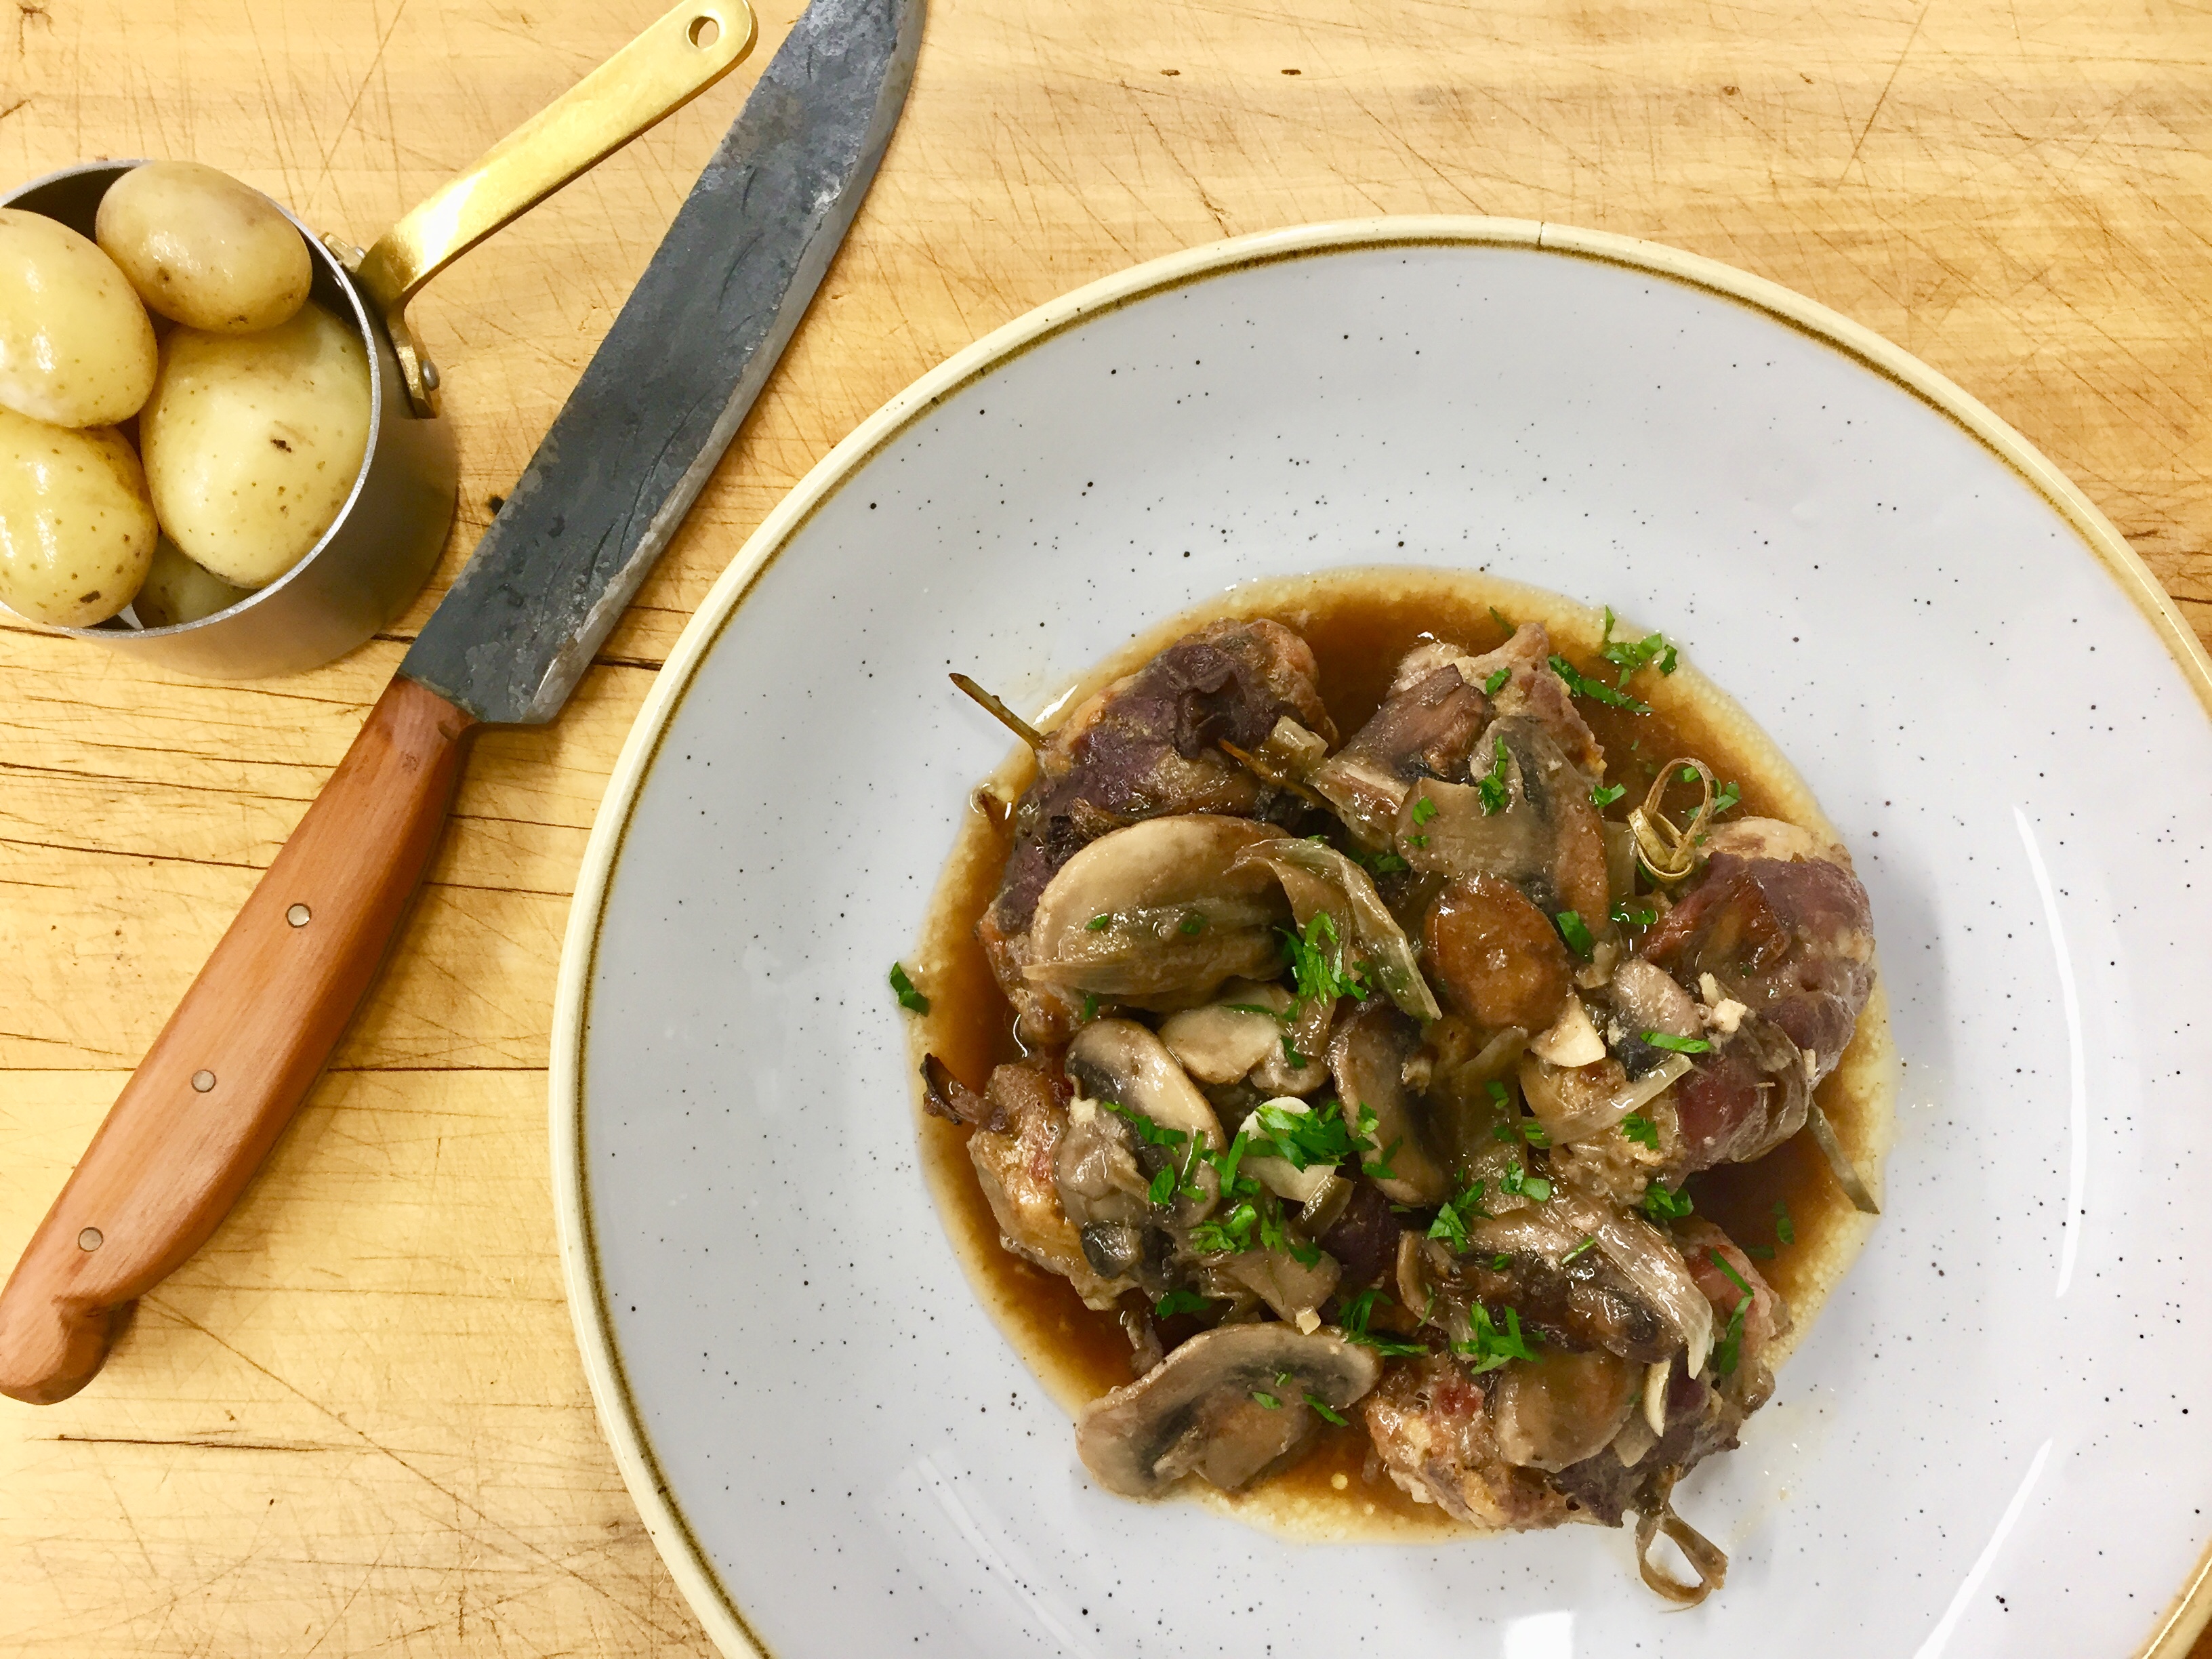
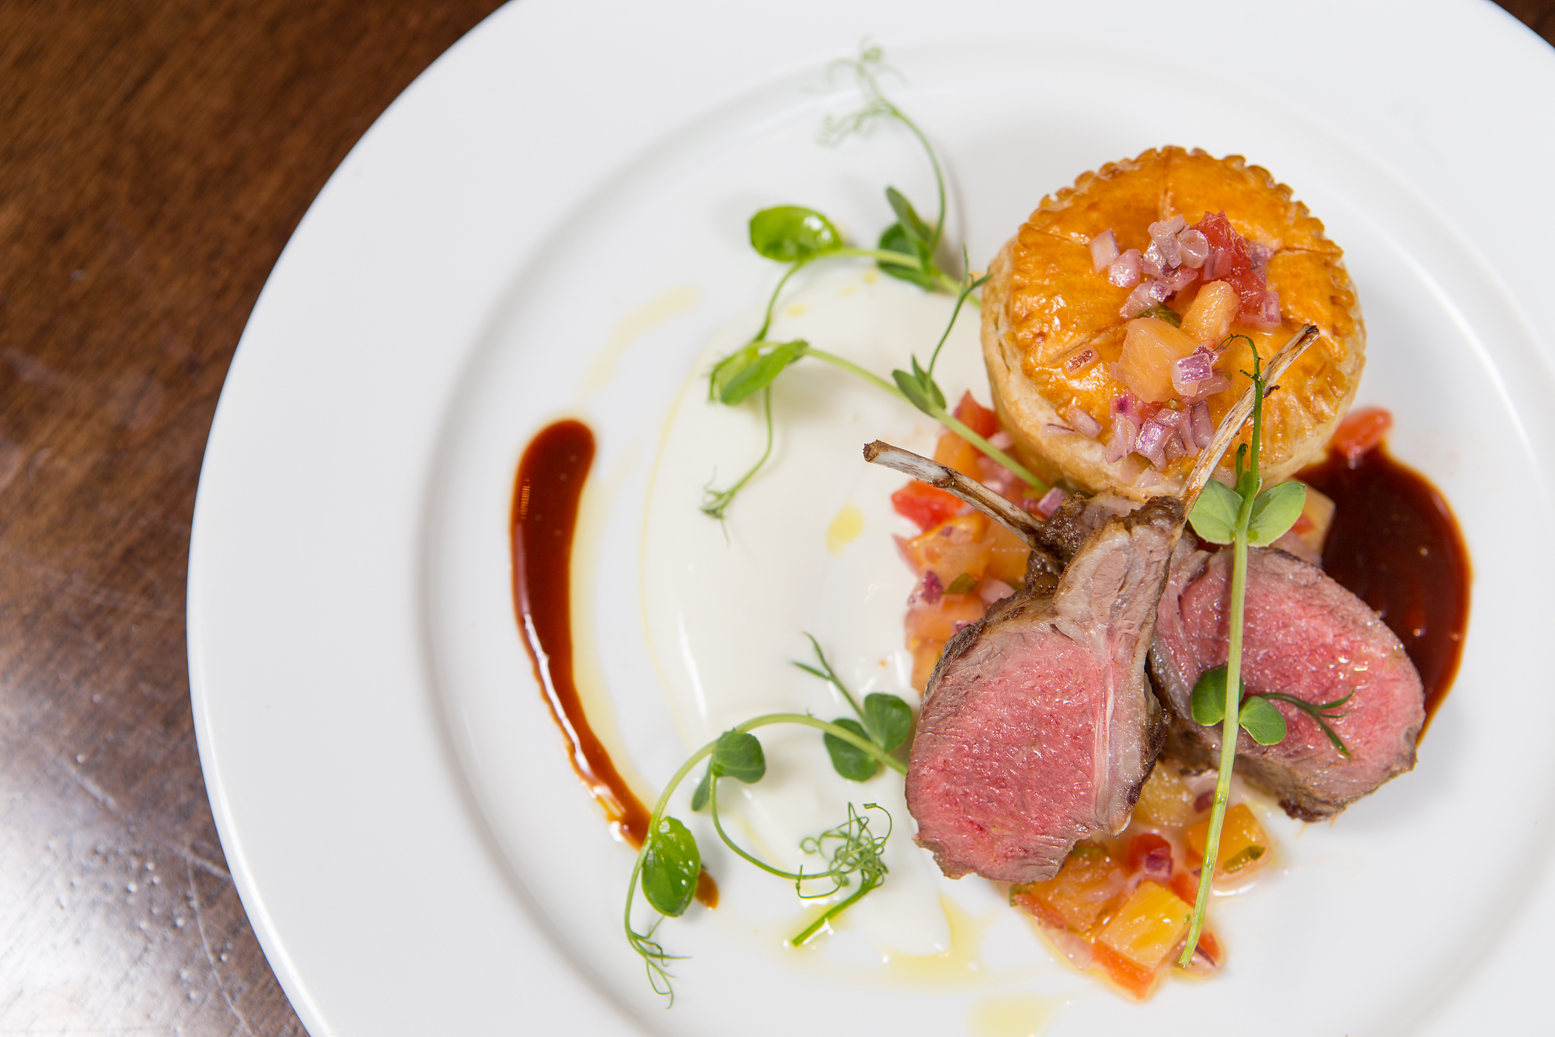
  1. In small batches, sear the diced meat in a hot pan with a little oil until it is nicely browned and put to one side. In a pot large enough to fit all your ingredients, fry the spice paste until it becomes fragrant, add the meat and all the other ingredients (except the puff pastry, egg and butter). Simmer on a low heat on the stove or covered in a baking dish in the oven set to 160C for about 2hrs or until meat is nice and tender. You can add more tamarind and fish sauce or sugar to taste. Cool. Once the mix is cold you can use to fill your pies. I like to make individual pies, how many pies you get out of the mix will depend on how big or small you would like them but this amount should get you about 10 or so medium sized pies or one really big one. Grease your pie moulds with some melted butter, cut circles of puff pastry large enough to fill your mould right to the edges, push the pastry into the moulds and prick the base with a fork to stop it from puffing up at the bottom. Fill your pies with the cold goat curry mix, brush the edges of the pastry with your whisked egg, cut out circles of pastry for your lids and crimp the pie lid on with a fork. Trim the overhanging edges with a knife and brush the top with your egg mix. Bake at 180C until the pastry is cooked and golden brown, (about 12-15mins depending on the size of your pies and the oven). Leave to cool just enough to handle and remove from the moulds. You can make these pies ahead of time and reheat them in the oven on a low heat. Serve with some tomato and pineapple salsa. Here I have served the pies with some salsa, jus and grilled goat rack garnished with picked coriander.
MacLean Fraser http://macleanfraser.com/


Leave a Comment

Filed under Recipes, The Hunter's Kitchen

Grilled Venison heart with Caper butter

hunters kitchen spread


Heart is a highly underrated piece of meat that I would guess most people leave behind. It is unlike any other offal and less like liver or kidney and much more like a fine textured steak. If we’re going to respect and make the most of our kills we should try and take as much as we can and if you have the chance I recommend bringing home the heart and giving it a try next time.

Venison Heart - Copy

Grilled Venison heart with Caper butter
Serves 2
This recipe uses one Venison heart (see How to: Venison Heart butchery) and serves 2 as a main or 4 as a starter.
Write a review
Print
Caper butter
  1. 250g salted butter, room temperature
  2. 1cl Garlic
  3. 1Tbs Capers
  4. 1tsp Mustard
  5. 1 Gherkin
  6. 1tsp Tarragon
  7. Pinch pepper
To Serve
  1. Salt and pepper
  2. Cooking oil
  3. Watercress or other salad leaves
  4. Salad dressing
For the Caper butter
  1. Roughly chop your garlic, capers, gherkin and tarragon. Combine all your ingredients into a food processor and mix until everything is well combined, you want the ingredients to be well incorporated and the last thing you want is to bite down on a massive chunk of raw garlic. You will want to serve the butter at room temperature so it is nice and soft but can keep in the fridge or the freezer for a few weeks. If you want to get a bit flash, when the butter is soft you can roll it up in glad wrap and set it in the fridge and once cold you can cut into nice round slices.
To Serve
  1. Place the trimmed up heart on a plate. Drizzle it with a little cooking oil and season on both sides with salt and pepper. Grill on the BBQ over a high heat the same as you would a steak. It will need about 3 minutes on each side depending on the thickness of your heart for medium rare. Heart, as it is a very lean mean is best served medium rare and no more than medium otherwise it will start to dry out. Once it is cooked rest it somewhere warm for at least 4 minutes so that the juices can set. Cut the grilled heart into slices and serve with the caper butter and some watercress tossed in salad dressing or a little olive oil and lemon juice if preferred.
MacLean Fraser http://macleanfraser.com/

Leave a Comment

Filed under Recipes, The Hunter's Kitchen

How to: Venison Heart butchery

hunters kitchen spread


Heart is a highly underrated piece of meat that I would guess most people leave behind. It is unlike any other offal and less like liver or kidney and much more like a fine textured steak. If we’re going to respect and make the most of our kills we should try and take as much as we can and if you have the chance I recommend bringing home the heart and giving it a try next time.


You will need:

1 large Venison heart

A tray to place you meat in as you prepare it

A bowl for your unusable off cuts

A good sized chopping board with a wet towel underneath to stop it moving

A sharp boning knife and steel


Step 1:

Place a wet towel under a chopping board so it won’t move around on you and grab a very sharp fine knife. Pat the heart dry with a towel and place on your board.

part 1 - Copy 

Step 2:

Remove all the fat and membrane from the outside of the heart making sure you cut away as little meat as possible.

part 2 - Copy

Step 3:

There are two sides to the heart each with two openings. Place your knife inside the opening and cut through both sides so you end up with the smaller side taken off.

part 3 - Copy

Step 4:

Place your knife in the other opening and cut through one side in order to butterfly open the larger half

part 4

Step 5:

Using your knife remove the membrane and any sinew from the inside of the heart.

part 5

 Step 6:

Trim up the heart and cut the larger of the two pieces in half if desired.

part 6 - Copy


Leave a Comment

Filed under Recipes, The Hunter's Kitchen

Tahr Olives with Mushroom sauce

hunters kitchen spread

This dish is a take on Beef Olives, which many of us would have had as kids. Don’t ask me why they’re called olives as they contain no actual olives. For this recipe I have used leg meat but any cut can be used here really as it going to be slow cooked. I would recommend saving your back steaks for a different recipe but if you do use a prime cut then you won’t have to cook it for as long in order for it to be tender.

 Tahr Olives

Tahr Olives with Mushroom sauce
Serves 4
Write a review
Print
Stuffing
  1. 150g Minced beef (or other meat of your choosing)
  2. 1Tbs Onion (finely diced)
  3. 1cl Garlic (crushed)
  4. 1tsp Dried mixed herbs
  5. 1 egg
  6. 20g (3 heaped Tbs) Breadcrumbs
  7. 1 rasher Streaky bacon (or ½ middle or shoulder bacon)
  8. Good pinch salt and pepper
Tahr Olives
  1. 600g Tahr
  2. 12 or so Toothpicks
  3. 3Tbs Flour for dusting
Mushroom Sauce
  1. 100g (6 large) Button mushrooms
  2. 2cl Garlic
  3. 60g (1/2) sliced onion
  4. 1 knob Butter
  5. 1tsp Cooking oil
  6. 500ml beef stock (or water and 1 stock cube)
  7. Salt and pepper to taste
For the stuffing
  1. Whisk up your egg until the white and yolk and mixed together well. Finely dice or mince the bacon. Combine all the ingredients together in a bowl and set to one side.
For the Tahr Olives
  1. Trim up your Tahr removing any sinew and silver skin. Cut into large slices about 1-2cm thick and using a heavy blunt instrument gently bash out to about 1/2cm thick as if you were making Schnitzel. Lay out your Thar on your chopping board and then using your hands shape the stuffing into sausage shapes big enough to fill each piece of Thar. To make the olives place the stuffing at one end of the meat and then roll up the meat around the stuffing and secure with a toothpick. Dust each roll in flour and set to one side while you get your sauce ready.
For the Mushroom sauce
  1. Slice up your mushrooms, slice the onions and finely dice or crush the garlic. Heat a fry pan over a moderate to high heat with 1tsp of cooking oil. When hot fry your Tahr giving it a nice browning on each side and then transferring to a casserole dish. Add a knob of butter to the pan and fry the mushrooms, onions and garlic until nicely browned then add to the casserole dish with the Tahr. Place the pan back on the heat and add about ¼ of the stock to the pan and using a wooden spoon scrape all the brown bits off the bottom of the pan as this will give you some good flavour. Add the hot stock from the pan along with the remaining stock to the casserole dish. Cover with a lid of tin foil and cook at 160C for about 1hour 45minutes of until the meat is tender. If the sauce is not thick enough you can always drain it off and thicken it with cornflour if needed. Season to taste then pour over the olives and serve with some buttery mashed potatoes.
MacLean Fraser http://macleanfraser.com/

Leave a Comment

Filed under Recipes, The Hunter's Kitchen

Wild Venison Scotch Eggs

hunters kitchen spread

This recipe is a take on an old classic. It’s just like how your Nan would make but much, much better…

Scotch Egg


Wild Venison Scotch Eggs
Serves 4
Write a review
Print
Prep Time
30 min
Cook Time
20 min
Total Time
50 min
Prep Time
30 min
Cook Time
20 min
Total Time
50 min
Scotch egg
  1. 250g Venison mince
  2. 1cl Garlic- minced
  3. 1Tbs mustard
  4. 1tsp minced (or dried) Thyme
  5. 1/2tsp salt
  6. 4 Eggs
Aioli – makes 500ml
  1. 5 yolks
  2. 1 tablespoons Dijon mustard
  3. 1 garlic clove
  4. Juice of 1 lemon
  5. 400ml canola oil
  6. 100ml olive oil
  7. Salt and pepper
To Finish
  1. Breadcrumbs
  2. Flour
  3. Egg - whisked
For the Scotch eggs
  1. Combine all the ingredients except the eggs. Boil the eggs for 6 minutes then run under cold water until cold and peel. Get about a quarter of the venison mix in your hand, flatten out and bring round the egg to encase it.
For the Aioli
  1. Combine all the ingredients except the oil in a food processor or blender and blend well for 1-2 minutes. With the blender running on high, slowly drizzle in the oil to emulsify and create the aioli. If your aioli is too thick you can add warm water at the end to thin it down if necessary.
To Finish
  1. Take your venison wrapped eggs and dust them in flour, then egg and then finally in the breadcrumbs. You can deep fry these or if you don’t have a deep fryer you can bake them in the oven or shallow fry them but they will need to go into the oven for a few minutes until the centre is hot. Serve with a side of aioli
MacLean Fraser http://macleanfraser.com/


Leave a Comment

Filed under Recipes, The Hunter's Kitchen

Paua Fritters with aioli

hunters kitchen spread

One of the best things about New Zealand, and something that we probably take for granted, is our free and easy access to wild game and fresh seafood. If you’re into your hunting and fishing and like to go for a dip in the ocean, or know a mate who does then here’s a classic recipe to cook at home or chuck on the flat top of the BBQ. A few years ago I was lucky enough to be doing a stint as a chef in the Queen Charlotte Sounds and have access to paua fresh as you can get. We would slice thinly and fry it quickly in butter with a squeeze of lemon and they were amazing. If you’re using great, fresh ingredients often the more simple recipes are the best.

Paua can be pretty tough and everyone has their own theory on how to tenderise them. The general rule of thumb is once they’ve been removed from the shell, gutted and the teeth removed you need to slice them thinly and fry them quick and fast, slowly braise them or mince them which is the method I am using for this recipe. These fritters are great thrown between two slices of fresh white toast bread with some aioli or you can serve them with some buttered new potatoes and a salad for a full meal. As always, it’s up to us to be responsible and ensure the future prosperity of our resources so make sure you stick to your bag limits and know your minimum sizes so we’ll all be able to enjoy nature’s bounty for years to come.

Paua Fritter Image


Paua Fritters with Aioli
Yields 6
Write a review
Print
Prep Time
45 min
Cook Time
20 min
Total Time
1 hr 5 min
Prep Time
45 min
Cook Time
20 min
Total Time
1 hr 5 min
Paua Fritters
  1. 3cl garlic
  2. 1/2 onion
  3. 1 egg
  4. 1/2 C flour
  5. 1/2tsp baking powder
  6. 1/2tsp salt
  7. 1tbs chopped parsley
  8. 3 large paua minced
  9. 4tbs milk
Aioli (makes 500ml)
  1. 5 yolks
  2. 1 tablespoons Dijon mustard
  3. 1 garlic clove
  4. Juice of 1 lemon
  5. 400ml canola oil
  6. 100ml olive oil
  7. Salt and pepper
For the Paua
  1. Finely dice the onion and crush the garlic. Place the onion and garlic in a large bowl with the minced paua, a whisked egg, chopped parsley and the salt. Combine well. Mix together the flour and baking powder then add to the paua mix. Lightly fold in the flour and don’t mix too much, too much mixing will make the mix tough and rubbery. Add the milk, using a little less or a little more if needed to get a stiff batter.
For the Aioli
  1. Combine all the ingredients except the oil in a food processor or blender and blend well for 1-2 minutes. With the blender running on high, slowly drizzle in the oil to emulsify and create the aioli. If your aioli is too thick you can add warm water at the end to thin it down if necessary.
MacLean Fraser http://macleanfraser.com/


Leave a Comment

Filed under Recipes, The Hunter's Kitchen

Wild Venison burgers with pickled beetroot and a fried egg


Burger Pic

Wild Venison burgers with pickled beetroot and a fried egg
Serves 8
When it comes to using high quality ingredients I like to keep it simple. There’s no need to add a whole bunch of ingredients and flavours to something that is already so good and wild venison you’ve harvested yourself is about as good as it can get.
Write a review
Print
Prep Time
30 min
Cook Time
25 min
Total Time
55 min
Prep Time
30 min
Cook Time
25 min
Total Time
55 min
You’ll need to make or buy
  1. Burger buns
  2. Tomato relish or sauce
  3. Mayo
  4. Lettuce
  5. Tomato
Venison Burgers
  1. 800g venison
  2. 200g pork mince
  3. 1tps salt
  4. 1/2tspn white pepper
Pickled Beetroot
  1. 3 large beetroot
  2. 1/2C cider (or white wine) vinegar
  3. 1/2C sugar
  4. 1/2C Water
For the Burger patties
  1. Combine all ingredients well, mould into burger shapes 1-2cm thick and keep in the fridge until you’re ready to cook them.
For the Beetroot
  1. Place the whole beetroot in a pot of salted water and simmer until the beetroot is very tender. Drain then rub the skins off and slice. Combine the vinegar, sugar and water and bring to the boil then take off the heat. Add the beetroot to the vinegar mix and allow to cool before storing in the fridge. Will last at least 4 weeks.Is best made well ahead of time and left to marinate.
To serve
  1. After you’ve made your pickle and got your burgers ready, the first thing you’ll want to do is get your lettuce washed and either shredded or pulled apart and your tomatoes sliced up. This is a great recipe to throw on the BBQ if you get some good weather, so get your hot plate warmed up, crack a cold beer and get ready to make some burgers. Grease your hotplate (or fry pan if using the stove) with a little oil and making sure it’s nice and hot throw your venison on. Give it about 2-3 minutes on each side to ensure it is nicely browned but make sure you cook it so it’s still pink in the middle. Warm your buns, fry your eggs then put the whole thing together. Spread some tomato relish on the bottom bun and mayo on the top, place your lettuce and tomato on the bottom bun, then your venison, beetroot relish and then finally your fried egg and put the lid on.
MacLean Fraser http://macleanfraser.com/

Leave a Comment

Filed under Blog, Recipes

Venison Koftas with Mint Yoghurt

hunters kitchen spread

When trimming up and portioning my venison I always end up with offcuts and trimmings that you can struggle finding a use for. If you’ve made the kill and gone to the effort of carrying as much of the meat out as you can it seems a shame to waste any of it, and this is where a mincer comes in handy. If only doing limited quantities you can purchase a small hand mincer for a minimal investment and it will pay for itself in no time. Hang on to all your venison trimmings to put through the mincer and you can use them to make this easy BBQ recipe. Make sure to soak bamboo skewers in water so they don’t burn when putting them on the grill. Ground spices can be used in place of the whole spices if you don’t want to grind them yourself, however you will always get better flavour grinding your spices fresh.

Venison Kofta MacLean

Venison Koftas with Mint Yoghurt
Serves 6
Write a review
Print
Prep Time
20 min
Cook Time
20 min
Total Time
40 min
Prep Time
20 min
Cook Time
20 min
Total Time
40 min
Venison Koftas
  1. 400g Venison mince
  2. 100g Pork mince
  3. 1 Egg, lightly beaten
  4. 1/2C Breadcrumbs
  5. 3cl Garlic, minced
  6. 2tsp Cumin seeds
  7. 2tsp Coriander seeds
  8. 1tsp Fennel seeds
  9. 1/2tsp Chilli flakes
  10. 2tsp Smoked Paprika
  11. 1tsp Salt
Mint Yoghurt
  1. 1/2C Plain Yoghurt
  2. 10-12 Mint leaves
  3. Squeeze lemon juice
  4. Pinch salt
For the Mint Yoghurt
  1. Finely slice the mint leaves and mix together with the yoghurt with a squeeze of lemon and a pinch of salt to taste. Keep in the fridge until ready to serve.
For the Koftas
  1. Lightly toast off the whole spices and grind together in a spice grinder or pestle and mortar. Place all the ingredients in a bowl and mix together until well combined. Wrap some of the venison mix around your choice of bamboo skewers and place them on the grill plate of the BBQ for about 3 minutes a side until just cooked through. Alternatively you can fry them in a pan over a moderate heat with a little oil to stop them from sticking.
  2. Serve the koftas with some warmed flat bread, a fresh seasonal salad along with the mint yoghurt.
MacLean Fraser http://macleanfraser.com/

Leave a Comment

Filed under Recipes, The Hunter's Kitchen, Uncategorized

Venison Wellington with mushrooms and kumara mash

hunters kitchen spread


This is a good recipe for entertaining and an impressive way to cook venison. The kumara adds a buttery richness to the dish and the earthiness of the mushrooms compliments the flavour of the meat well. If you wanted to save time and did not want to use the pastry aspect of the dish you could simply grill the venison and add some cream and meat stock to the mushrooms for a simple mushroom sauce.

Venison Wellington Final

Venison Wellington with mushrooms and kumara mash
Serves 4
Write a review
Print
Prep Time
45 min
Cook Time
20 min
Total Time
1 hr 5 min
Prep Time
45 min
Cook Time
20 min
Total Time
1 hr 5 min
Venison
  1. 600g venison back strap
  2. 2 sheets puff pastry
  3. Splash of milk
Mushroom Duxelle
  1. 1/2 onion
  2. 250g mushrooms
  3. 3cl garlic
  4. 1/2tsp dried thyme or fresh
  5. 50g butter
  6. 1tsp red wine vinegar
  7. Salt and pepper
Kumara Mash
  1. 2-3 kumara
  2. 50g butter
  3. Splash milk or cream
For the Mushroom
  1. Finely dice the onion, mushrooms and garlic by pulsing them all together in a food processor. Place in a pot along with the butter and thyme and cook out on a low to moderate heat until everything has softened and the liquid has evaporated, about 15mins. Add the vinegar and cook for another 2mins. Season to taste with salt and pepper then set aside to cool.
For the Kumara mash
  1. Peel the kumara and cut into even sized pieces. Starting in cold, salted water boil the kumara until nice and soft. Drain in a colander then return to the pot and cook over a low heat for 1 to 2 minutes to remove any excess water. Mash the kumara until nice and smooth. Melt the butter along with a little milk or cream and fold through the kumara mix. If the mash is too stiff add some cream or milk to thin it down and then season to taste with salt and white pepper.
For the Venison Wellington
  1. Trim the venison back strap of any silver skin by inserting a sharp pointed knife (such as a boning knife) under one end of the silver skin then with the blade angled upward remove the silver skin off in strips cutting off as little meat as possible. Pat the meat dry with a kitchen towel if required and season with salt and pepper. In a very hot pan with a little oil, sear the back strap until nicely browned on each side but not at all cooked. Set aside.
  2. Place the venison on a pastry sheet (you may need to cut your venison in half to fit depending on the size of your pastry sheets). Spoon some of the cold mushroom mix on top of the venison so the entire top of the meat is covered and then with one edge of the pastry brushed with milk so that it sticks, roll the venison and the mushroom together in the pastry and pinch the edges. Brush the pastry with milk.
To Serve
  1. Bake the venison Wellington on an oven tray lined with grease proof paper in a 200C oven for 10-15mins for rare to medium rare depending on the thickness of your back strap. Cooking beyond medium rare will make your venison dry. Once cooked remove from the oven and poke a few small holes in the base of the pastry to allow any resting juices to escape and rest on an oven rack for 10 minutes before carving. Serve with some hot kumara mash and a green salad or seasonal veg along with Branston pickle if desired.
MacLean Fraser http://macleanfraser.com/

Leave a Comment

Filed under Blog, Recipes, The Hunter's Kitchen

Southern Fried Rabbit with Smoky Chilli Mayo

hunters kitchen spread

This recipe and is a home version of fast food using wild game. It’s one of my favourite ways to eat rabbit as it locks in the moisture and flavour so make sure you don’t skip the brining process as this is critical to ensuring a moist result. If you don’t have all the ingredients to make the brine you can use just salt and water and that is better than nothing. The smoked chilli mayo recipe uses smoke essence which is available from specialty shops or you can replace the chilli powder and tabasco with canned Chipotle chillies which will give the mayo a lightly smoky flavour.   

 Fried Rabbit


Southern Fried Rabbit with Smoky Chilli Mayo
Yields 24
Write a review
Print
Cider brine
  1. 500ml apple cider
  2. 3lt Water
  3. 1/2C salt
  4. 3 star anise
  5. 4 bay leaves
  6. 4 sprigs thyme
  7. 2 rabbits (about 1kg each)
Smoky chilli mayo
  1. 4 yolks
  2. 1 whole egg
  3. 1tsp tabasco sauce
  4. 1 small garlic clove
  5. Juice of 1 lemon
  6. 375ml canola oil
  7. 125ml olive oil
  8. Salt and pepper
  9. 1/4tsp Chilli powder
  10. Dash smoke essence
Rabbit coating
  1. 1/4C milk
  2. 2Tbs cayenne pepper
  3. 1Tbs paprika
  4. 1tsp ground black pepper
  5. 1tsp garlic powder
  6. 1C flour
  7. 1/4C corn flour
For the brine
  1. Mix everything apart from the rabbit together and stir well to dissolve the salt. Take your skinned and gutted rabbit and using a sharp pointed knife remove any membrane and silver skin from the outside of the meat as this will go tough once cooked. Halve the now trimmed rabbit and cut each half through the bone into 6 pieces depending on how big you’d like them (I like to get 12 pieces out of every rabbit). Submerge the rabbit in the brine for about 12 hours or overnight.
For the mayo
  1. Combine all ingredients except the oil and smoke essence in a food processor or blender. Slowly add the oil with the food processor running to emulsify the oil and create the creamy mayo. Add smoke essence to taste and more tabasco/chilli powder if more heat is desired. Add warm water at the end for consistency if the mayo is too thick.
For the rabbit coating
  1. Combine in a large bowl all the ingredients except the milk and stir to mix all the spices evenly through the flour mix. Remove the rabbit from the brine and pat dry with a kitchen towel. Toss in the milk, shake off the excess and transfer to the flour mix. Toss the rabbit in the bowl of flour and leave for up to 2 hours making sure to give it a toss every now and again. This is to build up a good thick flour coating on the outside of the rabbit.
  2. Fry in vegetable oil or lard at 160C for about 10mins (depending on the size of your rabbit pieces) or until golden brown and just cooked through. If you coating starts to get too dark before the middle of your rabbit is fully cooked you can remove the rabbit from the oil and finish it in an oven set to 150C for a few minutes until cooked through.
MacLean Fraser http://macleanfraser.com/

Leave a Comment

Filed under Blog, Recipes, The Hunter's Kitchen