Tag Archives: The Hunter’s Kitchen

Massaman Goat Curry Pie

hunters kitchen spread

Shooting goats was the way many of us first graduated from hunting small to larger game and this recipe in my opinion transforms the humble goat into something pretty special. This recipe uses all of the animal which I think is really important, if we’re taking a life we should give it the respect it deserves and try to not waste any of it. You can use any part of the goat for the pie, even the prime cuts if you like however if you do you won’t need to cook it as long. For this dish I have used the back leg meat (could use neck or shoulder too) for the pie and I’ve taken to the goat with a hacksaw to make racks but you could always just go the quicker route and take the back steaks off the bone, just make sure you cook them pink so they don’t dry out. Oh and if you’re taking a meat animal, as always the younger nannies will taste the best.
goat 

Massaman Goat Curry Pie
Write a review
Print
Tomato Salsa
  1. 4 Tomatoes, large
  2. 1/4 Red onion
  3. 1/2C Pineapple
  4. 1/2C Cucumber
  5. Mint, finely sliced/chopped
  6. 1tsp Lime juice (to taste)
  7. 1tsp Fish sauce (to taste)
Massaman Goat Curry Pie
  1. 650g Goat leg, trimmed and diced
  2. 1x 425ml Tin coconut cream
  3. 2 tablespoons Massaman curry paste
  4. 1 cup chicken stock
  5. 1/2 cup unsalted roasted peanuts
  6. 2 medium potatoes, peeled, medium dice
  7. 1 cinnamon stick
  8. 2 bay leaves
  9. 5 cardamom pods
  10. 2 tablespoons brown sugar
  11. 1 tablespoon tamarind
  12. 1 tablespoon fish sauce
Plus
  1. 1 packet puff pastry sheets
  2. 1 egg, whisked with 1Tbs milk
  3. 2Tbs butter, melted
Tomato Salsa Method
  1. Take the seeds out of the tomatoes and the cucumbers but you can leave the cucumber skin on. Small dice the tomato, pineapple and cucumber but finely dice the onion (as fine as you can). Combine all the ingredients and season to taste with salt and pepper.
Massaman Goat Curry Pie Method
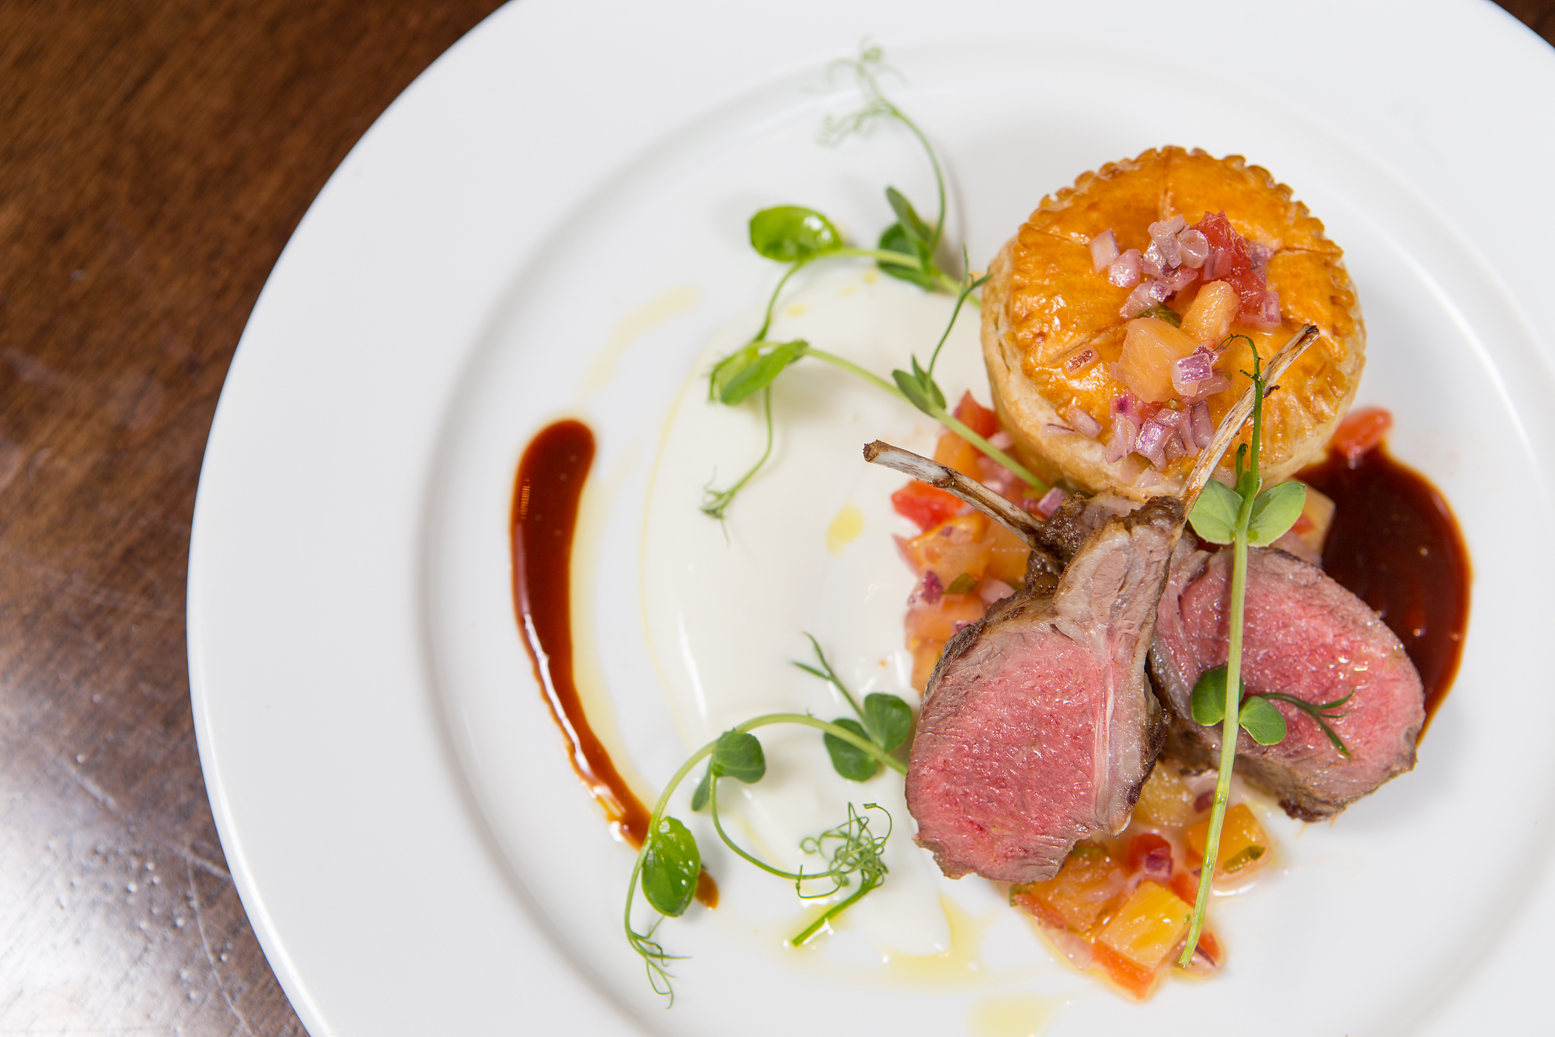
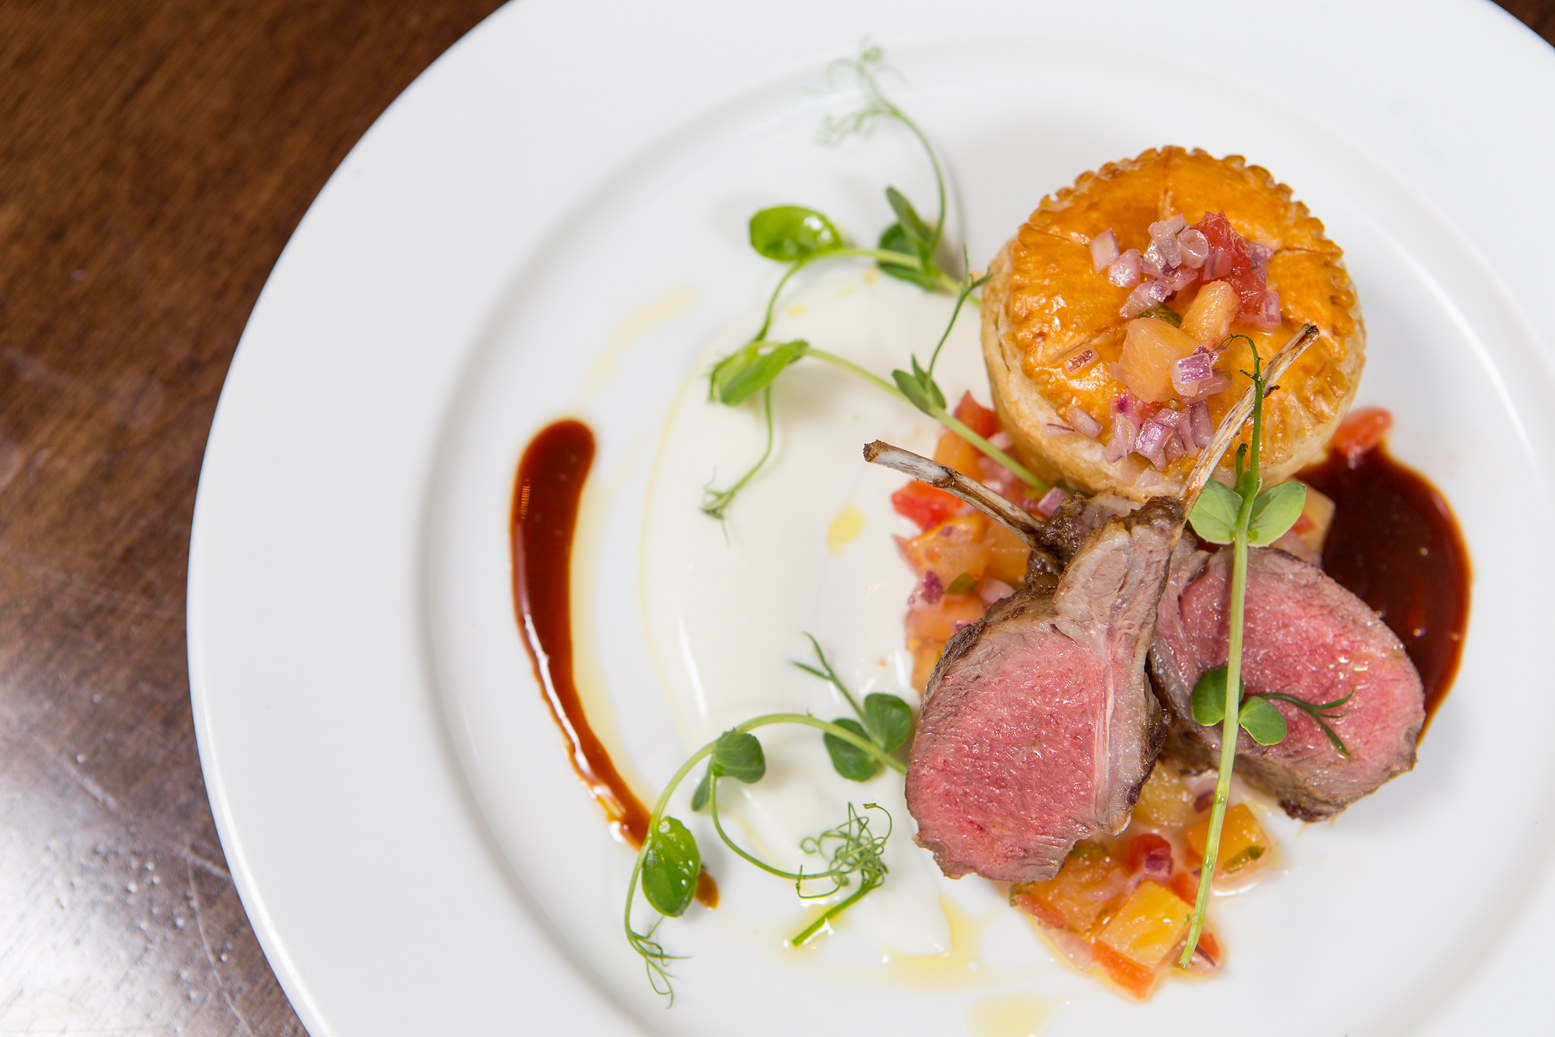
  1. In small batches, sear the diced meat in a hot pan with a little oil until it is nicely browned and put to one side. In a pot large enough to fit all your ingredients, fry the spice paste until it becomes fragrant, add the meat and all the other ingredients (except the puff pastry, egg and butter). Simmer on a low heat on the stove or covered in a baking dish in the oven set to 160C for about 2hrs or until meat is nice and tender. You can add more tamarind and fish sauce or sugar to taste. Cool. Once the mix is cold you can use to fill your pies. I like to make individual pies, how many pies you get out of the mix will depend on how big or small you would like them but this amount should get you about 10 or so medium sized pies or one really big one. Grease your pie moulds with some melted butter, cut circles of puff pastry large enough to fill your mould right to the edges, push the pastry into the moulds and prick the base with a fork to stop it from puffing up at the bottom. Fill your pies with the cold goat curry mix, brush the edges of the pastry with your whisked egg, cut out circles of pastry for your lids and crimp the pie lid on with a fork. Trim the overhanging edges with a knife and brush the top with your egg mix. Bake at 180C until the pastry is cooked and golden brown, (about 12-15mins depending on the size of your pies and the oven). Leave to cool just enough to handle and remove from the moulds. You can make these pies ahead of time and reheat them in the oven on a low heat. Serve with some tomato and pineapple salsa. Here I have served the pies with some salsa, jus and grilled goat rack garnished with picked coriander.
MacLean Fraser http://macleanfraser.com/


Leave a Comment

Filed under Recipes, The Hunter's Kitchen

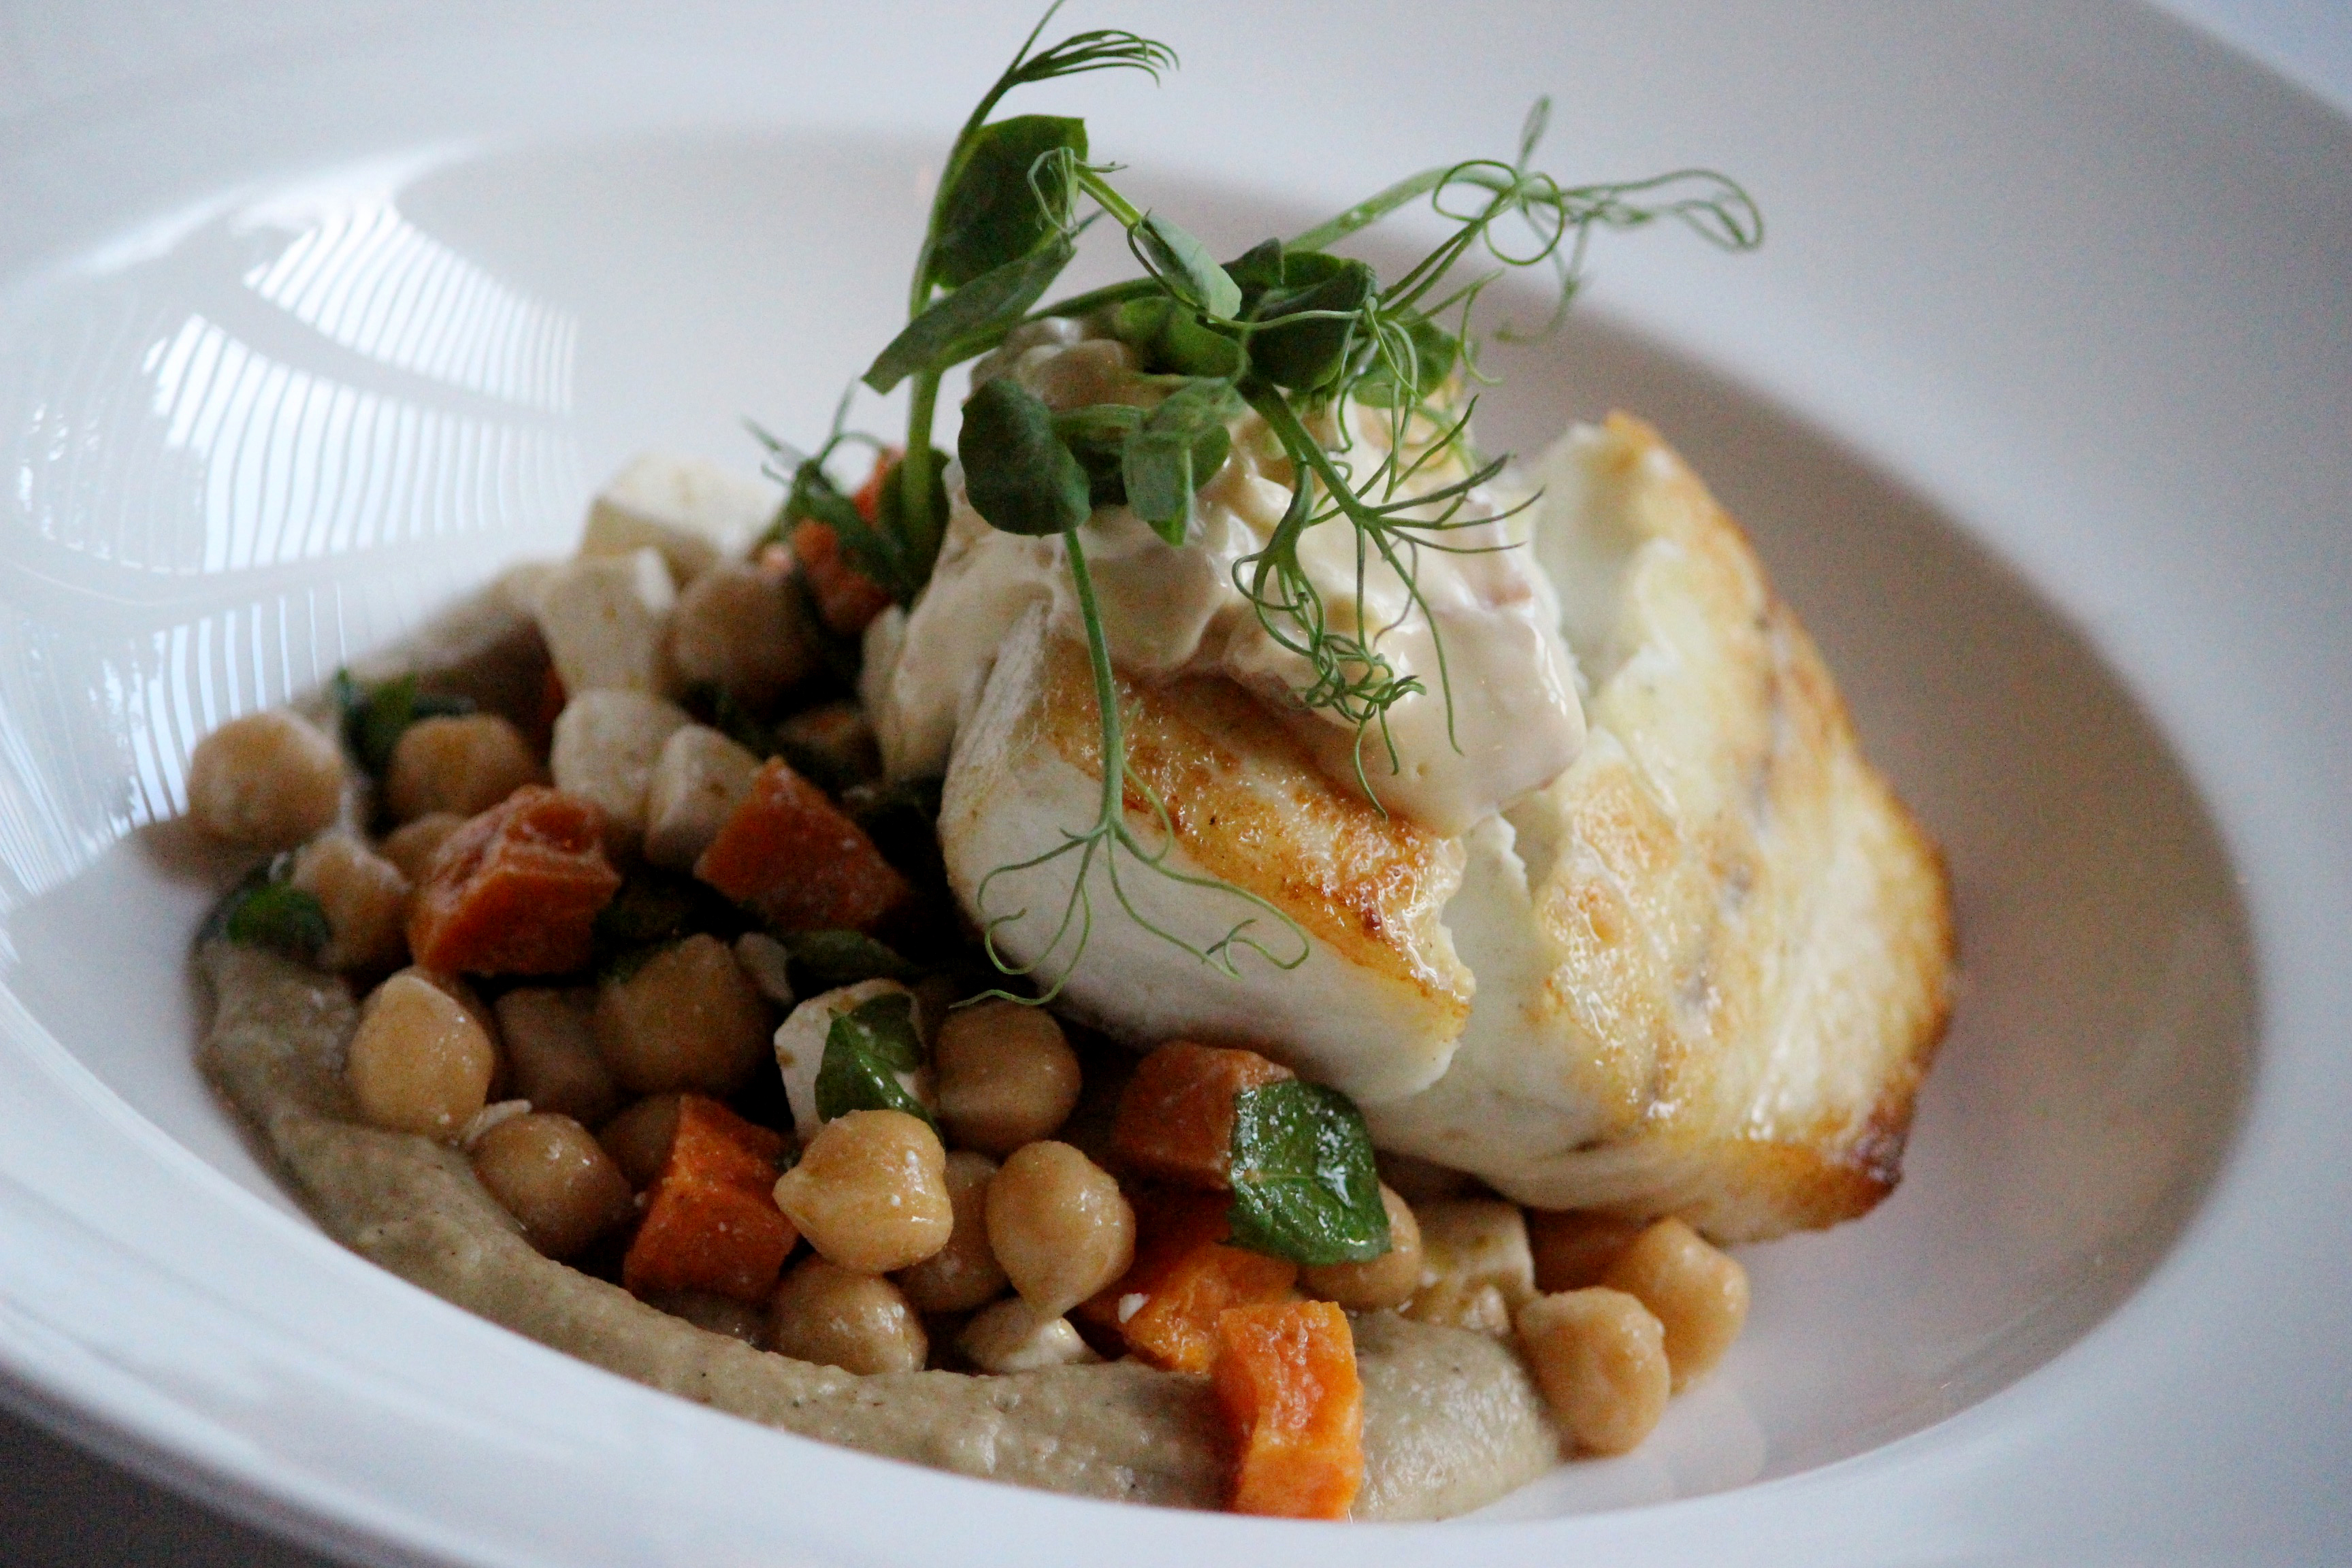
Grilled Hapuka with spiced kumara and chickpea salad, crayfish mayo

hunters kitchen spread

 This is an excellent recipe for those hot summer afternoons where you need to make use of the days catch (with enough veges to keep you in good nick). If Hapuka isn’t available, don’t dismay, as any fresh fish goes beautifully with this recipe. 

IMG_6712

Grilled Hapuka with spiced kumara and chickpea salad, crayfish mayo
Serves 4
Write a review
Print
Prep Time
45 min
Cook Time
45 min
Total Time
1 hr 45 min
Prep Time
45 min
Cook Time
45 min
Total Time
1 hr 45 min
Ingredients
  1. 4 nice pieces (700g approx.) Hapuka (or any other fish is fine)
Chickpea, feta and kumara salad
  1. 1 large Kumera – 1cm dice
  2. 1tbs Mixed spice
  3. 50g Feta - crumbled
  4. 1 small can Chickpeas, drained
  5. ¼ Red onion, fine dice
  6. 1 Tomato, seeds removed, diced
  7. 1 Spring onion stalk sliced (green and white parts)
  8. 2 sprigs Mint, chopped rough
  9. 2 sprigs Italian parsley, chopped rough
  10. 1tbs Olive oil
  11. 1tsp Lemon juice
  12. Salt and pepper to taste
Smoky eggplant
  1. 1 Eggplant
  2. 1 Lemon (juice only)
  3. 1tsp Cumin, ground
  4. 50-100ml Olive oil
For the salad
  1. Toss the kumara in a little oil and the mixed spice. Roast on an oven tray at 180C for abour 12-15 mins until the kumara is nicely roasted and cooked through. Toss all the ingredients together and can be kept in the fridge for a couple of hours if needed.
For the eggplant
  1. Char eggplant over a high heat on the grill side of your bbq until the skin is very blackened, then peel when cool. Blend in a food processor with cumin, lemon juice and oil. Season with flaky sea salt. You want to be able to taste the olive oil and the lemon juice in the puree.
To serve
  1. Grill the fish until just cooked and serve on the chick pea salad and the smoky eggplant. A nice touch if you’ve got some cooked crayfish left over is to dice it up, fold it through some home-made or good quality store bought mayo (Hellmann’s is good).
MacLean Fraser http://macleanfraser.com/

Leave a Comment

Filed under Recipes, The Hunter's Kitchen

How to: Breaking down a leg of Venison

hunters kitchen spread

So you’ve done the hard yards and carried your meat home, now it’s time to turn it into something you can cook with. When breaking down a whole deer taking out the back steaks are pretty self-explanatory, just make sure that you run your knife hard up against the backbone to make sure you get all the meat. You can take off the shoulder by cutting away behind the shoulder blade and the hind quarters can be removed by going through the hip joint. Make sure you don’t forget the inner fillets which run along the spine on the inside of the cavity and make sure you take the neck meat, it’s some of the best braising meat in my opinion. Personally I like to dice up the shoulder meat for stews, pies, curry etc and the back steaks I keep relatively whole for the BBQ or for pan frying. Don’t throw out any trim as this can be put through the mincer and used for things like meatballs, lasagne and chilli. The hind leg is probably the most difficult piece of meat to deal with so that’s what we’ll be breaking down today. The hind leg is made up of four primal cuts (Rump, knuckle, topside and silverside) plus the shank. These four main cuts are collectively known as Denver leg and I use them interchangeably using a fast cooking method (fry, roast, BBQ etc) with the shank the only cut that I think always needs to be braised. Depending on the age and condition of your particular animal you should be able to cook all these cuts as you would a steak, however once you’ve aged your meat to your liking and your meat is still tough one you may want to change to a slow cook method to make it nice and tender.


You will need:

A tray to place you meat in as you prepare it

Two bowls: one for your off cuts and one for rubbish

A good sized chopping board with a wet towel underneath to stop it moving

A sharp boning knife and steel

A hacksaw (optional)


Step 1:

Set your work bench up with all the gear you’ll need and place your leg flat on the chopping board. What we’re looking to do is to remove all the main muscle groups which are all separated by connective tissue. You’ll be able to pull away the muscle groups and use the knife to just help them on their way.

 IMG_0722

Step 1

Step 2:

Once the muscle groups are opened up and you’ve exposed the main leg bone (femur) you can just cut away the muscle with the knife hard up against the bone, this way you don’t waste any meat.

 Step 2

Step 3:

Keep following the seams and remove the main muscle groups off the bone and set aside.

Step 3

Step 4:

Remove the side muscle from the shank and keep this to one side for slow cooking.

 Step 4

Step 5:

Cut through the joint and separate the shank and keep for slow cooking. You can take the meat off the shank if you like or using a hacksaw remove the end of the bone so the shank fits better in your pot or slow cooker. The femur you can use to make stock of give to your dog and make his day.

 Step 5

IMG_0739

Step 6:

Now you will have your leg broken down into the main muscle groups you can follow the natural sinew lines and break each primal into its individual muscle groups.

 Step 6

Step 7:

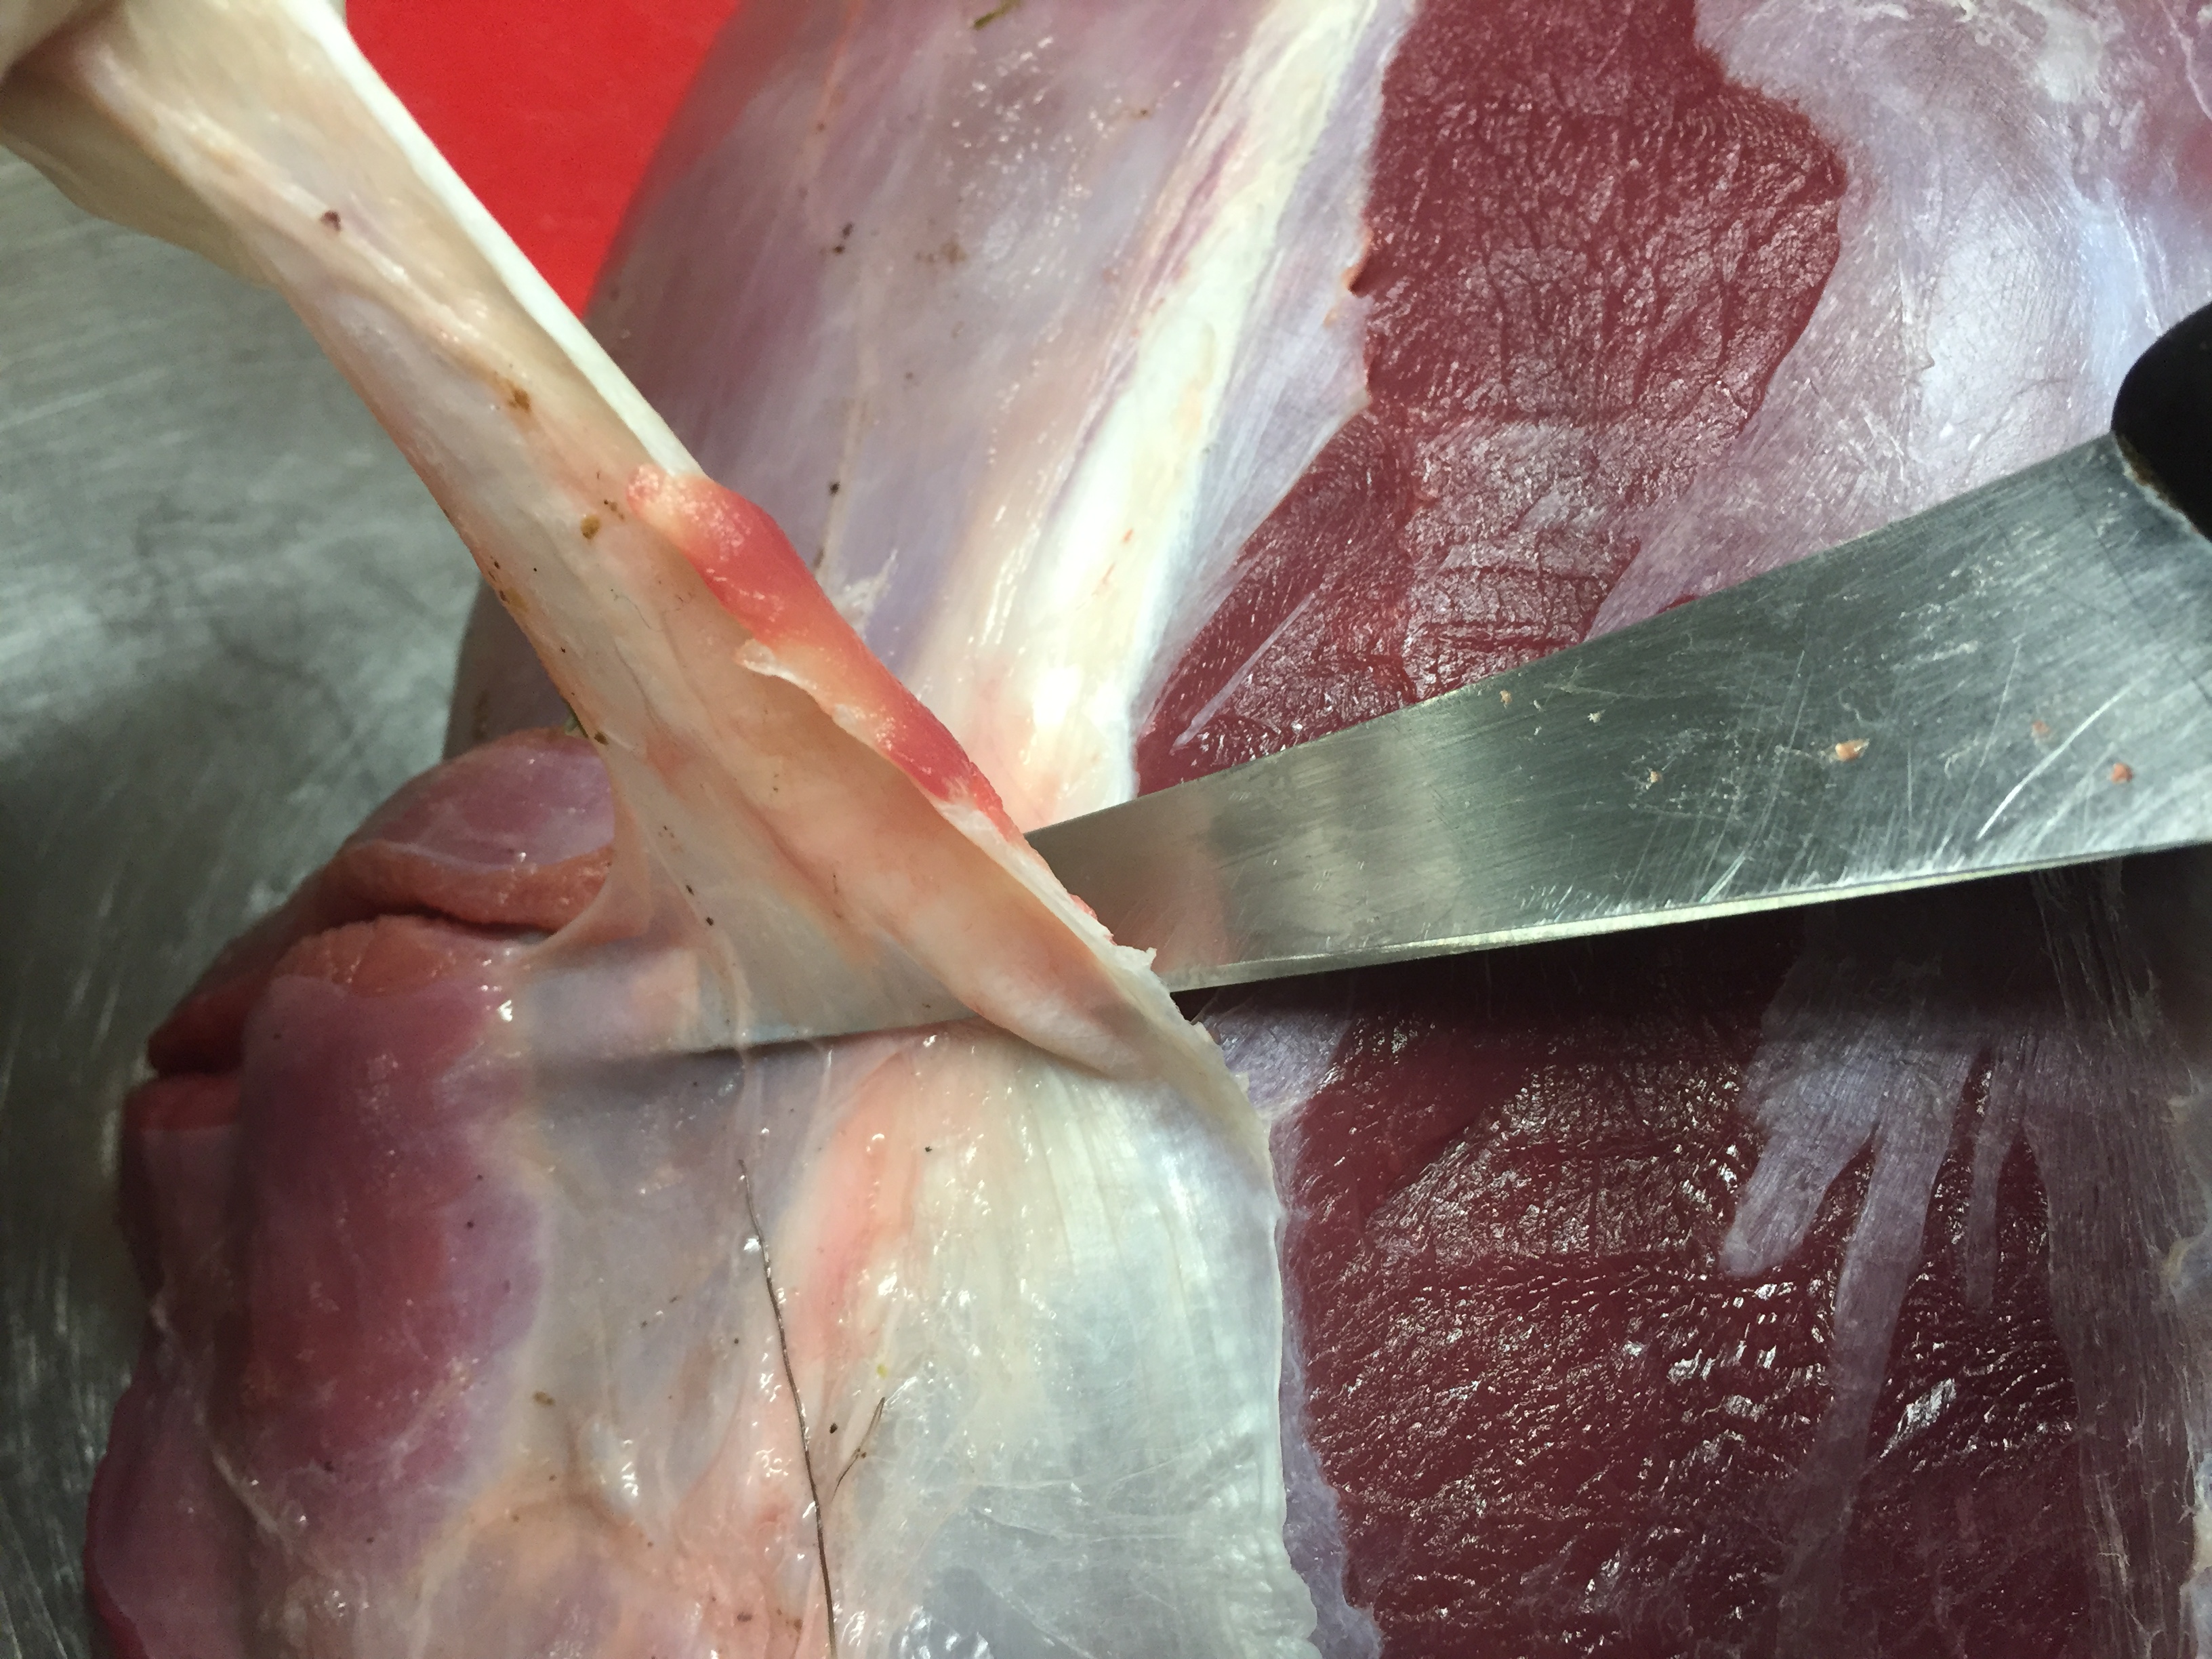
Remove all the membrane and silver skin by inserting your knife under the skin and with your knife angled upwards removing it by cutting it away in strips. If left on this will cook up very tough.

 Step 7

IMG_7863

Step 8:

Now that you have your meat trimmed up you can go ahead and portion it how you like. Either leave as whole pieces, cut into meal size chunks or portion into steaks or medallions ready for the BBQ. If you are going to freeze your meat be sure to make sure it’s wrapped well (this is where a vacuum packer earns its price) to avoid freezer burn.

Step 8

Leave a Comment

Filed under Recipes, The Hunter's Kitchen

Paua Fritters with aioli

hunters kitchen spread

One of the best things about New Zealand, and something that we probably take for granted, is our free and easy access to wild game and fresh seafood. If you’re into your hunting and fishing and like to go for a dip in the ocean, or know a mate who does then here’s a classic recipe to cook at home or chuck on the flat top of the BBQ. A few years ago I was lucky enough to be doing a stint as a chef in the Queen Charlotte Sounds and have access to paua fresh as you can get. We would slice thinly and fry it quickly in butter with a squeeze of lemon and they were amazing. If you’re using great, fresh ingredients often the more simple recipes are the best.

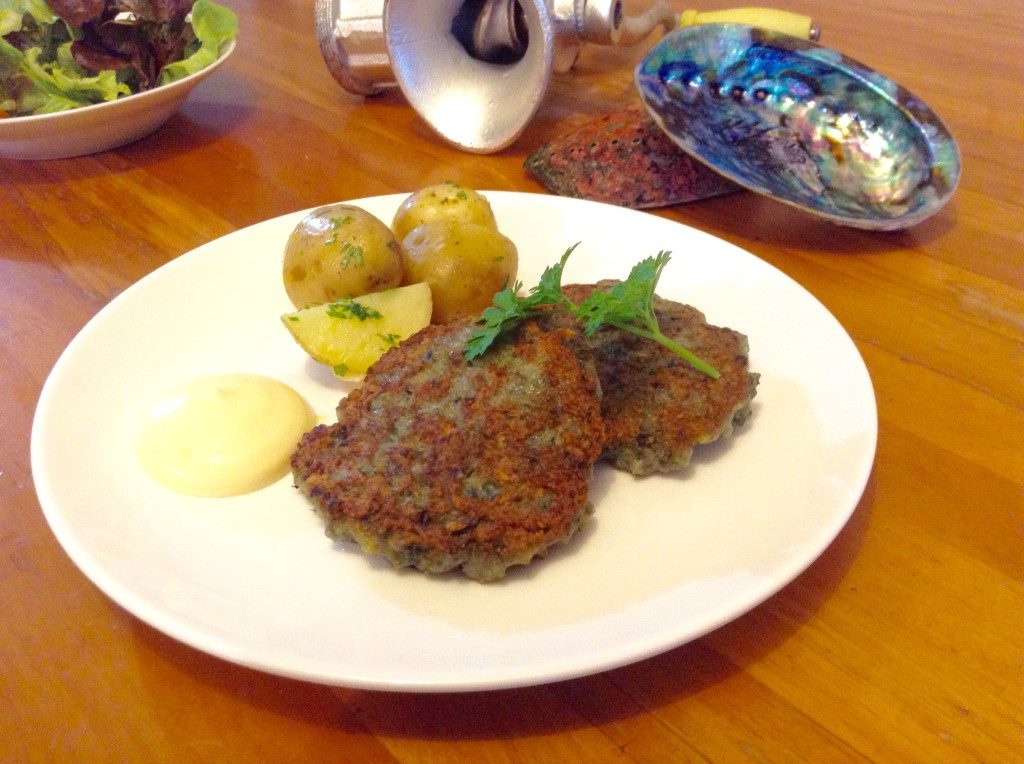
Paua can be pretty tough and everyone has their own theory on how to tenderise them. The general rule of thumb is once they’ve been removed from the shell, gutted and the teeth removed you need to slice them thinly and fry them quick and fast, slowly braise them or mince them which is the method I am using for this recipe. These fritters are great thrown between two slices of fresh white toast bread with some aioli or you can serve them with some buttered new potatoes and a salad for a full meal. As always, it’s up to us to be responsible and ensure the future prosperity of our resources so make sure you stick to your bag limits and know your minimum sizes so we’ll all be able to enjoy nature’s bounty for years to come.

Paua Fritter Image


Paua Fritters with Aioli
Yields 6
Write a review
Print
Prep Time
45 min
Cook Time
20 min
Total Time
1 hr 5 min
Prep Time
45 min
Cook Time
20 min
Total Time
1 hr 5 min
Paua Fritters
  1. 3cl garlic
  2. 1/2 onion
  3. 1 egg
  4. 1/2 C flour
  5. 1/2tsp baking powder
  6. 1/2tsp salt
  7. 1tbs chopped parsley
  8. 3 large paua minced
  9. 4tbs milk
Aioli (makes 500ml)
  1. 5 yolks
  2. 1 tablespoons Dijon mustard
  3. 1 garlic clove
  4. Juice of 1 lemon
  5. 400ml canola oil
  6. 100ml olive oil
  7. Salt and pepper
For the Paua
  1. Finely dice the onion and crush the garlic. Place the onion and garlic in a large bowl with the minced paua, a whisked egg, chopped parsley and the salt. Combine well. Mix together the flour and baking powder then add to the paua mix. Lightly fold in the flour and don’t mix too much, too much mixing will make the mix tough and rubbery. Add the milk, using a little less or a little more if needed to get a stiff batter.
For the Aioli
  1. Combine all the ingredients except the oil in a food processor or blender and blend well for 1-2 minutes. With the blender running on high, slowly drizzle in the oil to emulsify and create the aioli. If your aioli is too thick you can add warm water at the end to thin it down if necessary.
MacLean Fraser http://macleanfraser.com/


Leave a Comment

Filed under Recipes, The Hunter's Kitchen

How to: Plucking a Duck, wax method

hunters kitchen spread

“Here is a technique that gets a pretty good result, about as close as you can get to looking like a store bought duck. Plucking a duck can be a pretty laborious job but this technique is pretty quick and easy and means you get to enjoy the whole bird and its crispy skin.”


You will need:

Paraffin Wax

A big pot to boil water

A bucket of cold water


Step 1:

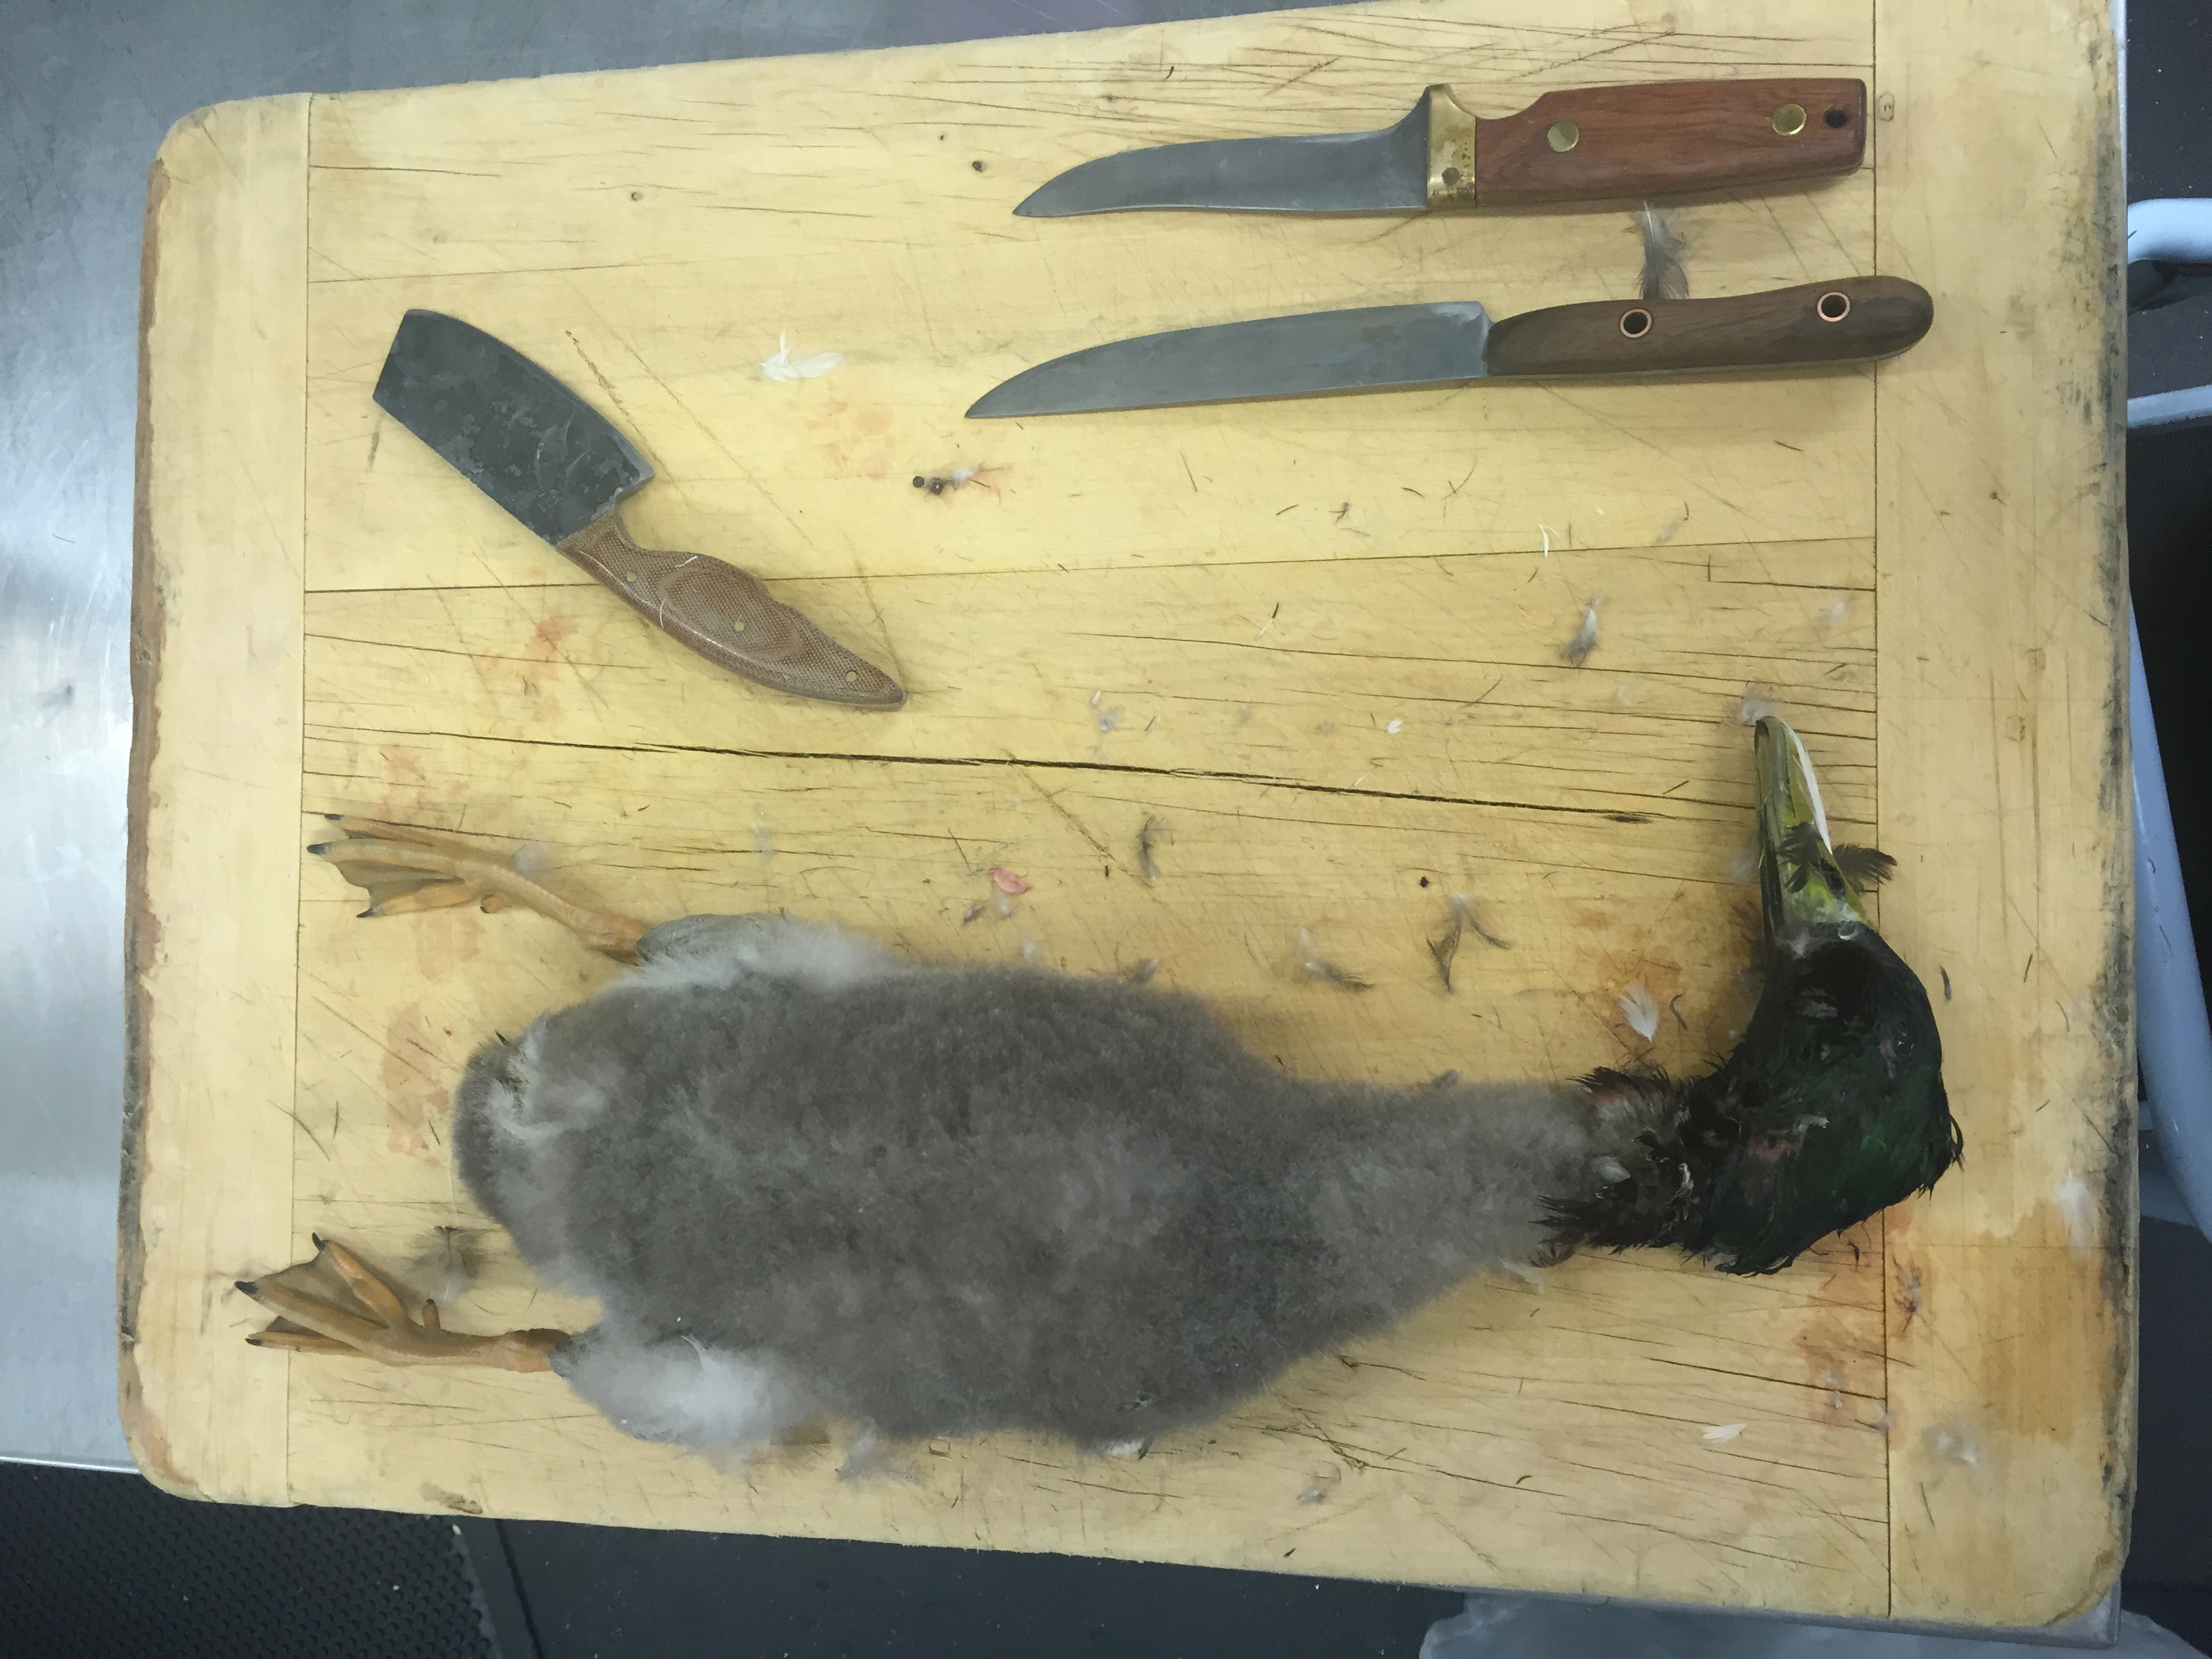
Find a place where you don’t mind making a bit of a mess and get your knives sharpened and ready along with a decent sized chopping board sitting on a wet towel to stop it from moving round on you. One of the first things you will want to do is get your big pot on to boil and add your paraffin wax to it to melt. Apparently National brand candles are made of paraffin wax which is certified food grade.

 Step 1

Step 2:

Remove the wings.

 Step 2

Step 3:

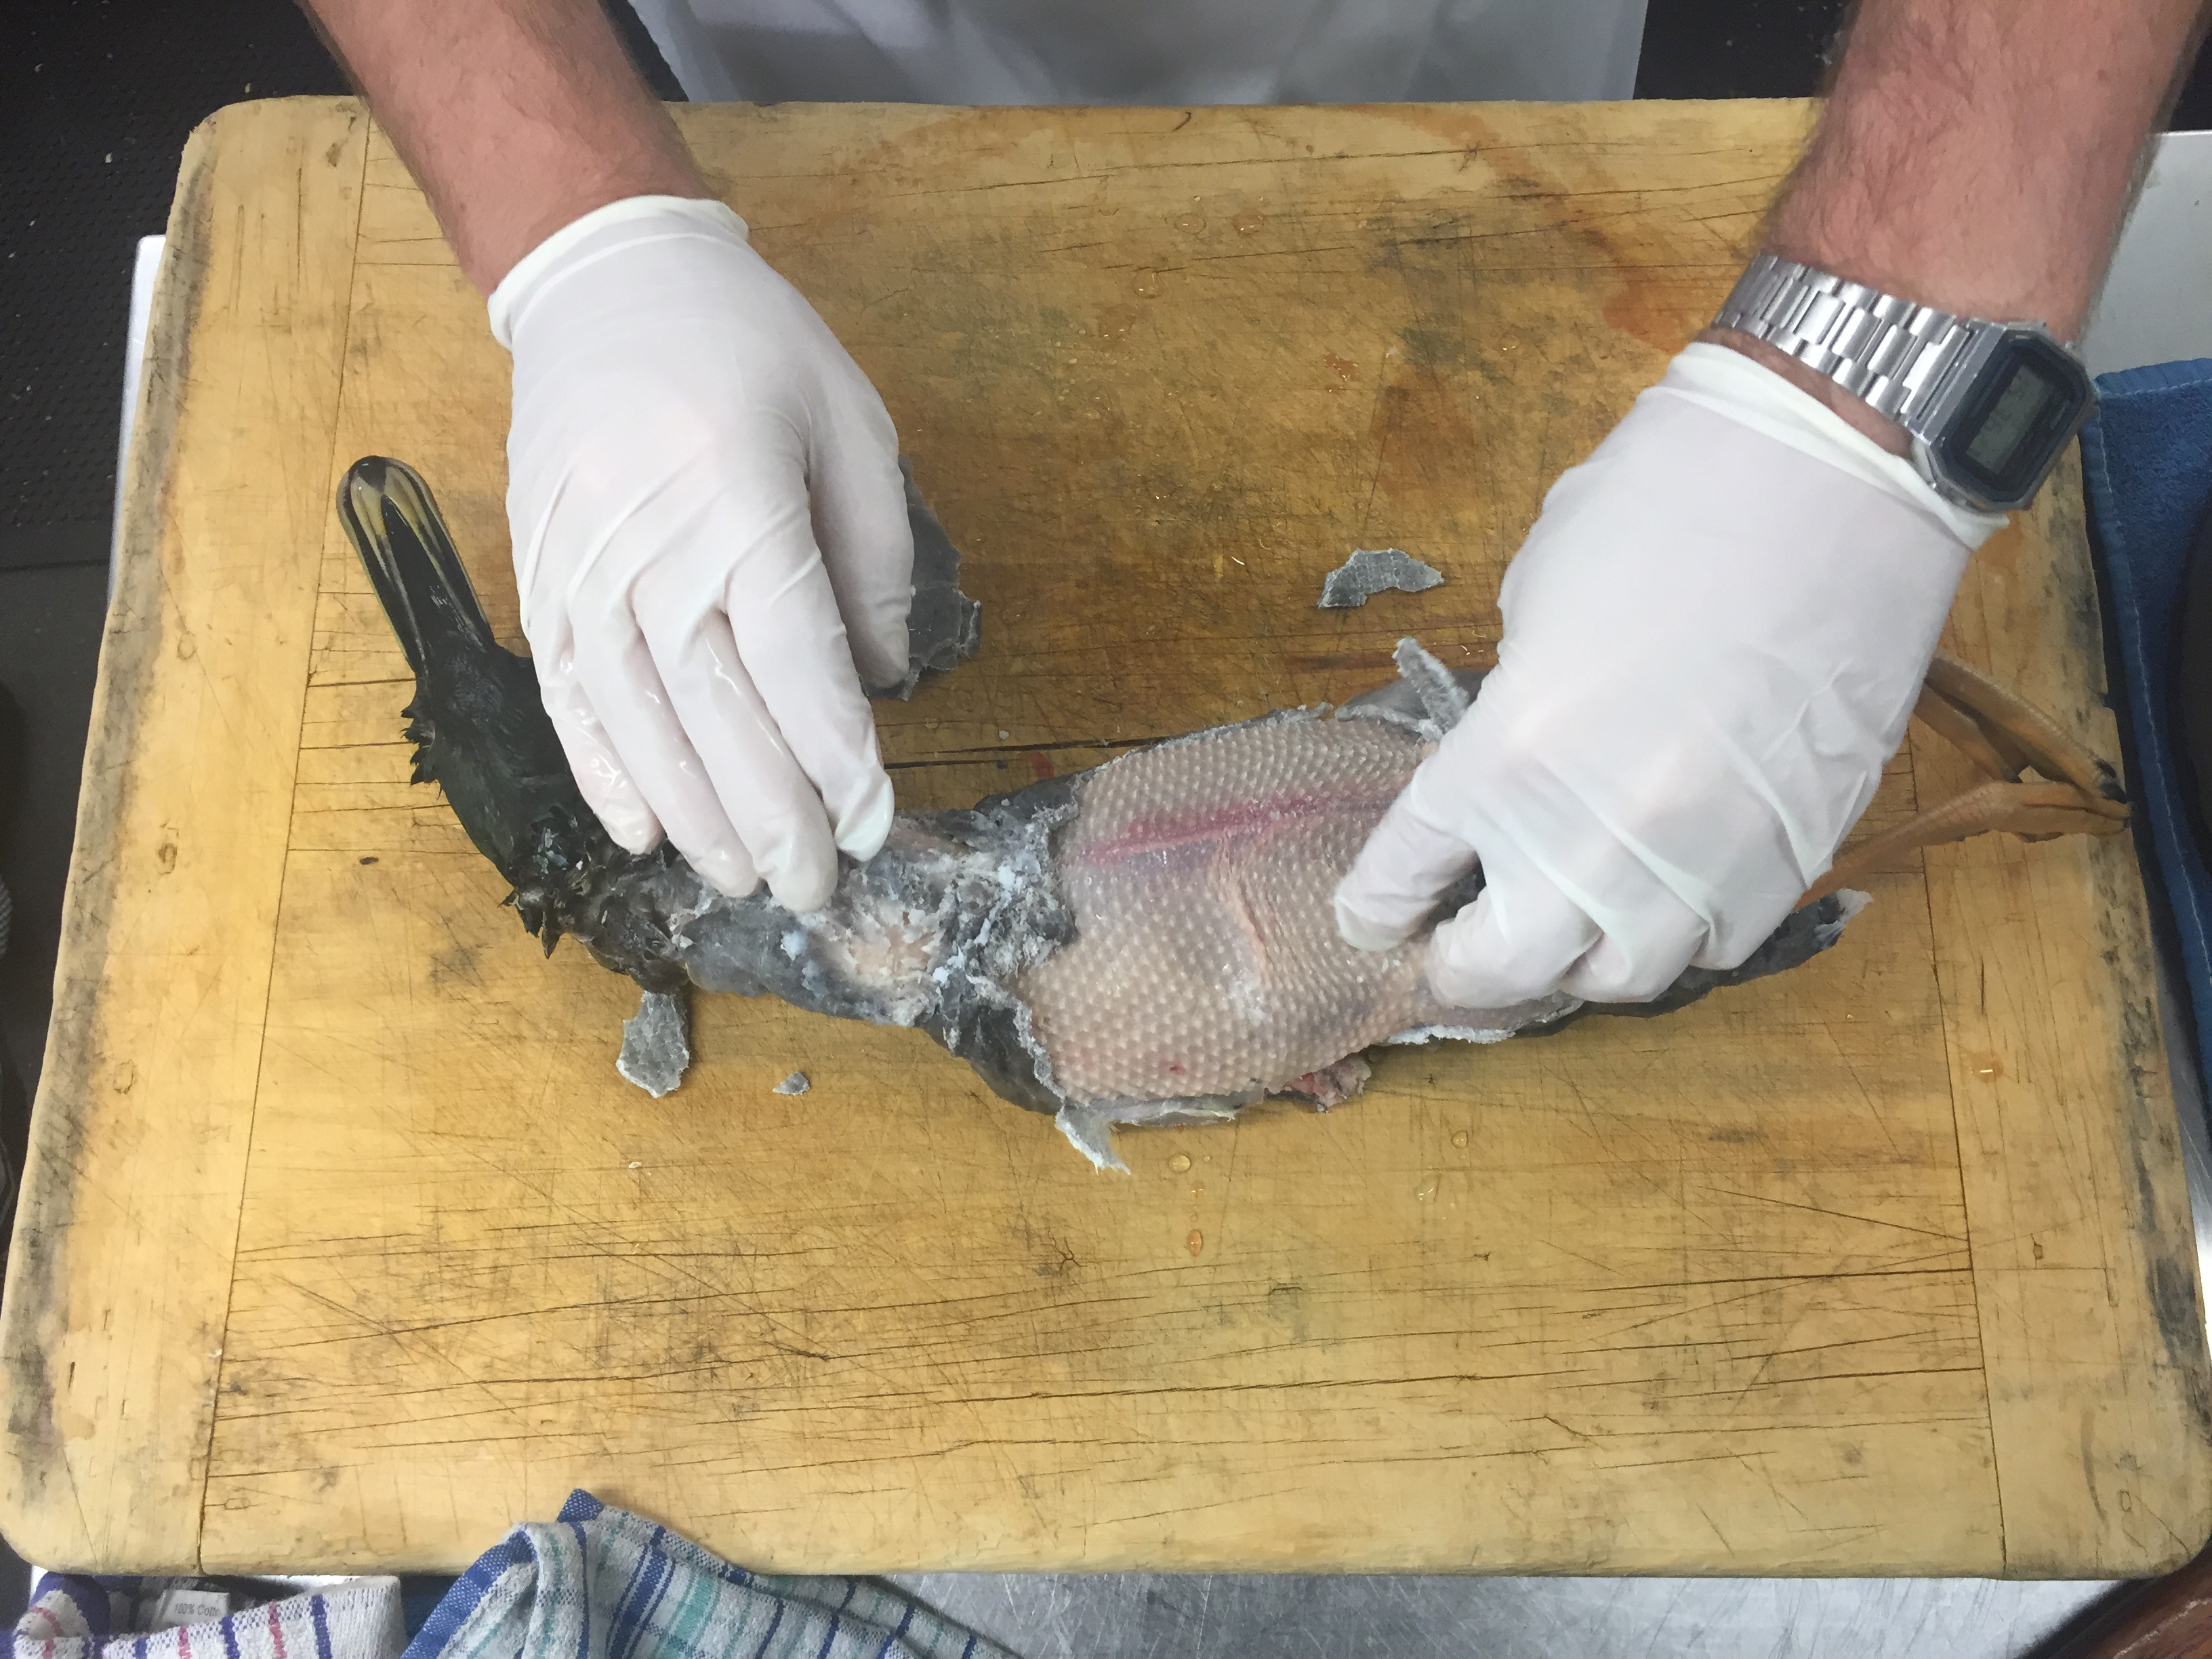
Remove the wing and tail feathers. The easiest way is to pull these straight out, with the grain.

 Step 3

Step 4:

All the other feathers are easiest if pulled out against the grain. Don’t completely pluck the duck, what we want to do is leave a covering of the down feathers so we can remove them with the hot wax.

 Step 4

Step 4 part 2

Step 5:

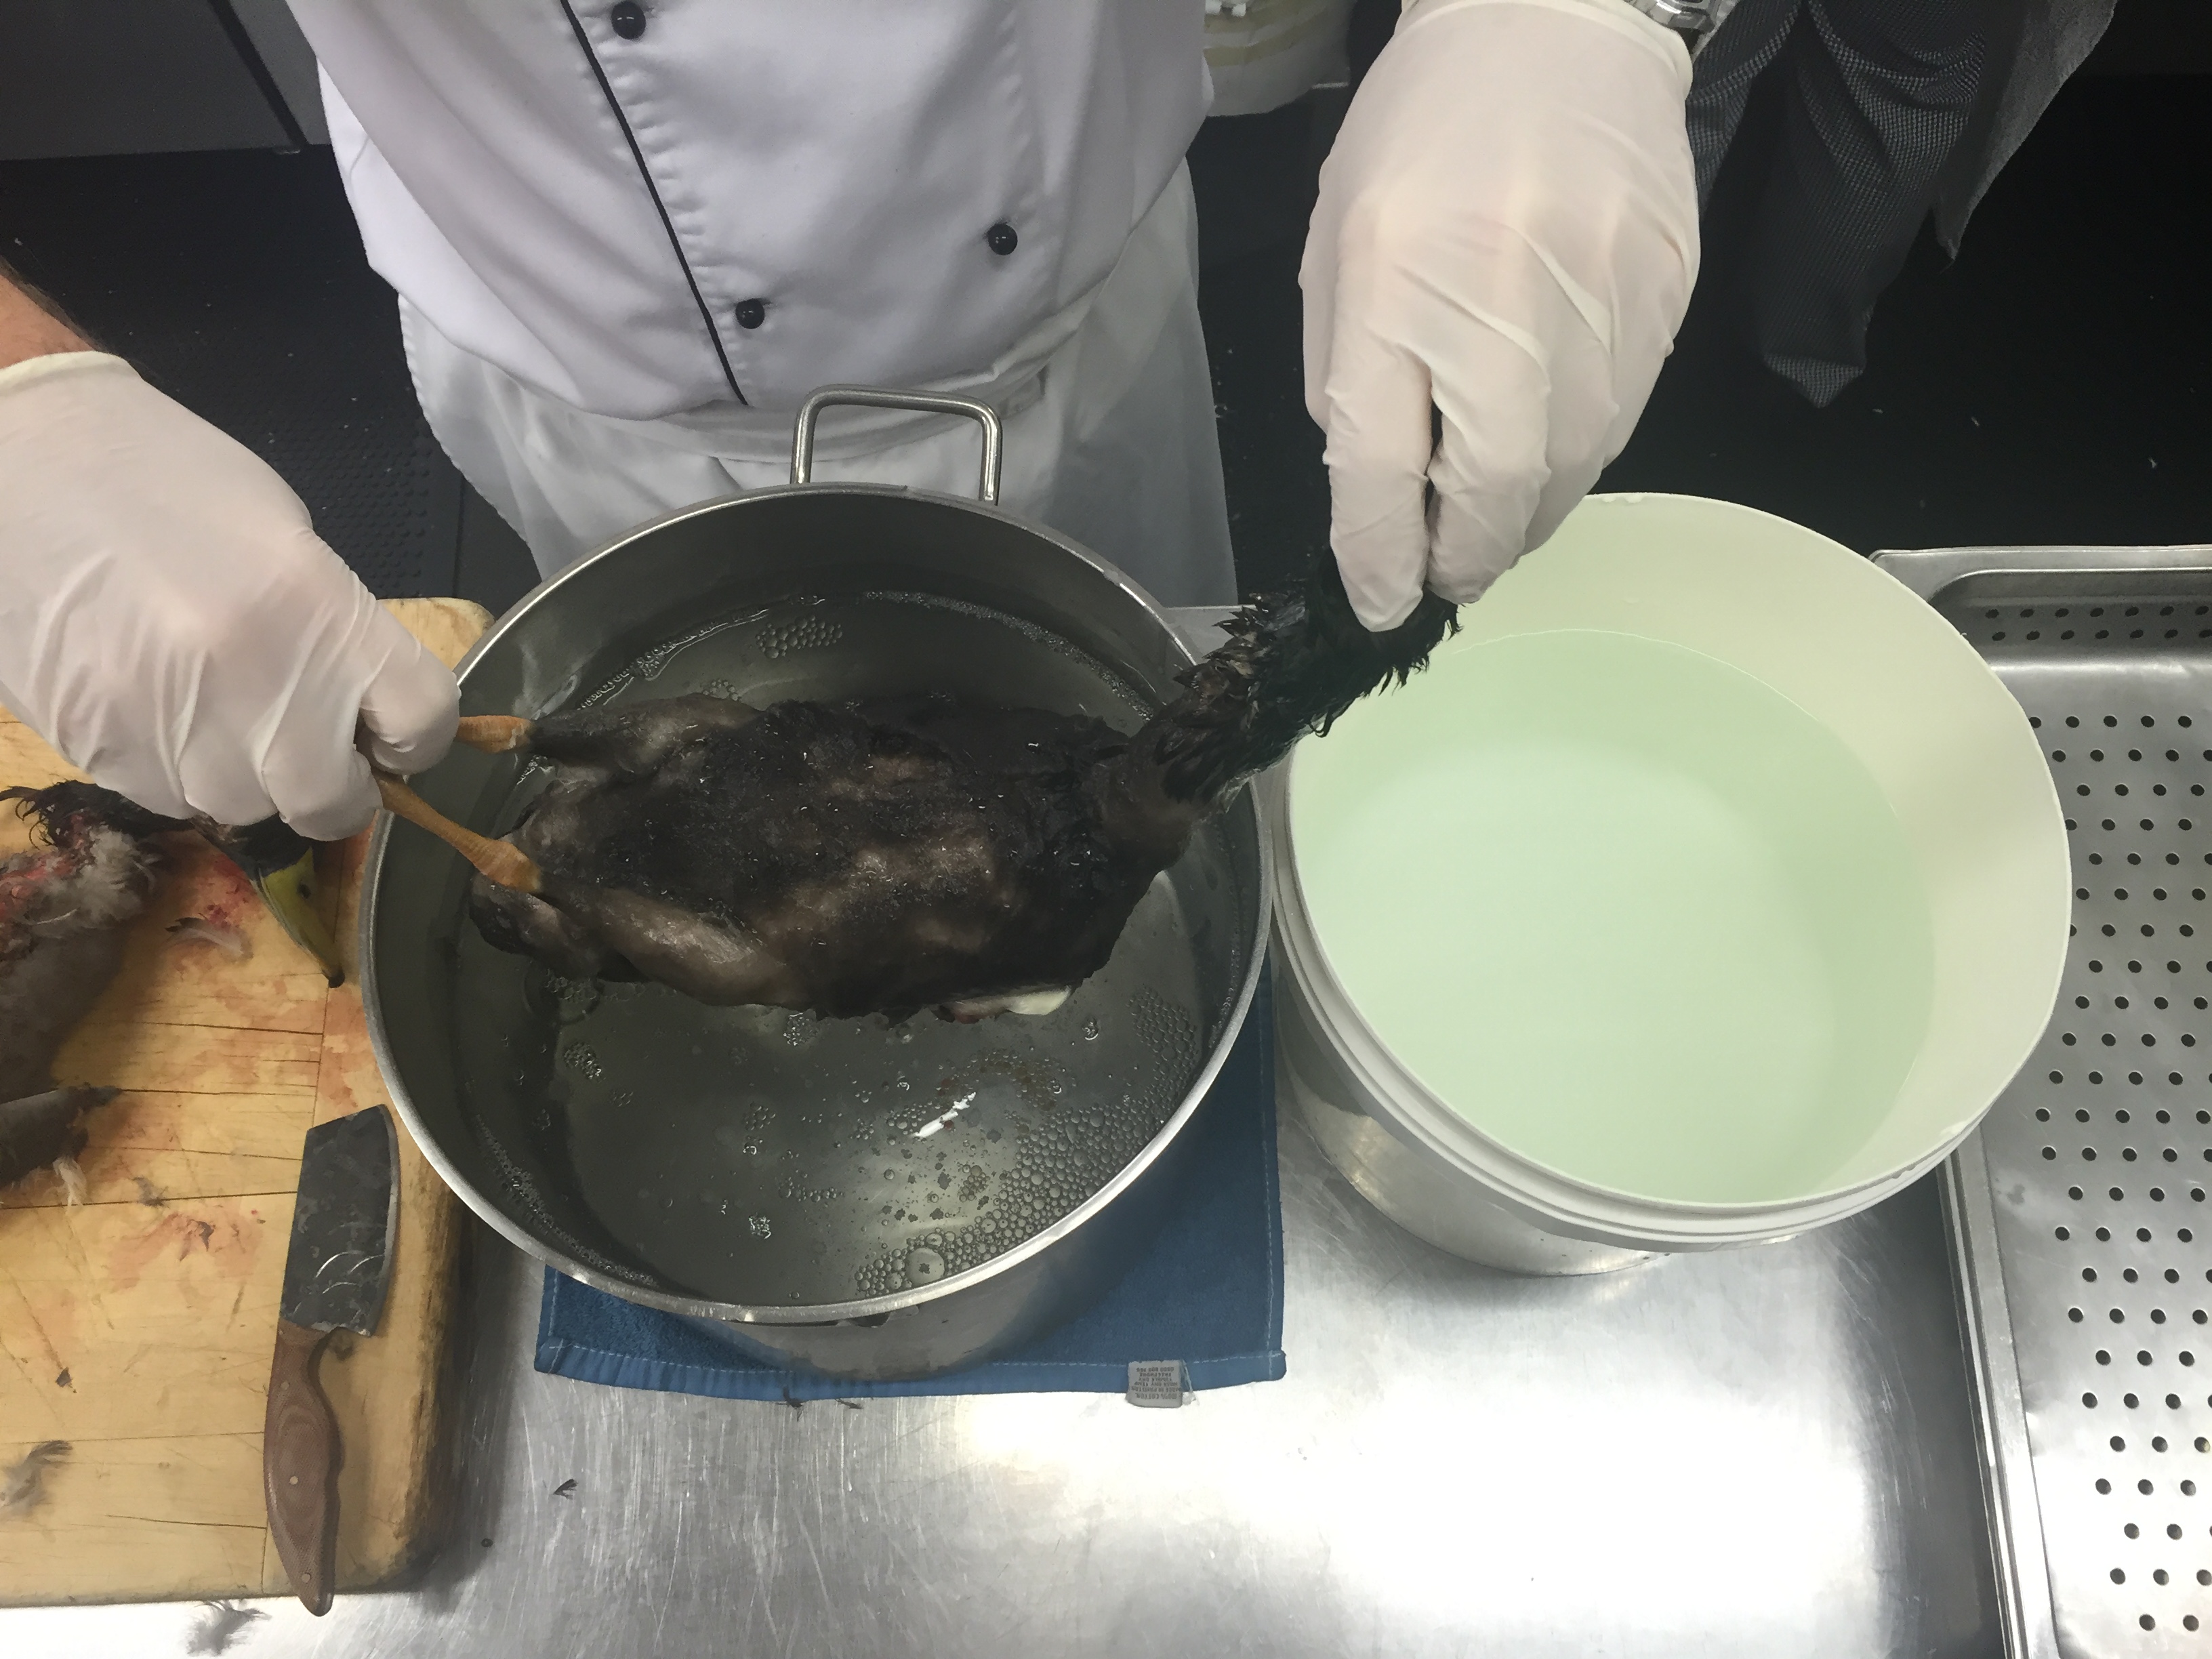
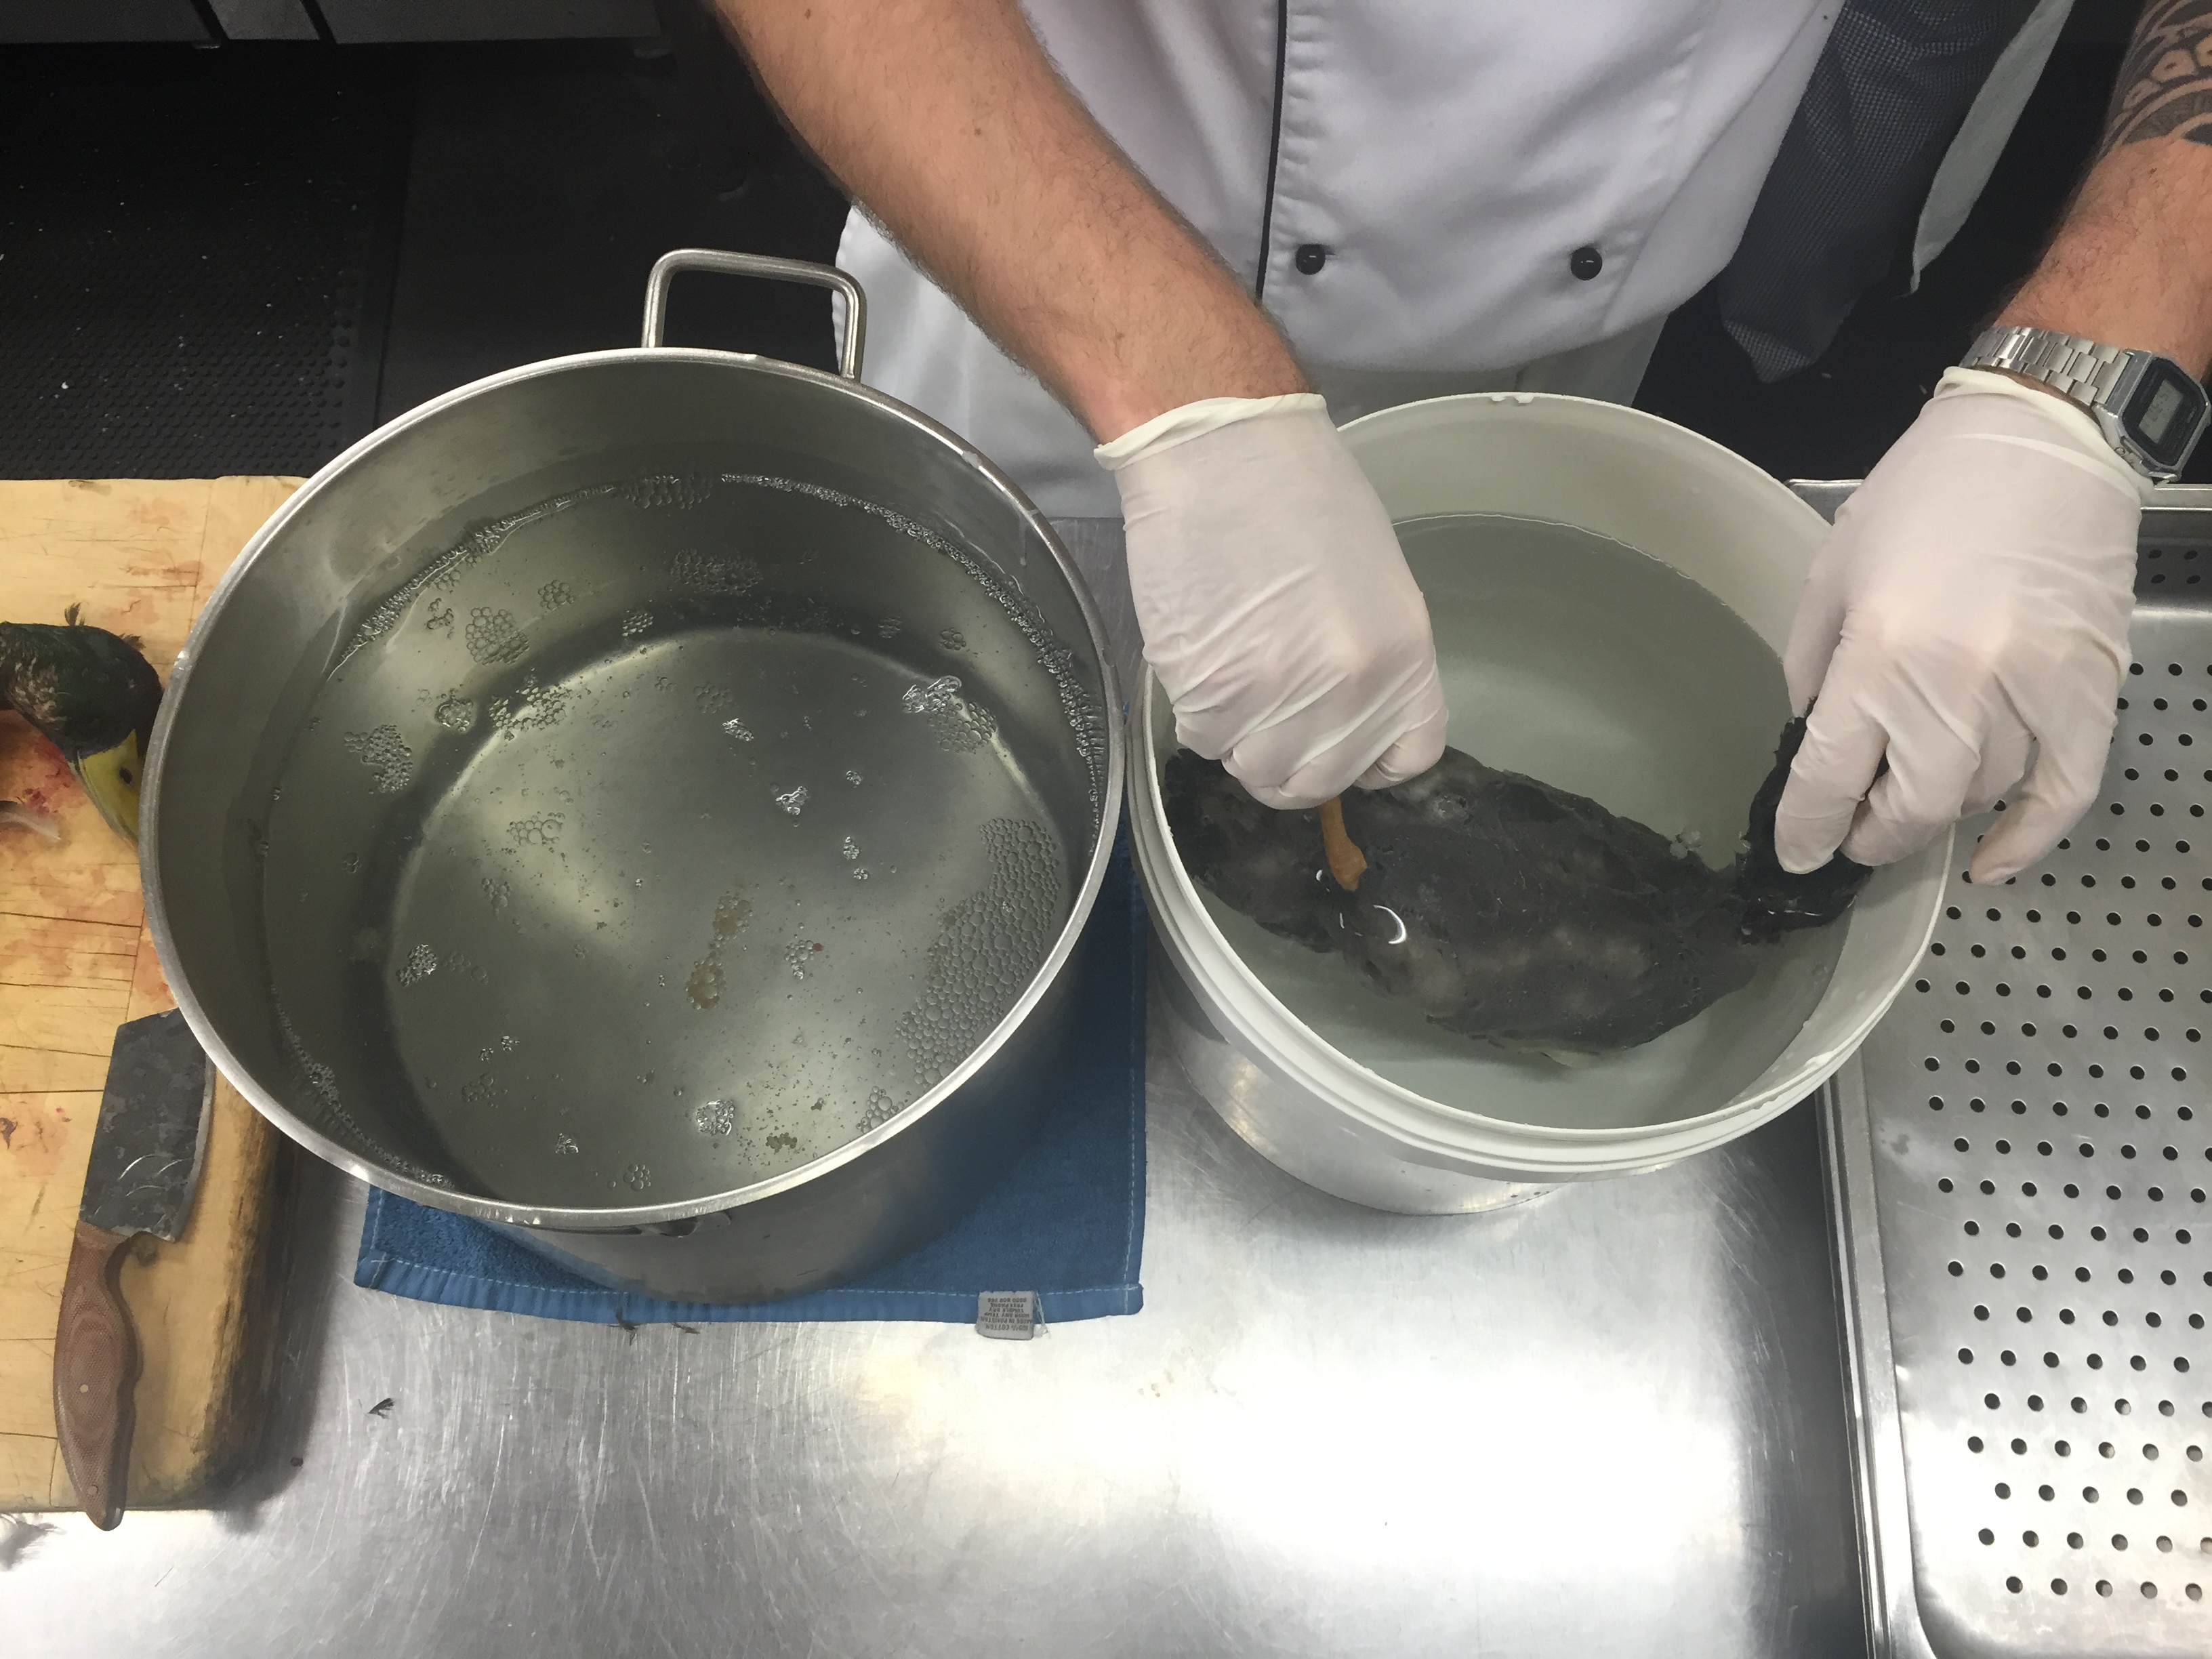
Holding your semi plucked duck (guts still intact) by the head and feet, dip it slowly into a pot with the melted wax for a few seconds then transfer to a bucket of cold water. Leave the duck there for about 5 minutes in order for the wax to set rock hard.

 Step 5 part 1

Step 5 part 2

Step 6:

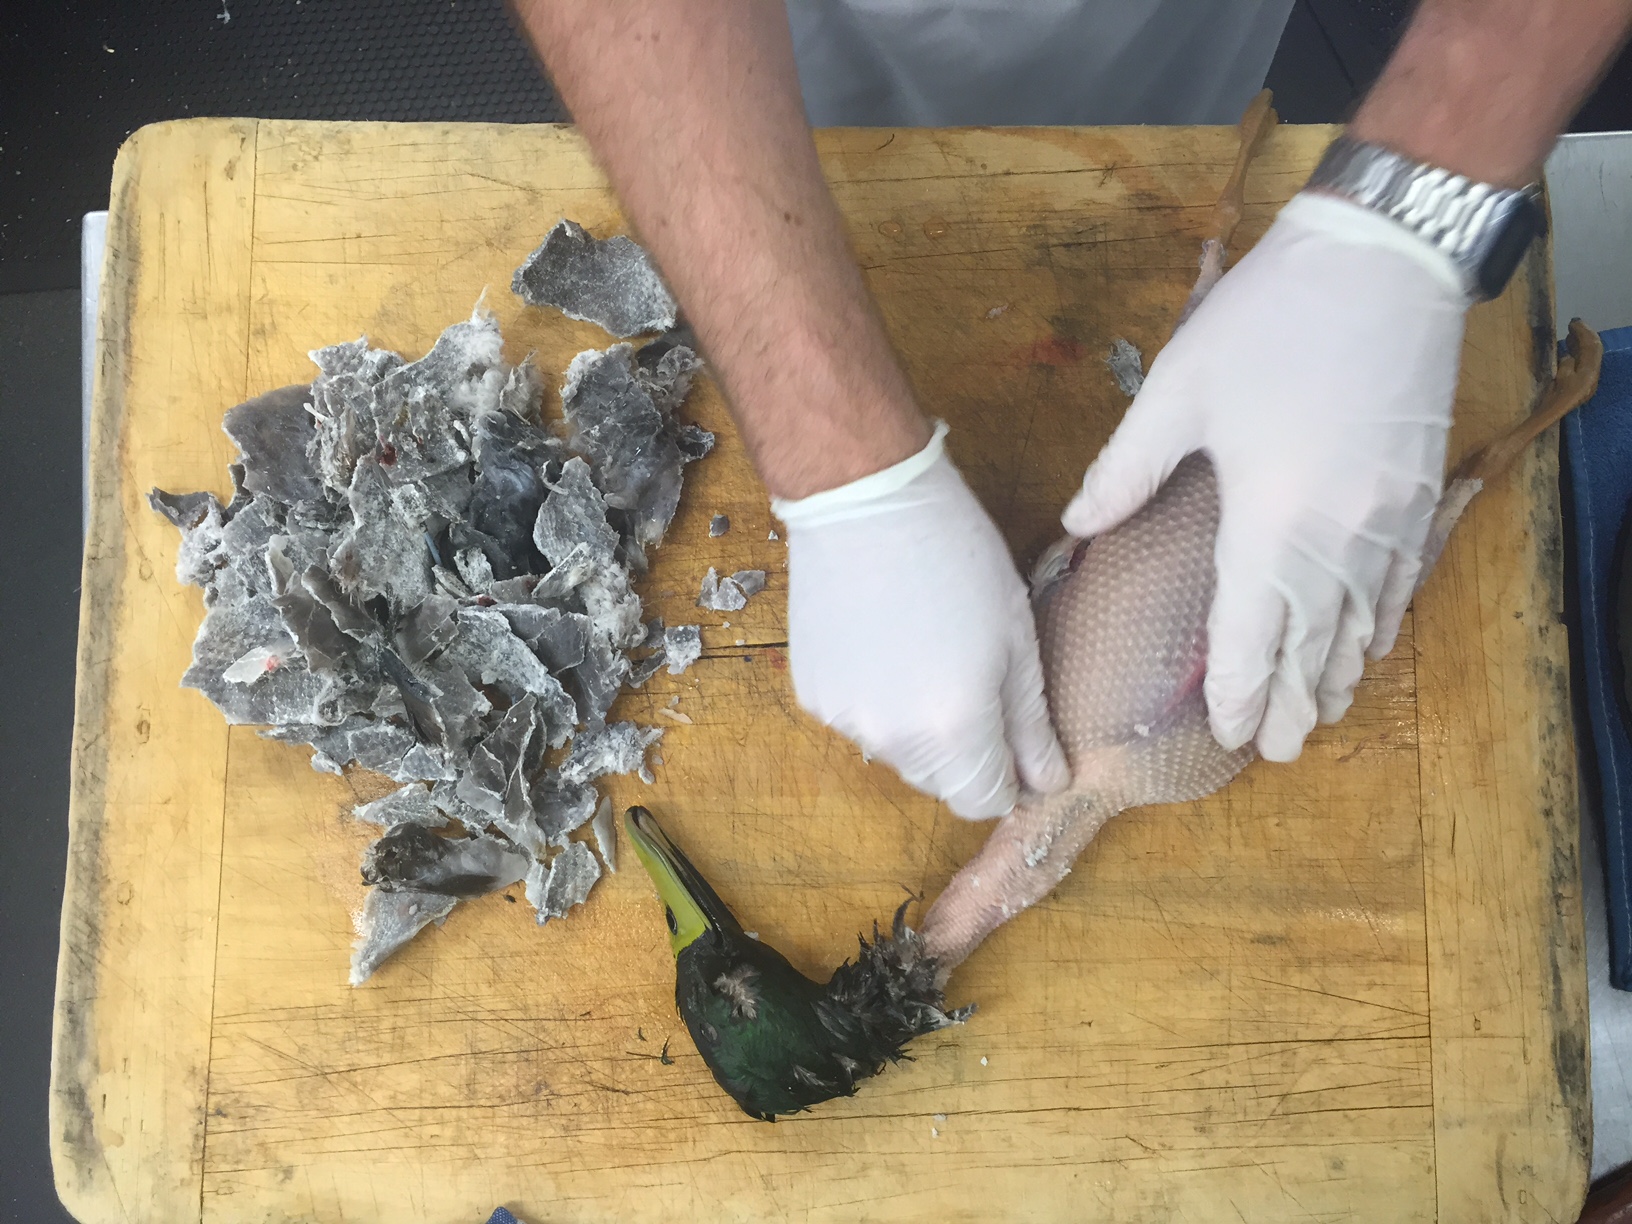
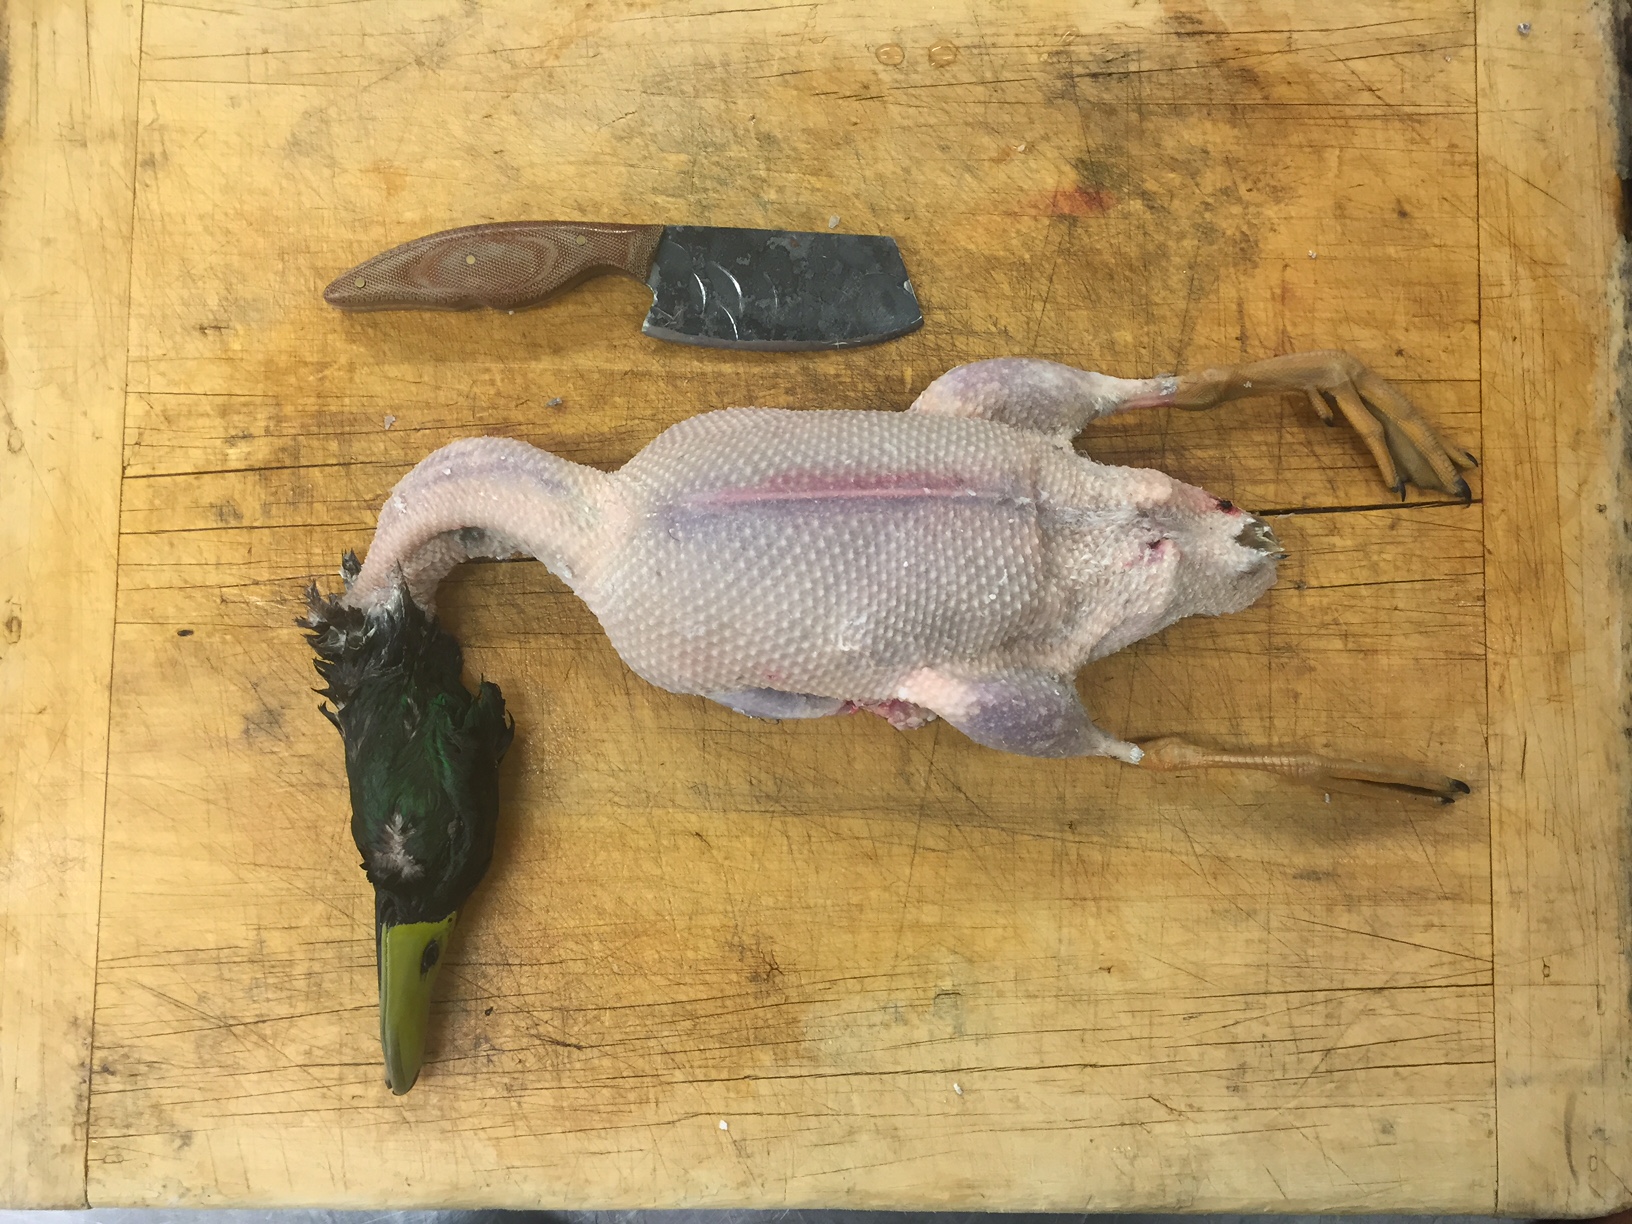
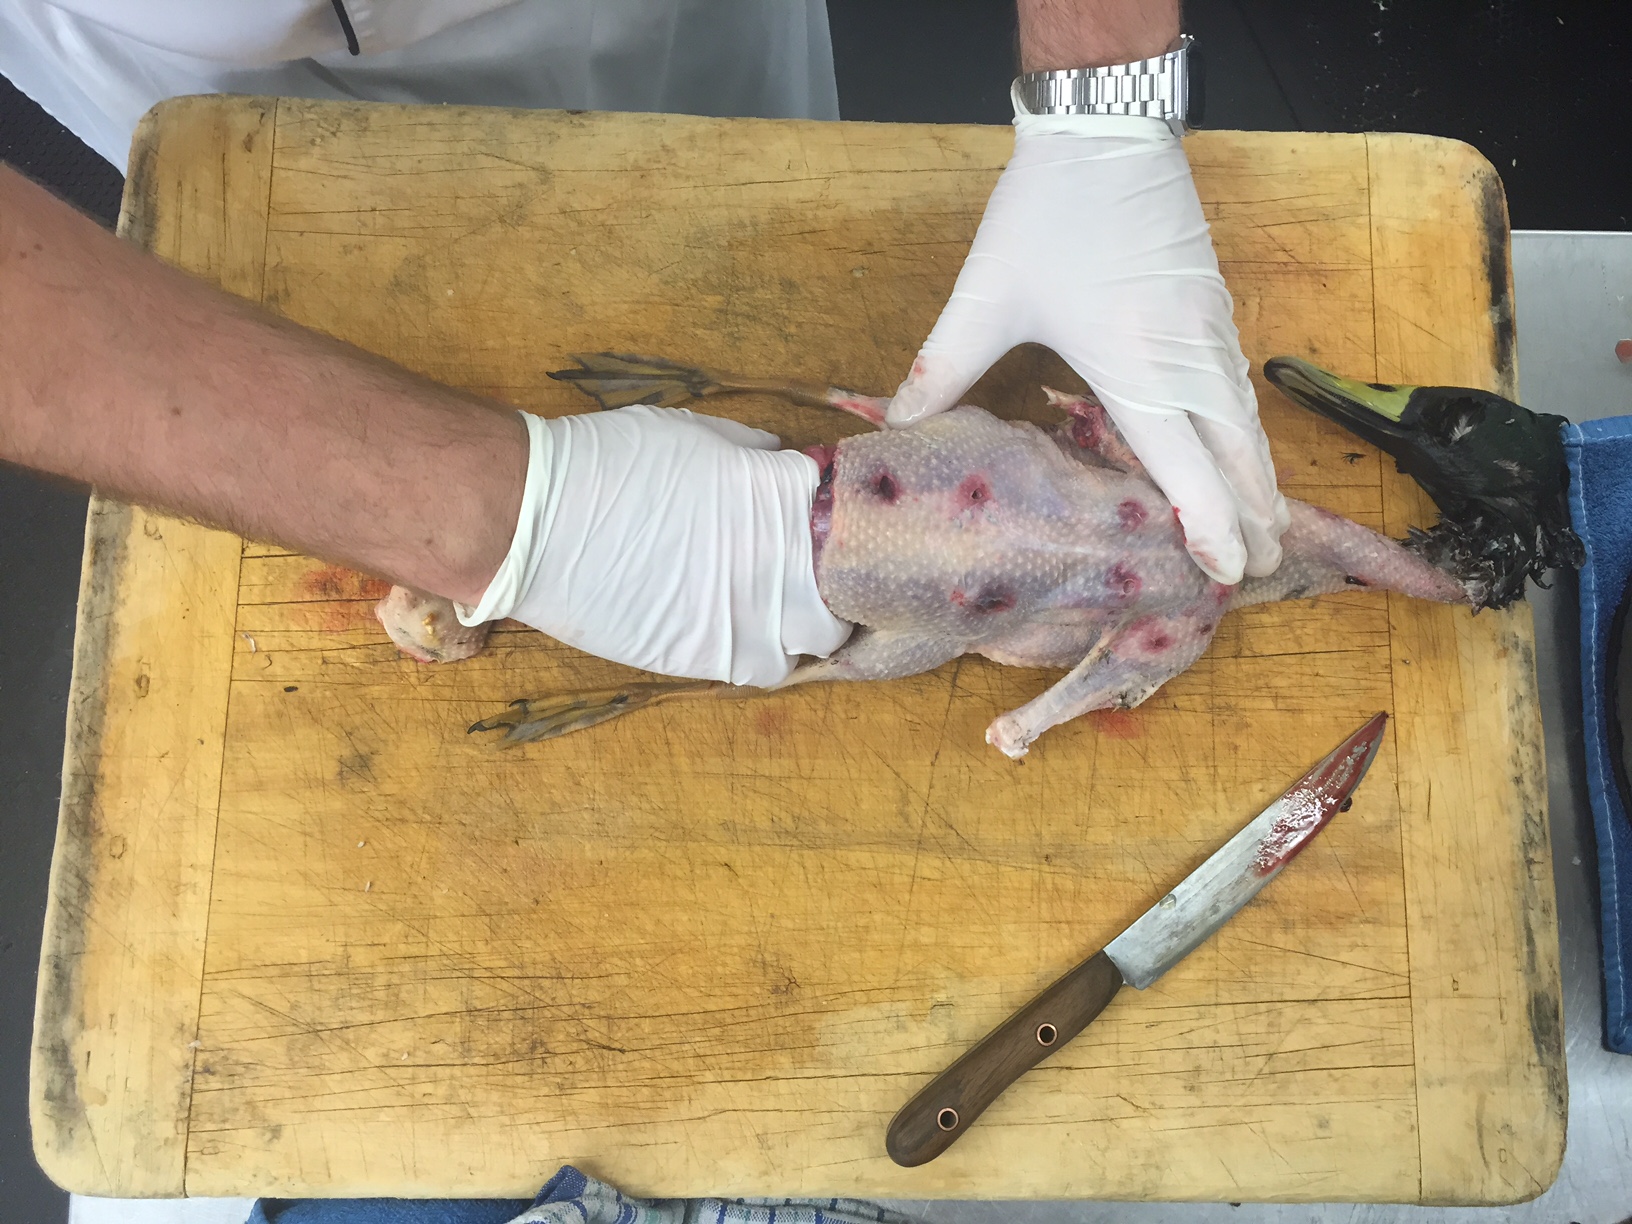
Now that the wax is hard and has stuck to the feathers you can start at the neck and carefully peel it off the duck, removing all the feathers in the process. Once your duck has all the feathers and wax removed you can go ahead and remove the head and feet. If there are any small down feathers left here and there they can be singed by a quick go with a blow torch.

 Step 6 part 1

Step 6 part 2

Step 6 part 3

Step 7:

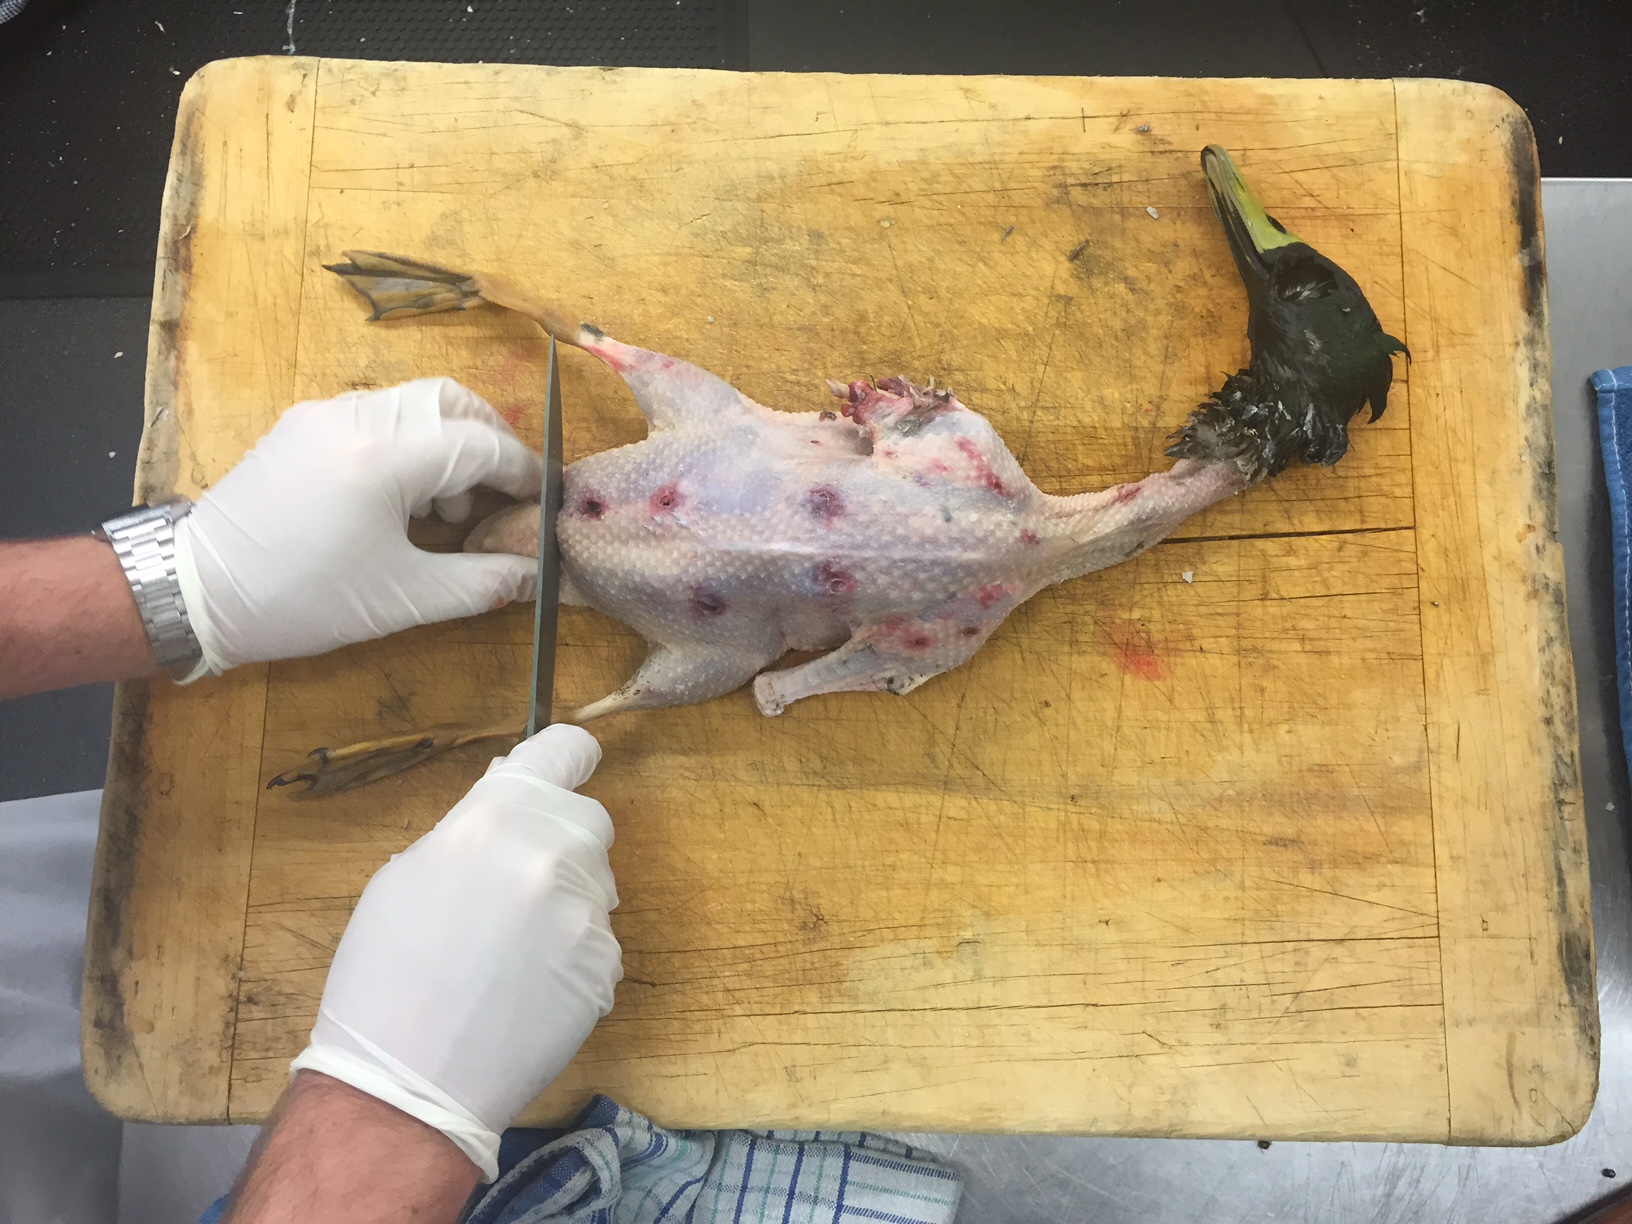
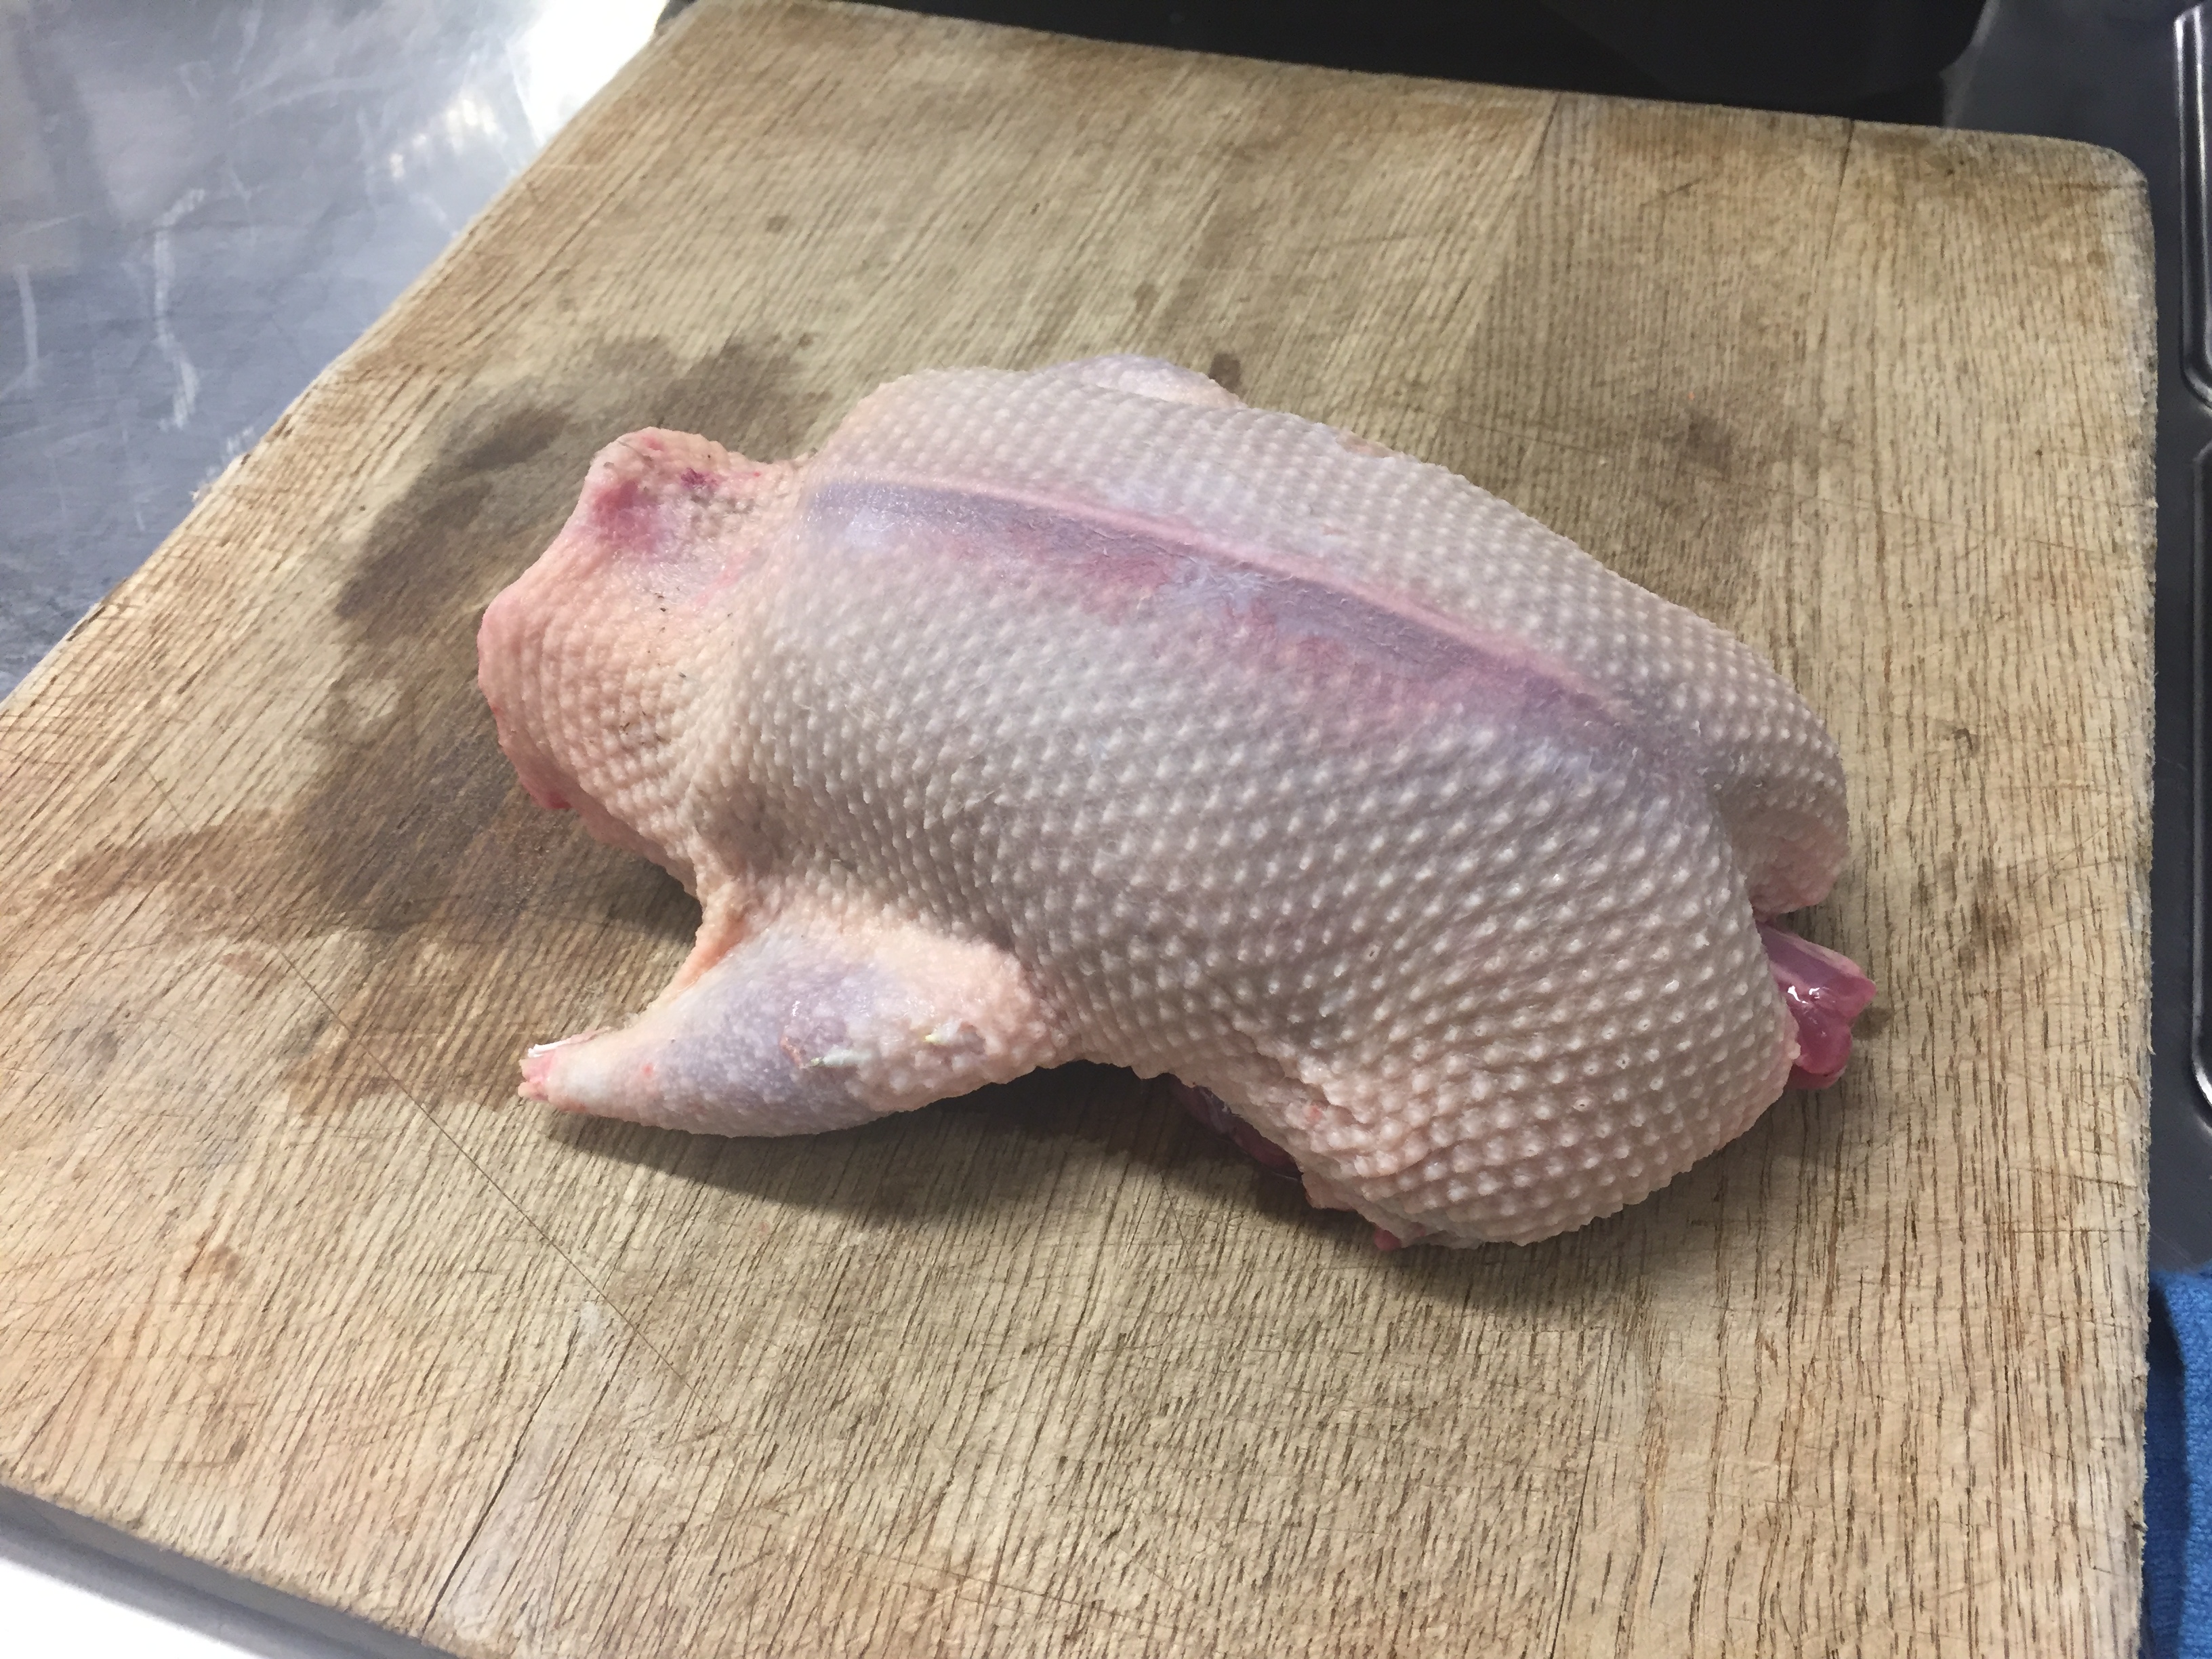
To gut the bird remove the tail by cutting straight through just past where the bones stop. Reach into the cavity and pull out all the contents being sure to remove the lights (lungs) which are found at the neck end of the bird on either side of the backbone. Give it a good rinse inside and out with cold running water, inspect for any shot and pat it dry. Now it’s ready to cook. 

Step 7 part 1


Step 7 part 2


Step 7 part 3

1 Comment

Filed under Blog, The Hunter's Kitchen

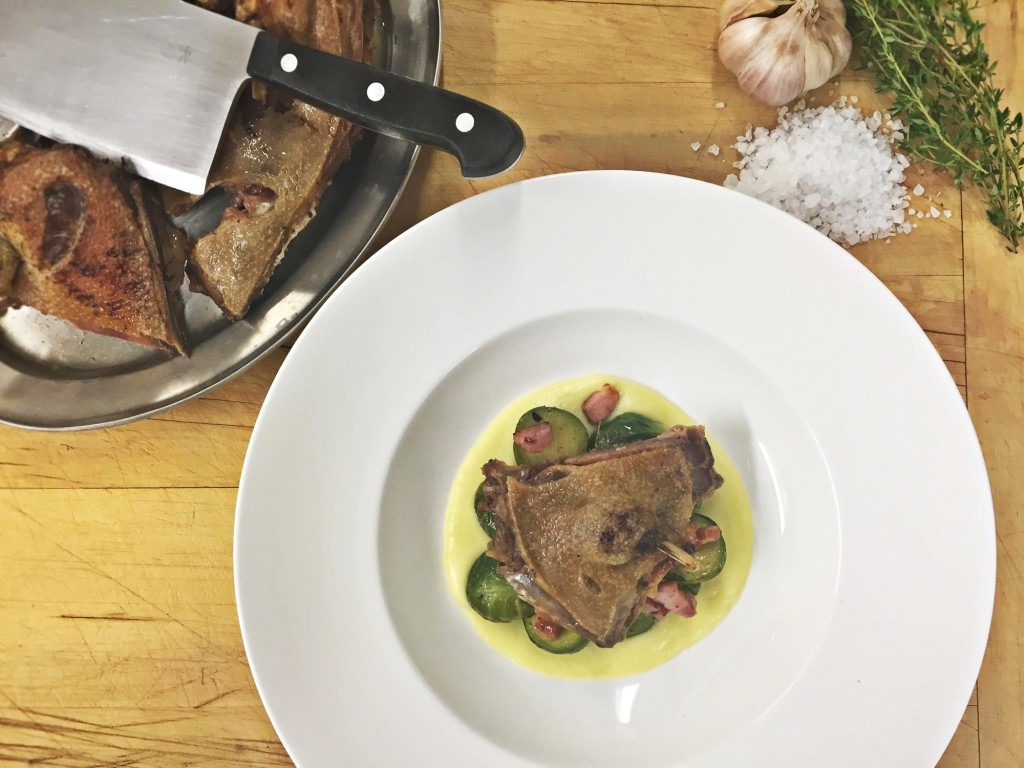
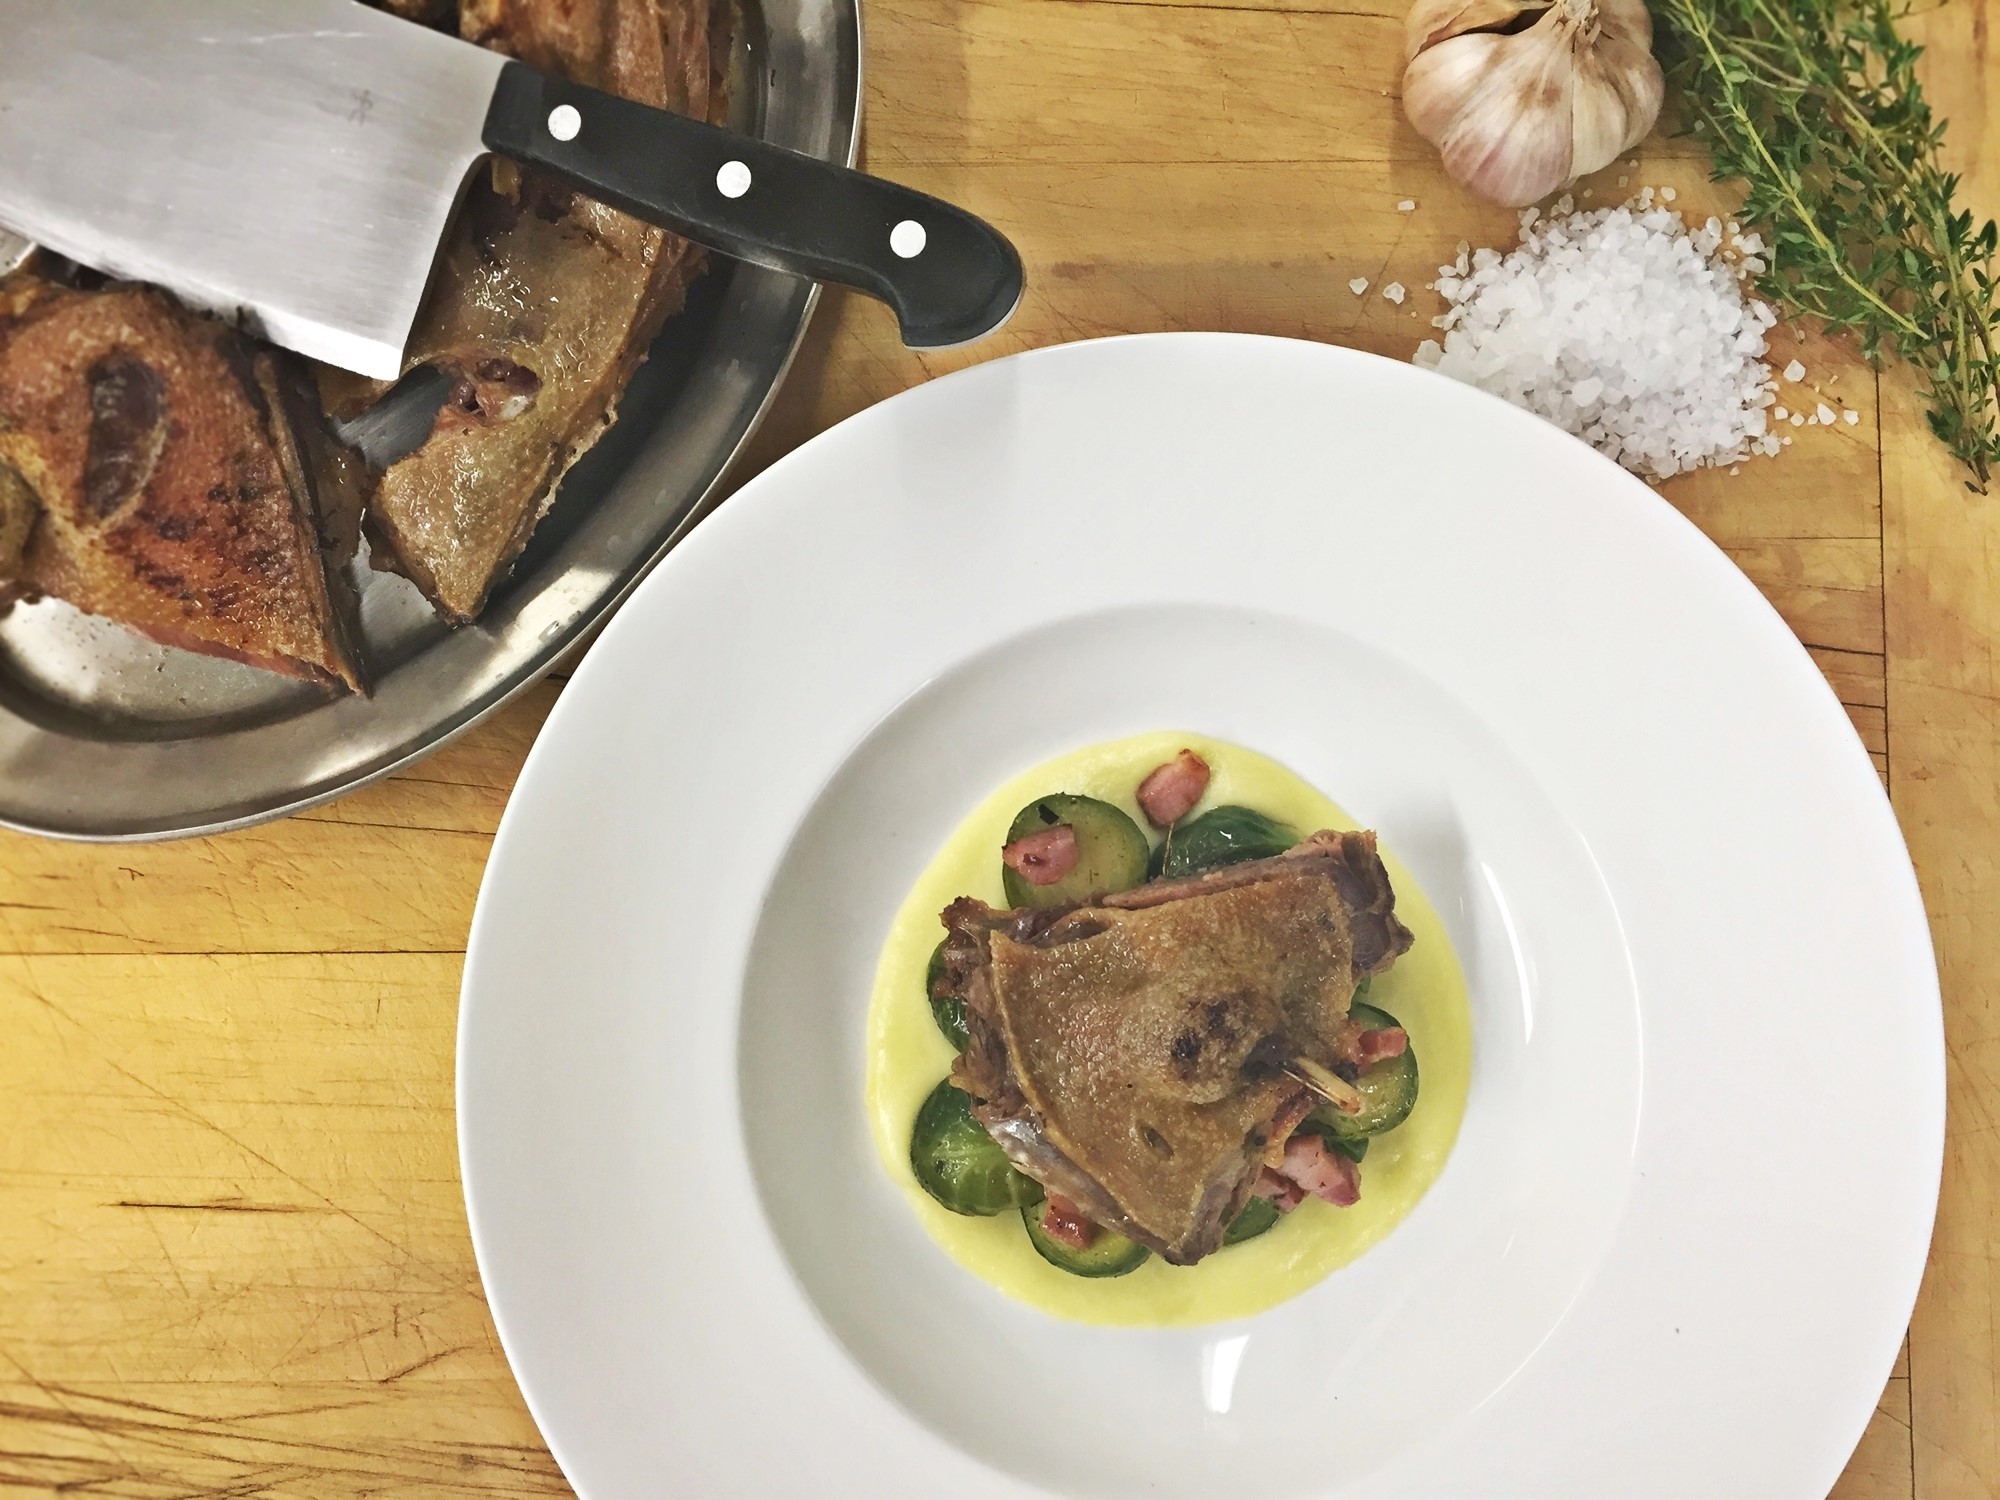
Duck confit on caramelised Brussel sprouts, bacon and grain mustard with bread sauce and fig chutney

hunters kitchen spread


This recipe utilises the whole duck and because of the slow method of cooking in fat you end up with a tender, moist and flavoursome result. I recommend giving the Brussel sprouts a go as bacon always makes things better but if you don’t feel like making the accompaniments then serving with some nice buttery mash potatoes is the way to go. 

Confit Duck with Brussel Sprouts Image

Duck confit on caramelised Brussel sprouts, bacon and grain mustard with bread sauce and fig chutney
Serves 4
Write a review
Print
Prep Time
1 hr 30 min
Cook Time
4 hr
Total Time
5 hr 30 min
Prep Time
1 hr 30 min
Cook Time
4 hr
Total Time
5 hr 30 min
Duck Confit
  1. 1 Duck, cleaned
  2. Rendered duck fat
Confit Salt
  1. 1 bulb Garlic
  2. 6 Juniper berries (or 1 Star anise)
  3. 1 tsp Peppercorns
  4. 1/2C Rock salt
  5. 12 sprigs Thyme
  6. 3 Bay leaves
Brussel Sprouts
  1. 400g Brussel sprouts
  2. 2Tbs Butter
  3. 1Tbs Wholegrain mustard
  4. 4 Rashers streaky bacon (or 2 rashers Middle bacon)
  5. 4Tbs Brown sugar
Bread Sauce
  1. 1C Milk
  2. 1Tbs butter
  3. ¼ Onion
  4. 1 Whole clove
  5. 4 Whole peppercorns
  6. 1 Clove garlic
  7. 1 Bay leaf
  8. 1 Sprig thyme
  9. 2 Slices white toast bread (crusts removed)
  10. Pinch ground nutmeg
  11. Salt and white pepper
For the Duck
  1. Place all the confit salt ingredients except the salt itself into a food processor or using a mortar and pestle coarsely grind together. Add the salt and briefly grind together until well mixed. Cut the duck completely in half along the back bone and rub the salt mix all over and into both sides of the duck. Cover and leave in the fridge for 10-12 hours or overnight. After no more than 12 hours rinse off all the salt mix under cold running water and pat the duck dry on a kitchen towel. Place the duck in an oven proof dish and cover completely with rendered duck fat, cover with baking paper then tin foil and bake at 110C for 2-4 hours until the meat easily falls away from the bone. As long as the duck is covered in the fat it can be kept in the fridge for up to 3 months. To serve, drain the duck out of the fat (keep the fat for next time or for roasting potatoes), then roast in a hot oven to crisp up the skin.
For the Brussels
  1. Cut the Brussel sprouts in half lengthwise and cook in salted boiling water until they’re just cooked; about 5 minutes. Drain and keep to one side. Chop up the bacon and fry in a little oil for 1 min. Add to the pan the Brussel sprouts, butter, brown sugar and mustard and fry over a moderate heat until nice and brown. Season with a bit of salt to taste (keeping in mind the bacon is already a bit salty).
For the Bread Sauce
  1. Gently heat the milk, clove, peppercorns, bay leaf and thyme in a pot. Chop the onion into small pieces and roughly smash the garlic with the back of your knife. Gently cook the onion and garlic in a pot with the butter for about 4-5 mins until softened but not brown. Pour the hot milk mix on top of the onions and garlic and simmer gently for 10mins to infuse the flavours. Strain the flavoured milk into a pot, discard the onions and herbs etc and add the bread to the milk mix. Simmer for 3-4mins. Blend with a stick blender until smooth or leave chunky for a rustic sauce. Season with a pinch of nutmeg, salt and pepper to taste.
To serve
  1. Serve the crispy confit duck with the Brussel sprouts and bread sauce piping hot along with some nice fruit or fig chutney.
MacLean Fraser http://macleanfraser.com/

Leave a Comment

Filed under Blog, The Hunter's Kitchen

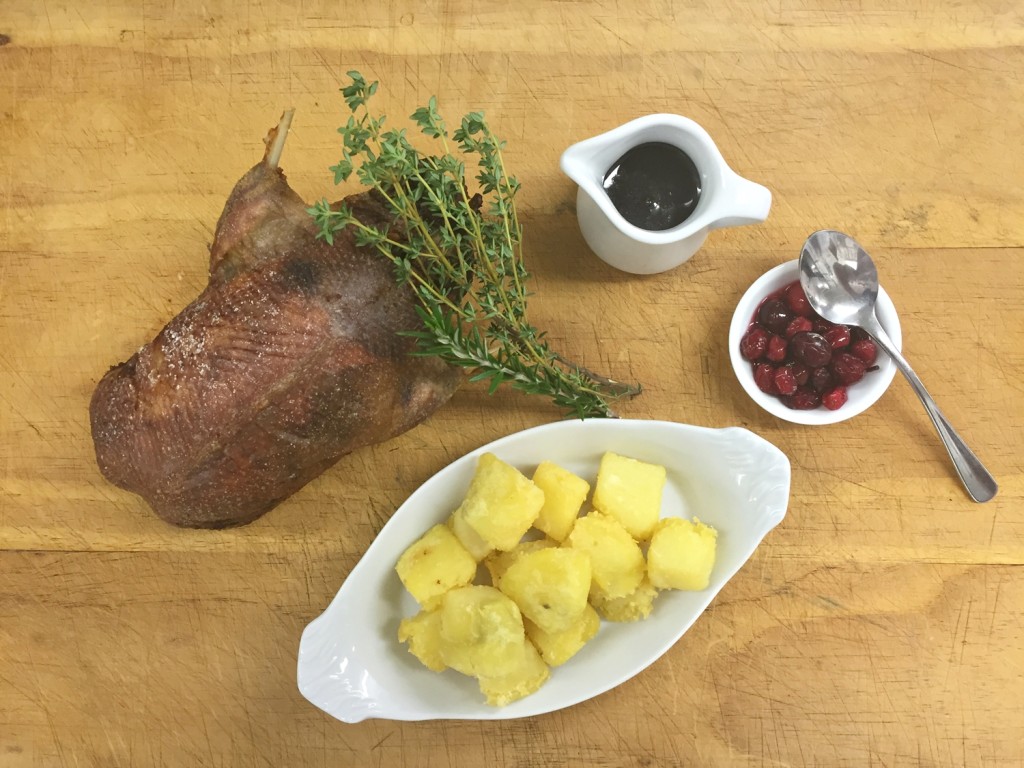
Whole roast duck with cranberry, bacon and walnut stuffing

hunters kitchen spread

Since it is now Duck shooting season, here is a wee bonus recipe utilizing the whole duck and which can be done easily at home. Be sure not to cook the duck longer than you need to or it can dry out.. This is a great opportunity to use your Dutch oven if you have one and it will yield great results as they retain the heat and moisture really well. My recipe for Duck Confit can be found in the July/August edition of NZ Guns & Hunting magazine and keep an eye out in the next edition for tips on how to pluck and dress your duck. 

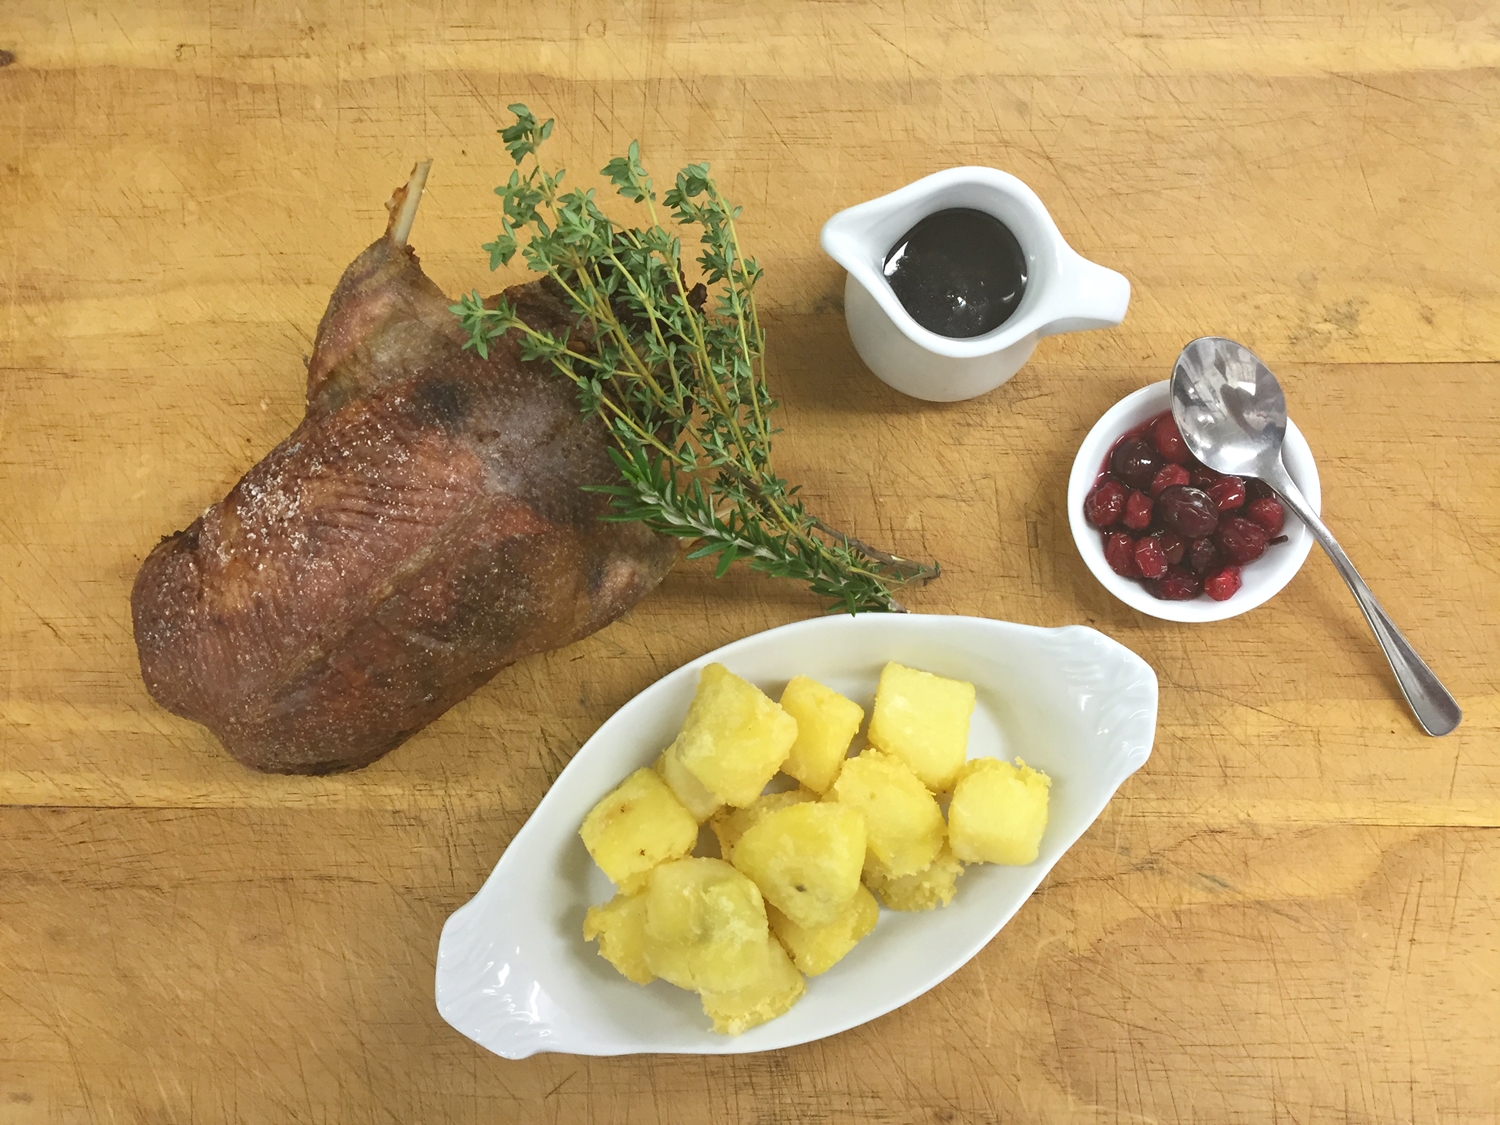
Whole Roast Duck Image

Whole roast duck with cranberry, bacon and walnut stuffing
Serves 4
Here is an easy recipe that uses the whole duck but can be adapted to use for any roasting bird.
Write a review
Print
Prep Time
20 min
Cook Time
2 hr
Total Time
3 hr
Prep Time
20 min
Cook Time
2 hr
Total Time
3 hr
1 Duck
  1. plucked, cleaned and gutted
Stuffing
  1. 2 Stale Bread Rolls
  2. 1 Shallot or ¼ Onion
  3. 1 Clove Garlic
  4. 1Tbs Dried Cranberries (can substitute chopped dried apricots)
  5. 1Tbs Walnut Pieces
  6. 1Tsp Dried Mixed Herbs
  7. 1 Egg
  8. 1 Small Bunch Parsley (leaves only)
  9. 2 Rashers of Bacon
  10. Salt and Pepper
Duck Fat Potatoes
  1. Potatoes
  2. Duck Fat
  3. Salt
For the Stuffing
  1. Roughly chop up the garlic, shallot and bacon. In a food processor pulse these three ingredients together then add the bread and parsley and pulse until it resembles coarse bread crumbs. Add the cranberries, walnuts and the egg along with some salt and pepper and mix for 5-10 seconds until it has come together. Stuff the duck’s cavity with the stuffing mix and secure the hole with a toothpick. Season the outside of the bird with some salt and bake in a preheated oven at 160C for 1.5-2hrs (depending on the size of your bird) or until the leg meat is tender and the skin is golden and crispy. If the duck is getting too brown but is not cooked to your liking you can cover it with tinfoil to stop it from burning. If you are concerned about the breasts drying out you can insert a rasher of bacon under the skin on top of each of the breasts. Save the duck fat for roasting your potatoes.
For the Potatoes
  1. Peel your potatoes (Agria potatoes are nice here) and cook in a pot of salted cold water until they are about 80% cooked and are still a little bit firm in the centre. Drain and keep to one side. In a roasting tray place a few spoonfuls of duck fat and place the tray with the fat in it in a 200C oven until it is really hot, about 15mins. Being careful not to burn yourself tip the nearly cooked potatoes into the tray with the duck fat and shake the pan a little to coat the potatoes with fat and season with a little salt. Place back in the oven and roast until nice and crispy, about 20-30mins.
To Serve
  1. Once the duck is cooked cover with some tin foil or a tea towel and leave it to rest for 15mins before carving so the juices set and the meat has time to relax. You can’t go wrong serving it with a good bottle of Central Otago Pinot Noir.
MacLean Fraser http://macleanfraser.com/

Leave a Comment

Filed under Blog, Recipes, The Hunter's Kitchen

Wild venison, blue cheese and mushroom pie

hunters kitchen spread

I am a professional chef and amateur hunter. I have spent time hunting in most of the North Island ranges but do most of my hunting in the Tararua’s. Working as a chef has sent me to several locations in the world and I have worked in New Zealand, Malaysia, Cook Islands and the Maldives. I first started out hunting rabbits and possums with my old man when I was a kid before moving on to goats and deer as I grew older. As a chef I like to use the best produce available. Hunters when killing humanely and taking only what they need can end up cooking with not only the most ethically harvested meat but when dealt with properly, the best quality also. I think it’s really important to know where your food comes from and how best not to waste it, and that’s why I think hunting and cooking marry so well together and that’s what I hope to promote and achieve through sharing the recipes and techniques we use to cook wild game professionally.  

You can find a new recipe using wild game in every new edition of NZ Guns & Hunting Magazine. Here is the first recipe from The Hunter’s Kitchen from the May/June edition.

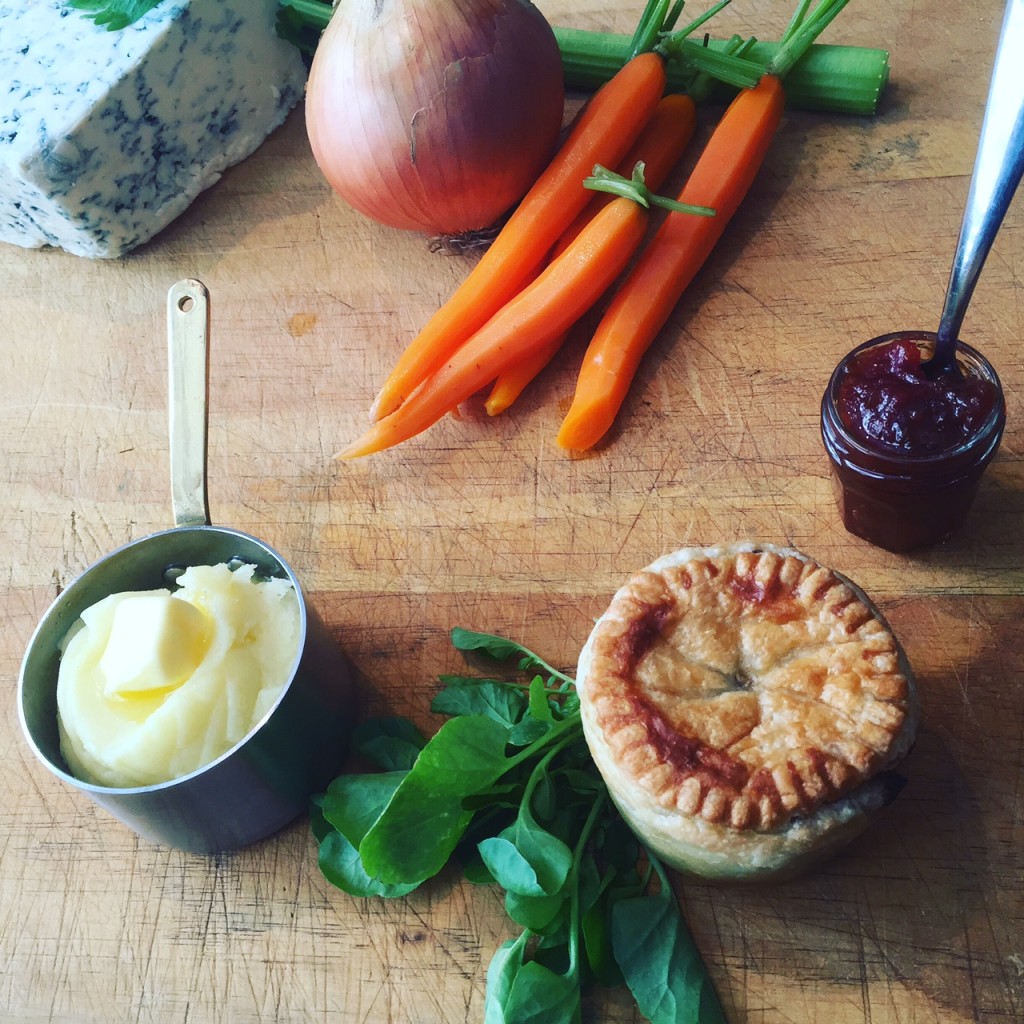
venison pie

Wild venison, blue cheese and mushroom pie
Serves 6
This recipe utilises Venison shoulder and is great dish for the colder months. Shoulder is a heavily worked muscle which means it requires a slow long cooking time to break down the connective tissue, the flip side is that the tougher cuts of meat have more flavour!
Write a review
Print
Prep Time
1 hr
Cook Time
3 hr 30 min
Total Time
4 hr
Prep Time
1 hr
Cook Time
3 hr 30 min
Total Time
4 hr
Ingredients
  1. 1kg Diced, trimmed Venison shoulder (or neck)
  2. 1/2 Onion
  3. 3cl Garlic
  4. 100g Blue cheese wedge
  5. 1 bottle Speights or any other ale beer
  6. 200ml Red wine
  7. Chicken stock (or water) – enough to cover
  8. 1 Sprig Thyme
  9. 1 Sprig Rosemary
  10. 50g Dried mushrooms (porcini best but can use shittake)
  11. 100g Mushrooms (buttons or flats)
  12. 2Tbsp Duck fat (or butter or cooking oil)
  13. 8Tbs Plain flour
  14. Salt and pepper
  15. 1 Pkt Puff pastry sheets
  16. 1 Egg (whisked with 1Tbs water)
  17. 2Tbs Melted butter
Instructions
  1. Crush the garlic and dice the onion. Roughly chop the mushroom stalks and dried mushrooms. Heat the duck fat in a pot and cook off the garlic, onion and mushrooms until nicely browned. Dust the diced venison in a little flour and in 4 or 5 batches, sear in a hot pan with a little oil until nicely browned. Combine all ingredients together in a deep oven dish (adding enough water or chicken stock so the ingredients are covered) and braise slowly at 150C until tender – about 2-3hrs. If the sauce is too thin then drain the liquid into a pot and reduce until nicely thickened, season with salt and pepper. Cool.
  2. Once cool grease several small (or one large) pie tins and line the base with puff pastry, fill with the pie mix and crumble some blue cheese on top. Place some puff pastry on top for a lid and crimp the edges with a fork. Trim off any excess pastry and brush the top with some whisked egg wash. Bake 1t 180C for about 12-15 mins or until the pastry is cooked and a nice golden brown.
  3. I suggest serving with some buttery mash potatoes and tomato relish.”
MacLean Fraser http://macleanfraser.com/

Leave a Comment

Filed under Blog, Recipes, The Hunter's Kitchen