This recipe is a take on an old classic. It’s just like how your Nan would make but much, much better…
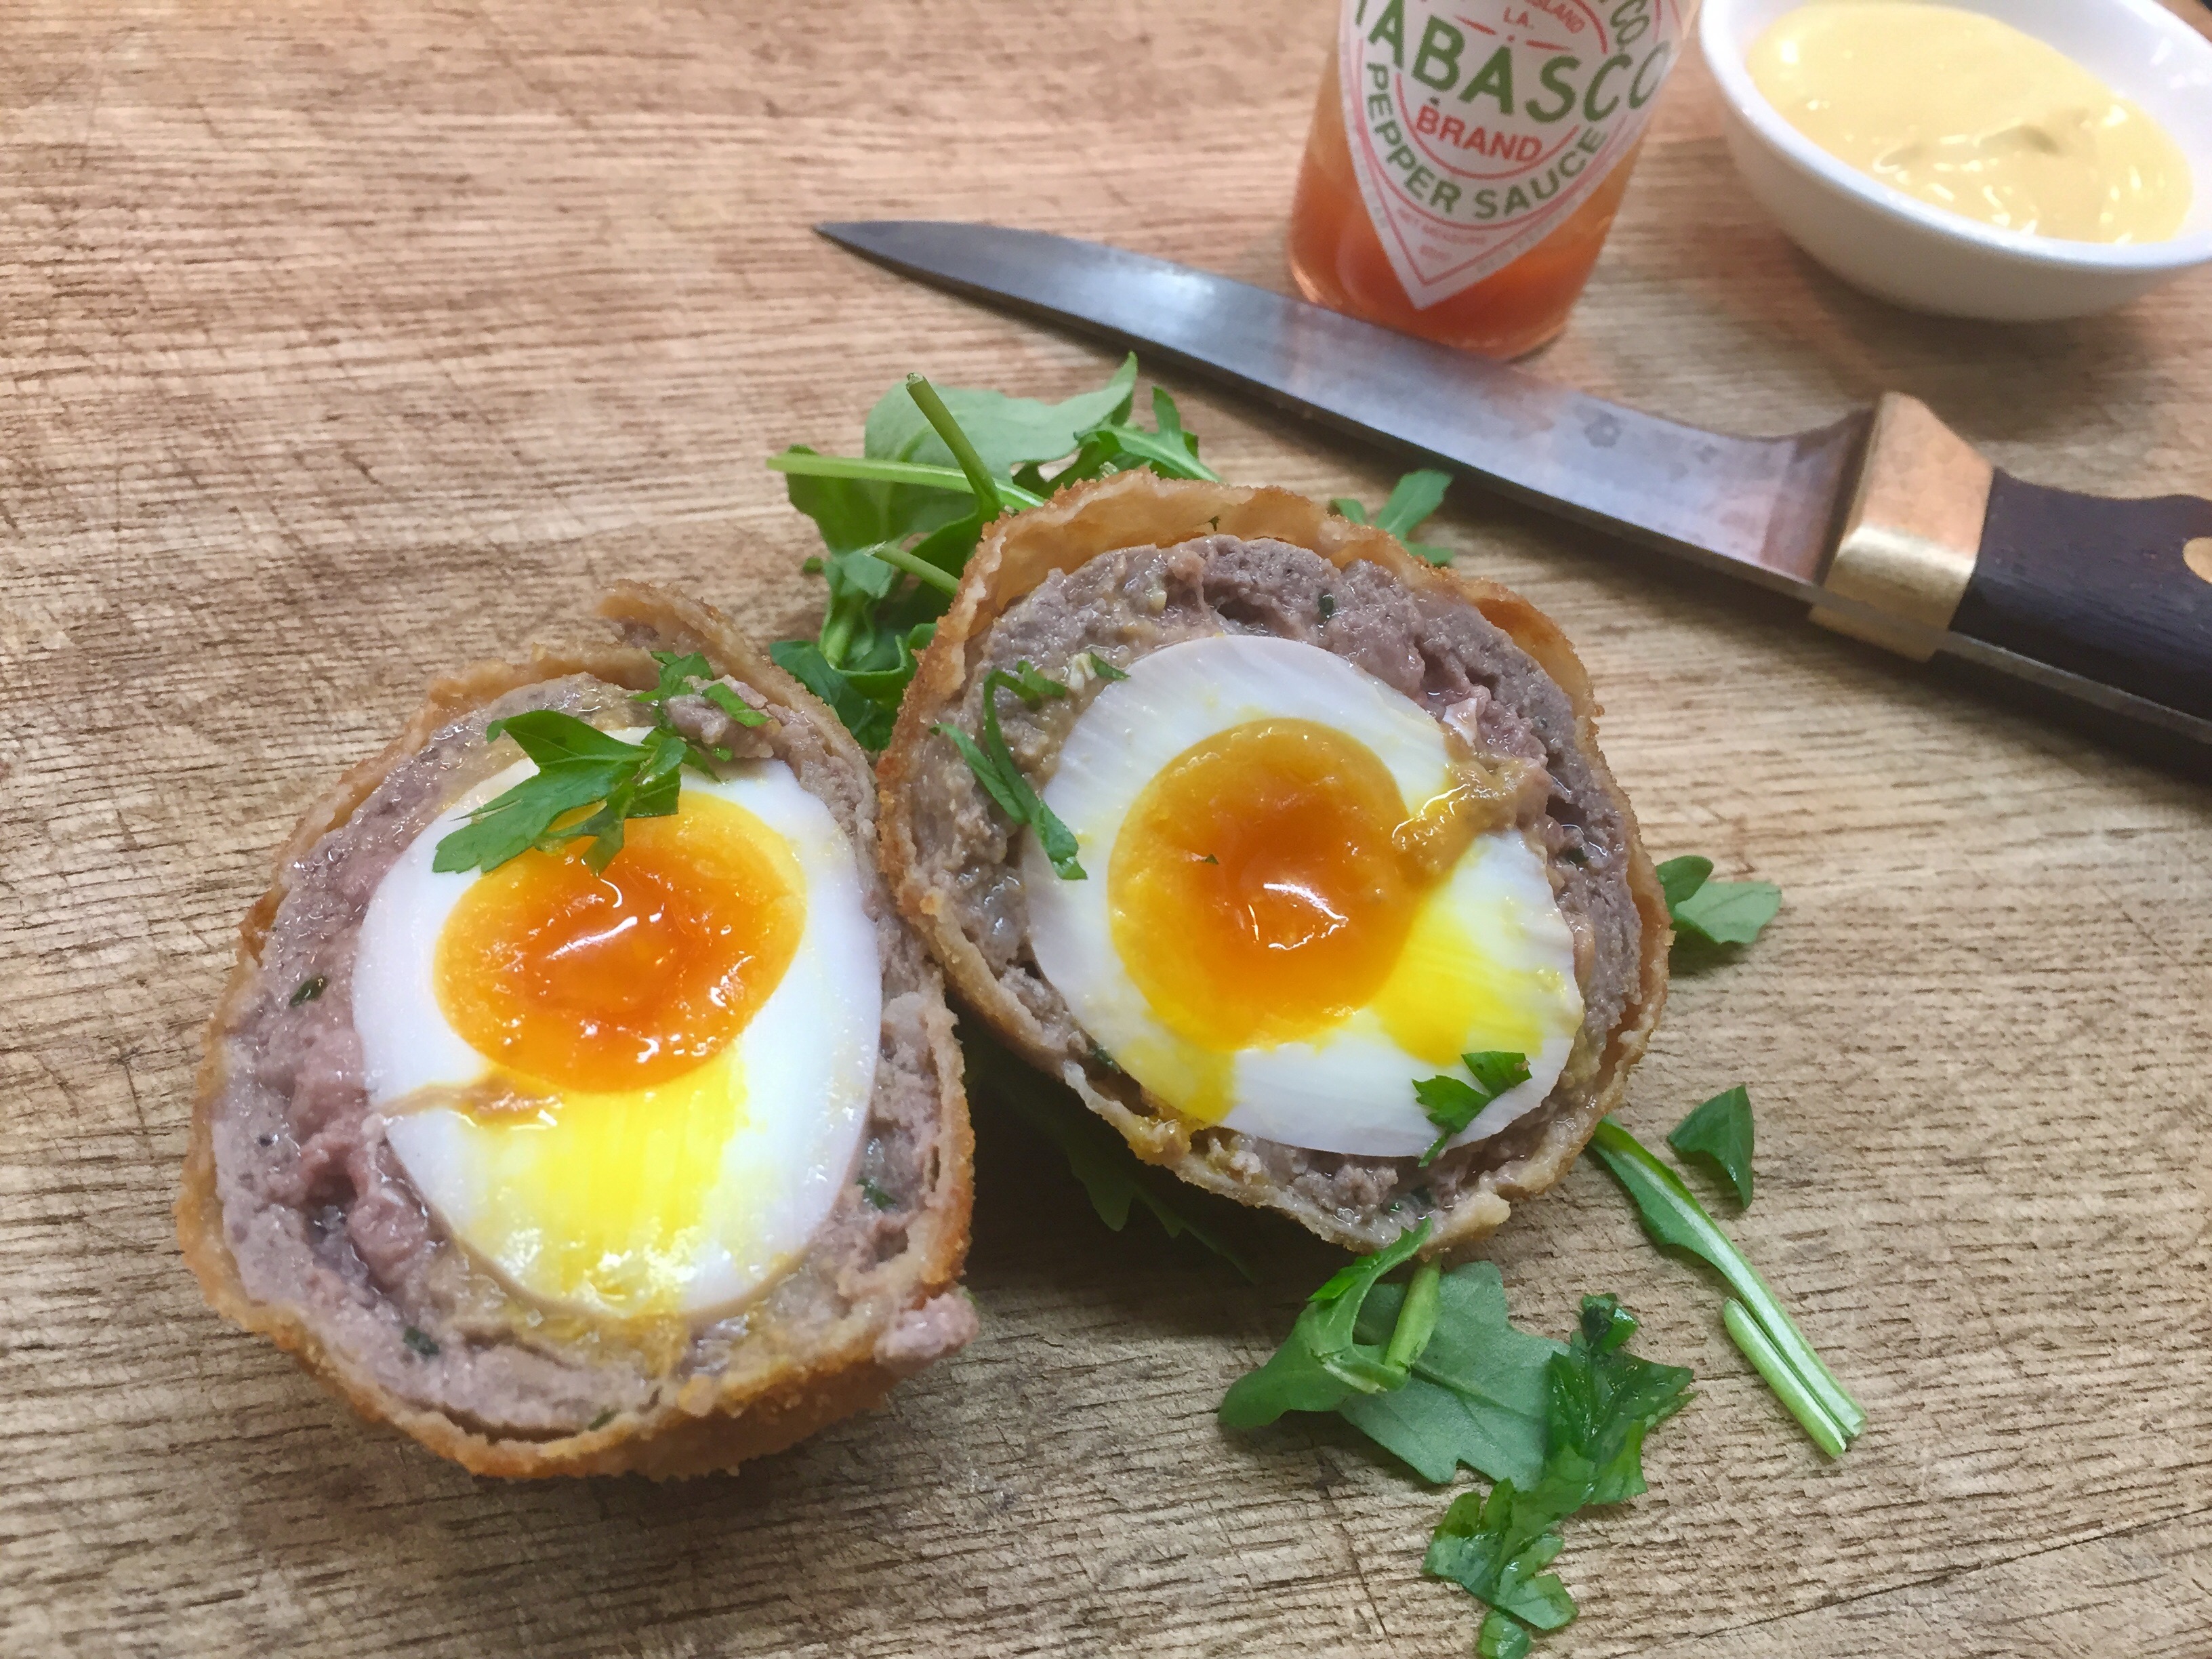

Wild Venison Scotch Eggs
2017-08-24 19:01:43
Serves 4
Prep Time
30 min
Cook Time
20 min
Total Time
50 min
Scotch egg
- 250g Venison mince
- 1cl Garlic- minced
- 1Tbs mustard
- 1tsp minced (or dried) Thyme
- 1/2tsp salt
- 4 Eggs
Aioli – makes 500ml
- 5 yolks
- 1 tablespoons Dijon mustard
- 1 garlic clove
- Juice of 1 lemon
- 400ml canola oil
- 100ml olive oil
- Salt and pepper
To Finish
- Breadcrumbs
- Flour
- Egg - whisked
For the Scotch eggs
- Combine all the ingredients except the eggs. Boil the eggs for 6 minutes then run under cold water until cold and peel. Get about a quarter of the venison mix in your hand, flatten out and bring round the egg to encase it.
For the Aioli
- Combine all the ingredients except the oil in a food processor or blender and blend well for 1-2 minutes. With the blender running on high, slowly drizzle in the oil to emulsify and create the aioli. If your aioli is too thick you can add warm water at the end to thin it down if necessary.
To Finish
- Take your venison wrapped eggs and dust them in flour, then egg and then finally in the breadcrumbs. You can deep fry these or if you don’t have a deep fryer you can bake them in the oven or shallow fry them but they will need to go into the oven for a few minutes until the centre is hot. Serve with a side of aioli
MacLean Fraser http://macleanfraser.com/